Fulfillment Management
Fulfillment Management
Fulfillment management includes the operations of shipment and labels. This article mainly introduces how to create a shipment manually and print the labels on Ship. If you need to create labels occasionally initiating them without through an order, please refer to this article to complete the operations on Fulfillment section.
1. Navigate to Shipments > Fulfillments, it will display the all created shipments here.
The shipments will be displayed on 5 tab (All, New Shipped, Canceled and Exception) which is sorted by the shipment status.
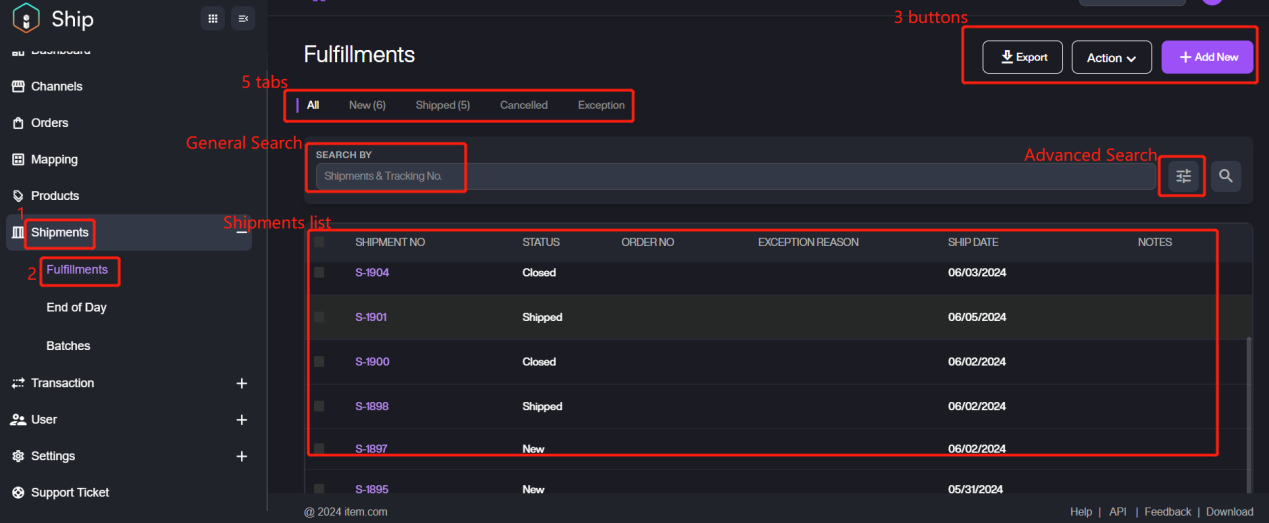
As we can see as from the page, it also supports searches for the specific category much quickly and conveniently. Here are the detailed categories for the two searching methods.
Category | Description |
|---|---|
Shipments No. | The shipment number which displays on the list. |
Tracking No. | The tracking number which displays on the list. |
Shipment No. | The shipment number which displays on the list. |
Order No. | The order number which displays on the list. |
Carrier | The carrier of this shipment. Please select the carrier from the preset values. |
Tracking No. | The tracking number which displays on the list. |
Batch No. | The batch number which displays on the list. |
Last Updated By | The user who last updated the shipment’s information. |
Status | The status of the shipment. Value: New, Shipped, Canceled, Exception, Closed |
Recipient | The recipient of the shipment. |
Ship Date | Setup a time range of the shipping for searching. |
Created Time | Setup a time range of creating the shipment for searching. |
Last Updated Time | The time when the last update was completed. |
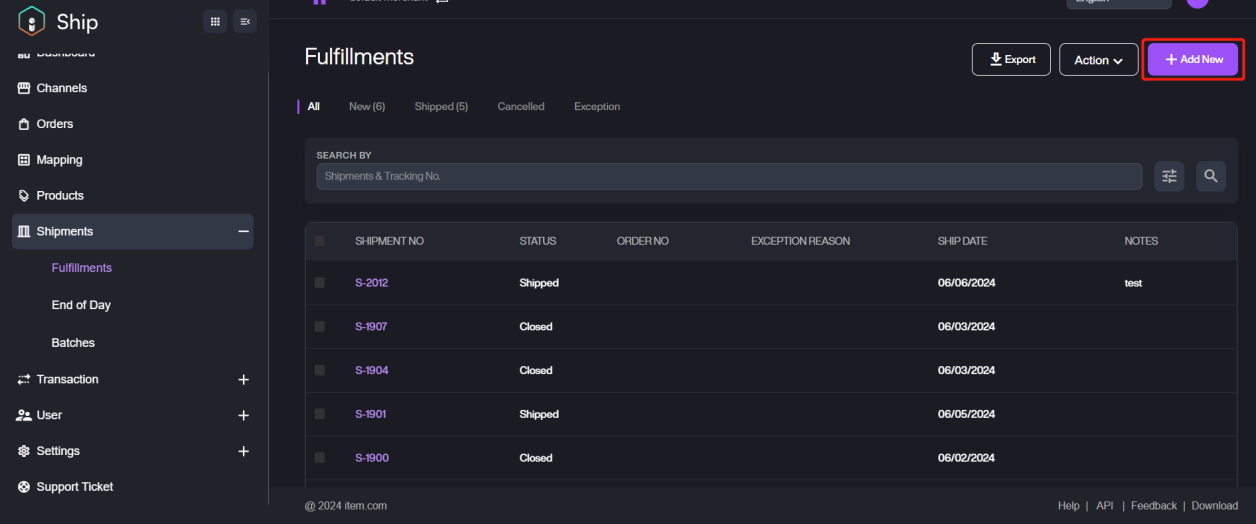
2. Click + Add New button to create a new shipment if you on the All/Canceled/Exception tabs. Take All as the example as shown:
If you are on the New or Shipped tab, please click Action > New Shipment to add a new shipment. Take New as an example as shown:
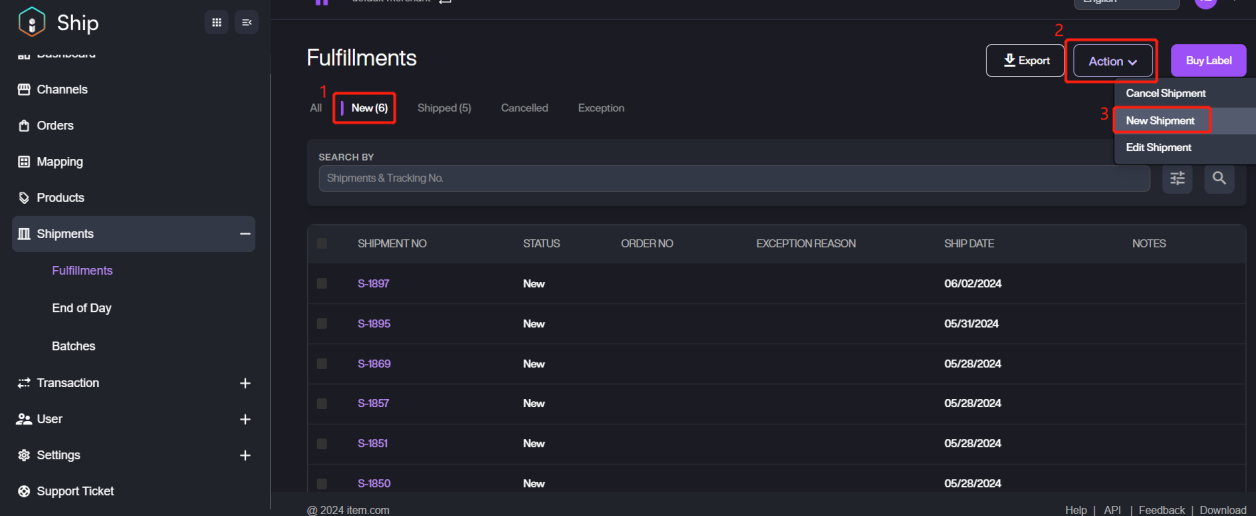
The action operations are the different under the different tab, here we will explain the all action operations.
Action | Description |
|---|---|
New Shipment | Add a new shipment. |
Cancel Shipment | Cancel the shipment which is no longer need any further actions. |
Edit Shipment | Edit the shipment information. |
Void Label | Void the label which has been printed will not print it again. |
Buy Label | Buy a label for the shipment whose status is marked as New. Note: this action is only available for new shipments. |
Print Label | Print the label. |
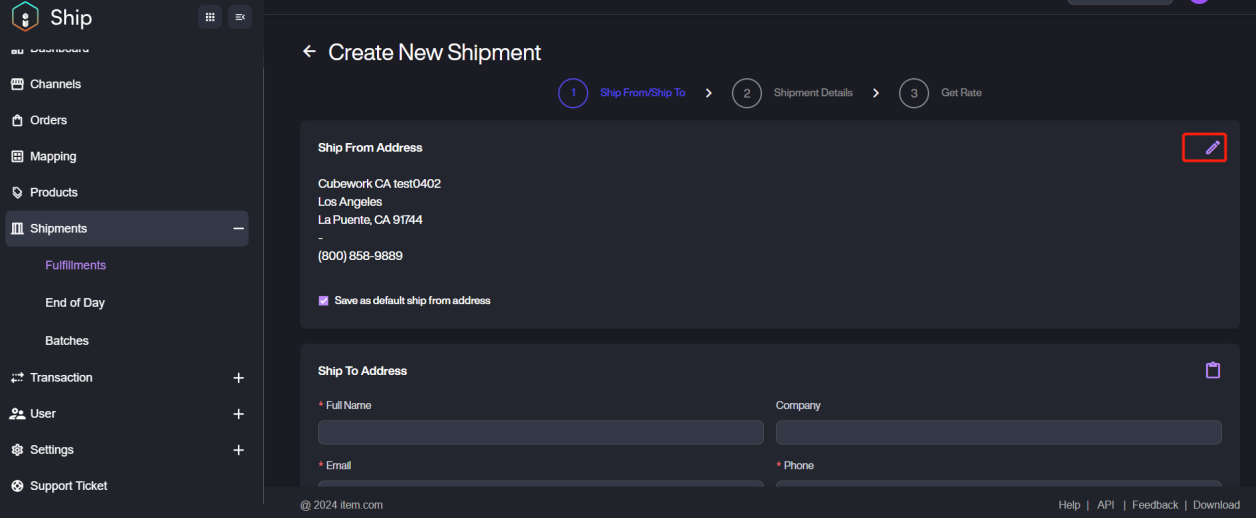
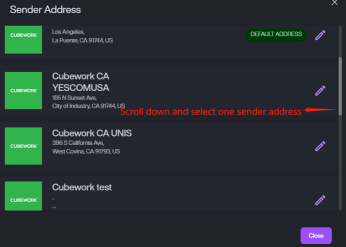
3. Click the pencil icon to edit the Ship From Address.
If you have preset the sender addresses before, you can select one from them.
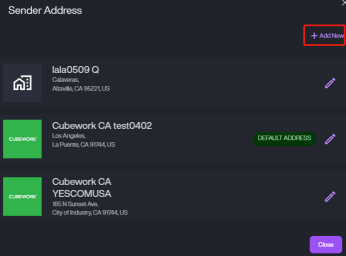
If there is no sender address you need, please click + Add New and refer this Ship From to complete adding a new sender address.
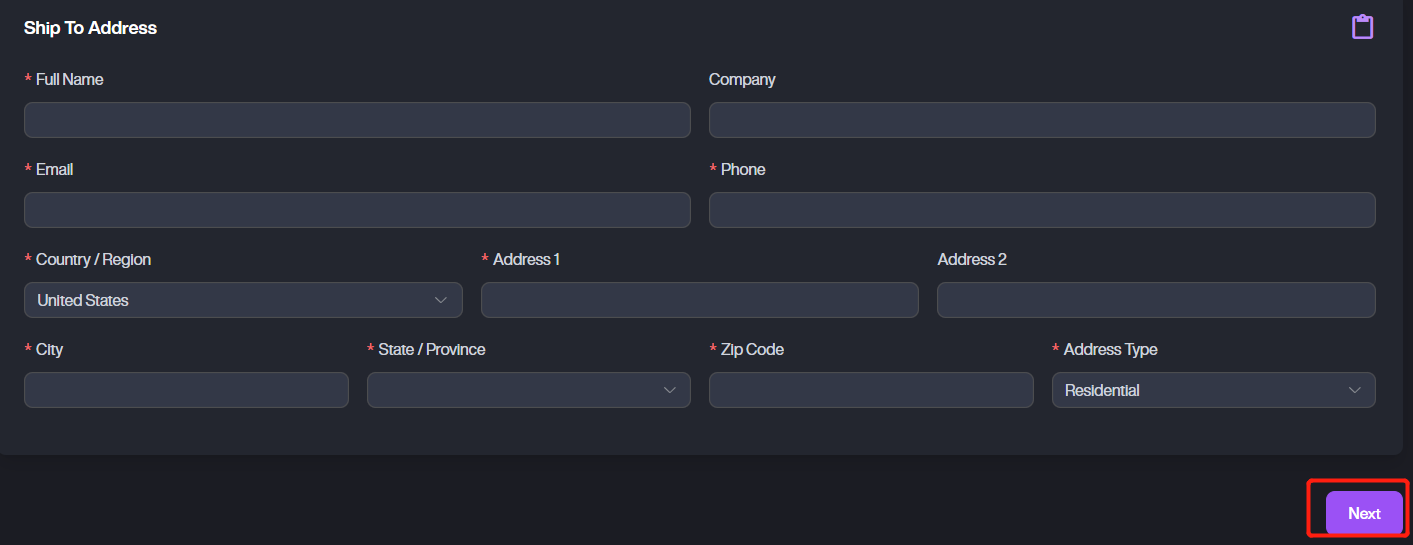
4. Fill in the required information of the Ship To Address, then click Next to next step.
5. Fill in the detailed package information, for more details, please refer to Package Management.
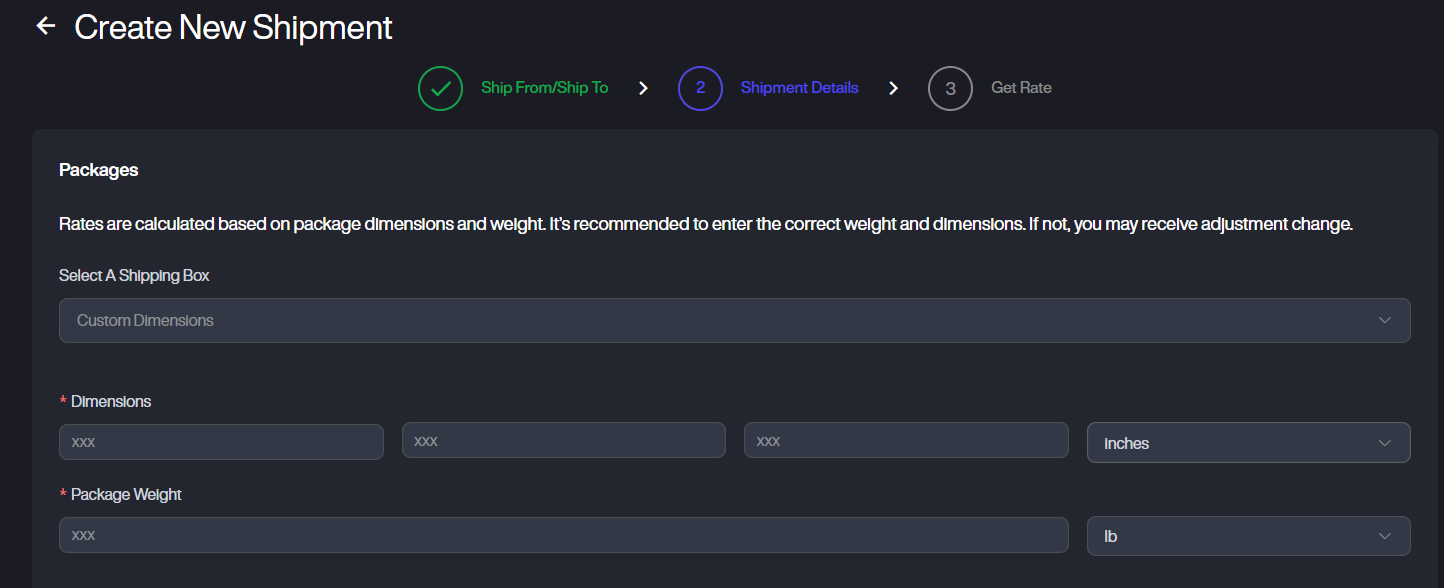
If you want to make some notes on the shipment, please write the content here.

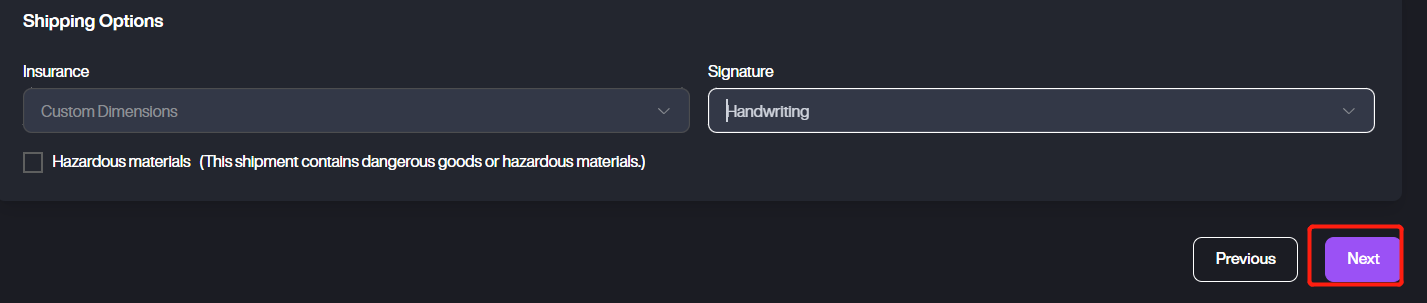
Configure the Shipping Options and click Next to next step. If the shipment contains dangerous goods or hazardous materials, please select Hazardous material option.
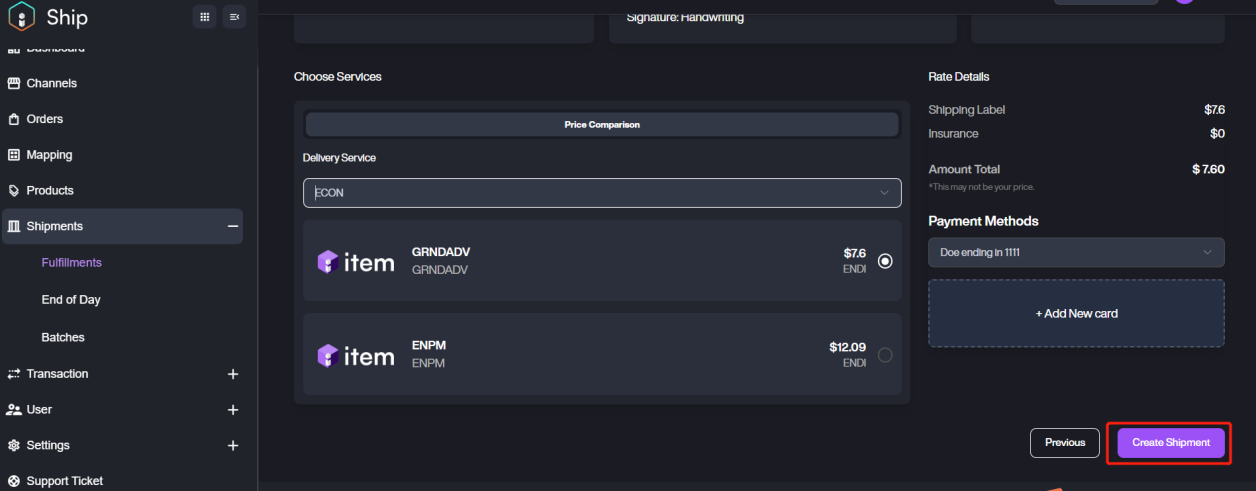
6. Check the shipment information to confirm whether there is anything incorrect, then to select Delivery Service and get the rate. If there is anything incorrect, please click the Previous button at the bottom to correct it.
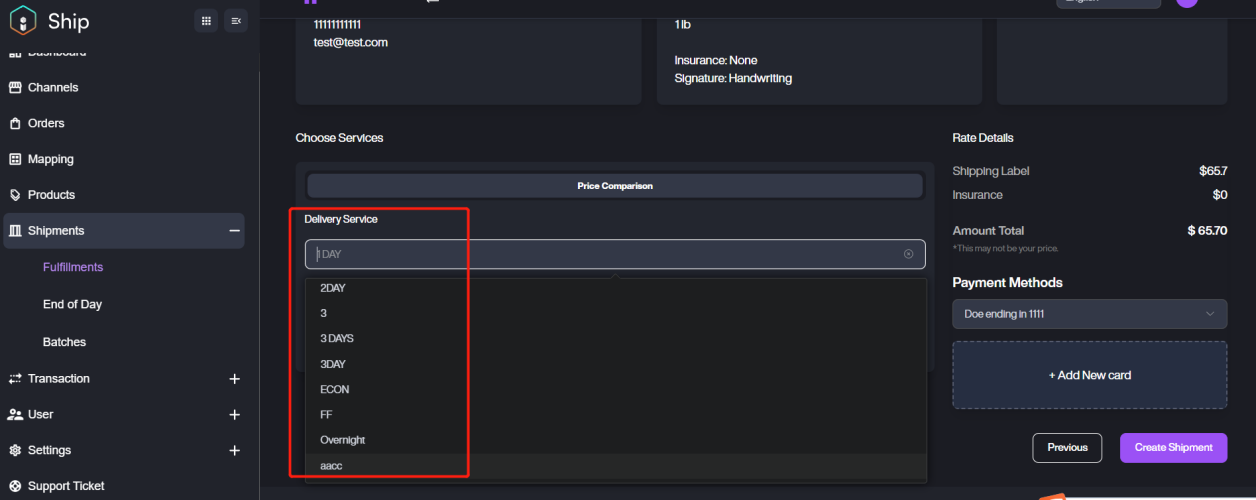

Note: if the actual dimension/weight of the package exceeds the preset value, you might receive a price difference for adjustment.
If you’re a Cubework user and the shipping address is a Cubework address, it will offer label printing services for your goods at an additional cost.
7. Click Create Shipment to complete the progress.
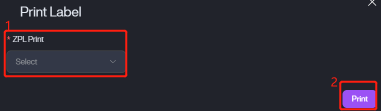
After creating the shipment, the system will prompt a popup window for printing. If you want to print the label immediately, please select your local printer and click Print to complete printing. For more details on Printings, Printing Settings is for your reference.