Channel Management
Channel Management
Channels form a data connection between the merchant, your business, and the shipping service to maintain traceability at every step of an order. Item Ship supports to enable or disable the multiple shipping services via clicking the button, and also to edit the channel. This article introduces how to manage the channel.
Note:
the channel page is nested from Item DI platform, please kindly refer to DI Channel Integration and DI Channel Settings for more details.
How to Create a New Channel
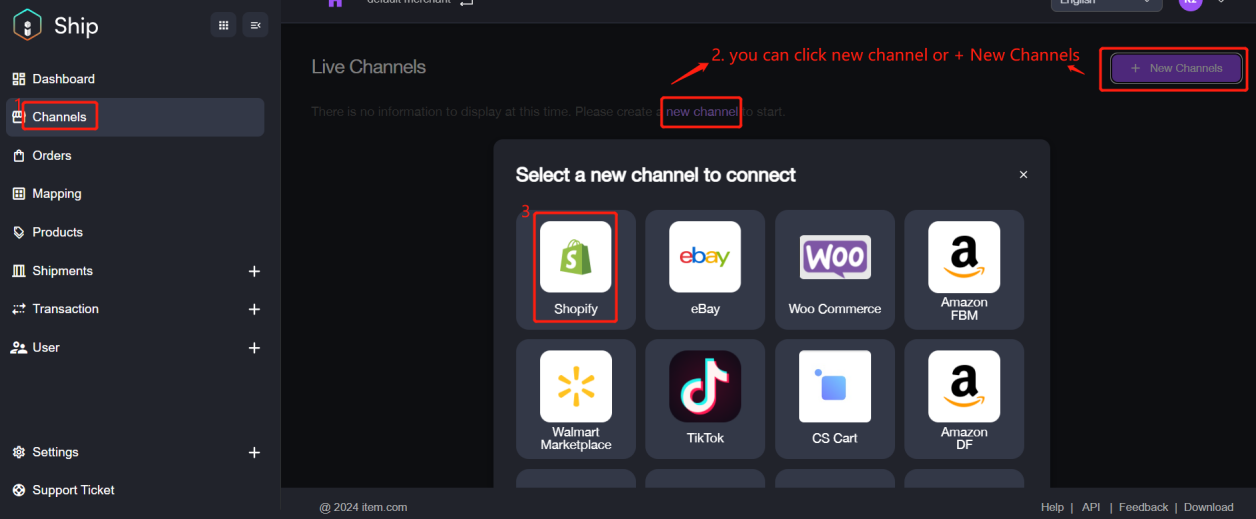
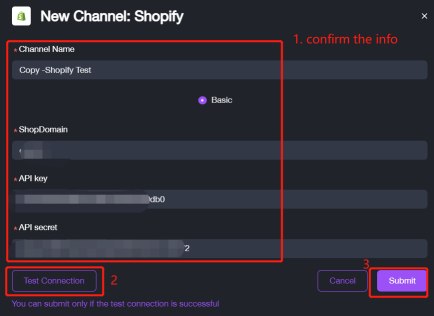
1. Navigate to Channel > + New Channels or new channel, select a shipping channel to add. Take Shopify as an example as shown:
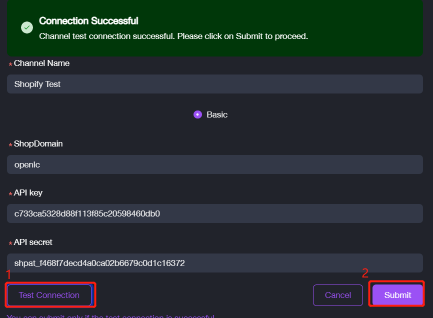
2. Fill in the required information then to click Test Connection button.

3. After connection successful, please click on Submit to complete the process.

How to Manage the Channel
Item Ship supports to easily view, edit, delete (etc.) channel for a merchant to adjust to your business operations on the fly. This section will introduce the detailed operations.
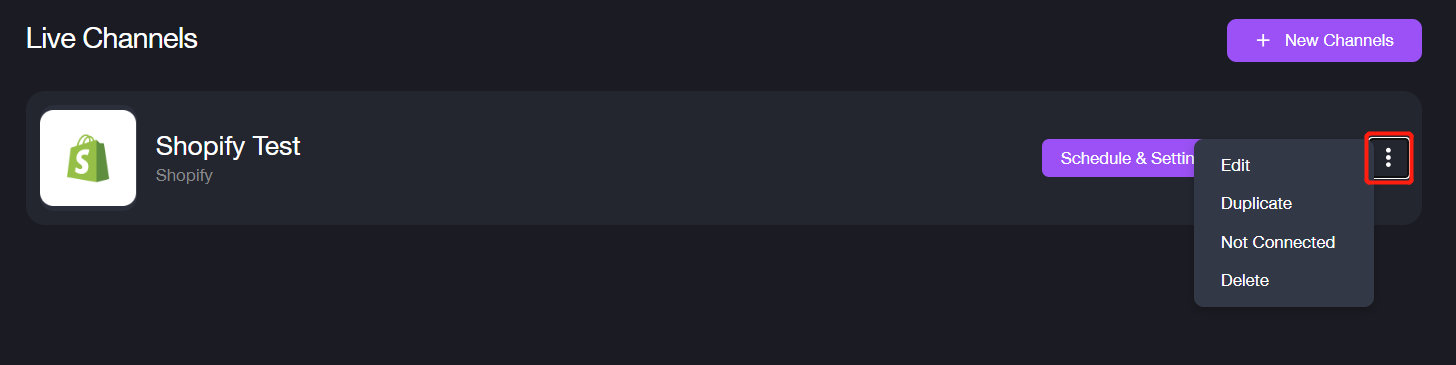
Click three dots option, it will display four operations.
Edit
It supports to edit the channel information after clicking the button.
1. Click Edit and update the information you need.
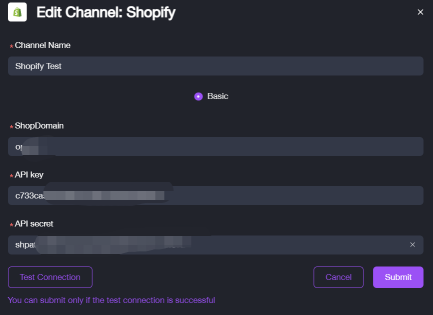
2. Click Test Connection, then click Submit if the test connection is successful.
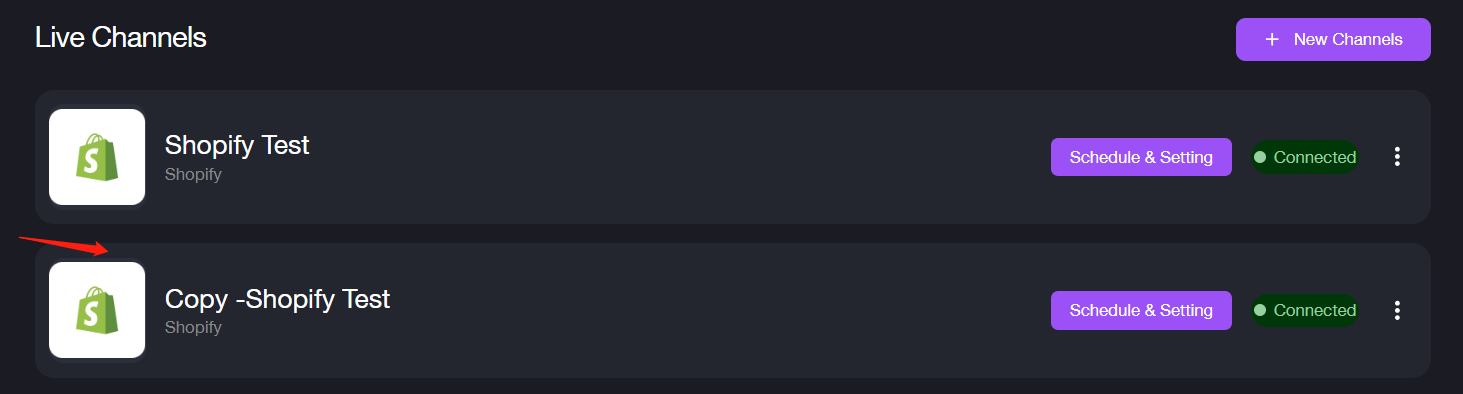
Duplicate
The system will copy the channel you selected automatically.
1. Click Duplicate and ensure the information is correct. 2. Click Test Connection and click Submit after the test connection is successful.
After successful duplication, it will display under the live channel list. As shown:
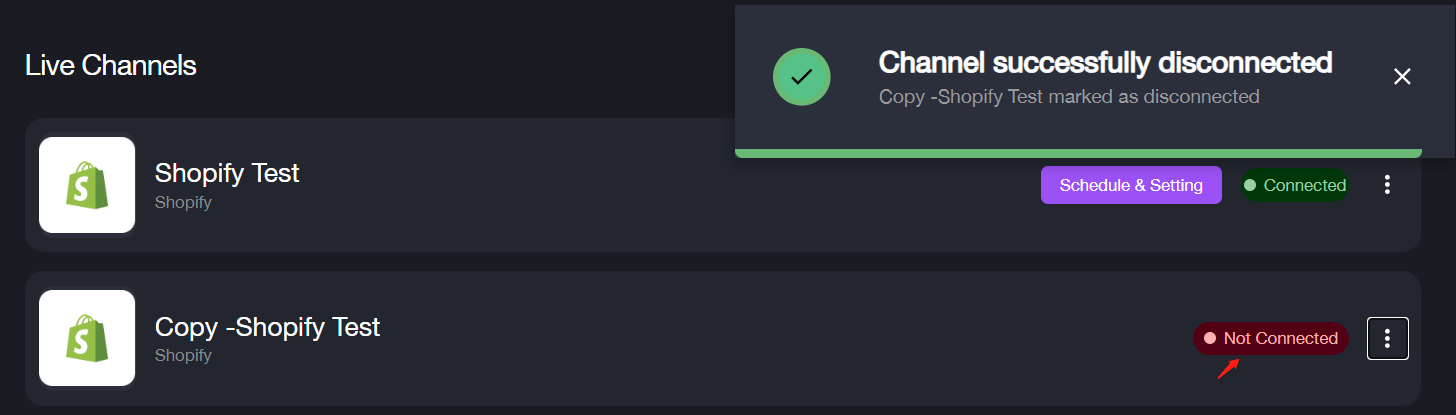
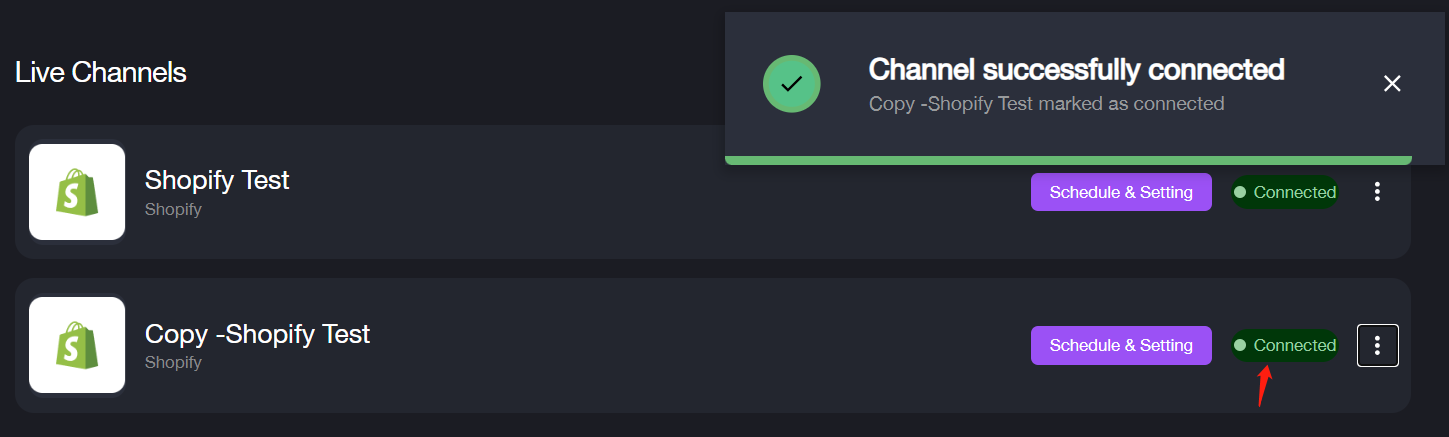
No Connected/Connected
It supports to switch the connection status of the channel. As shown:
Delete
It supports to delete the channel which is not useful.
Click Delete then click Yes,delete on the popup window.
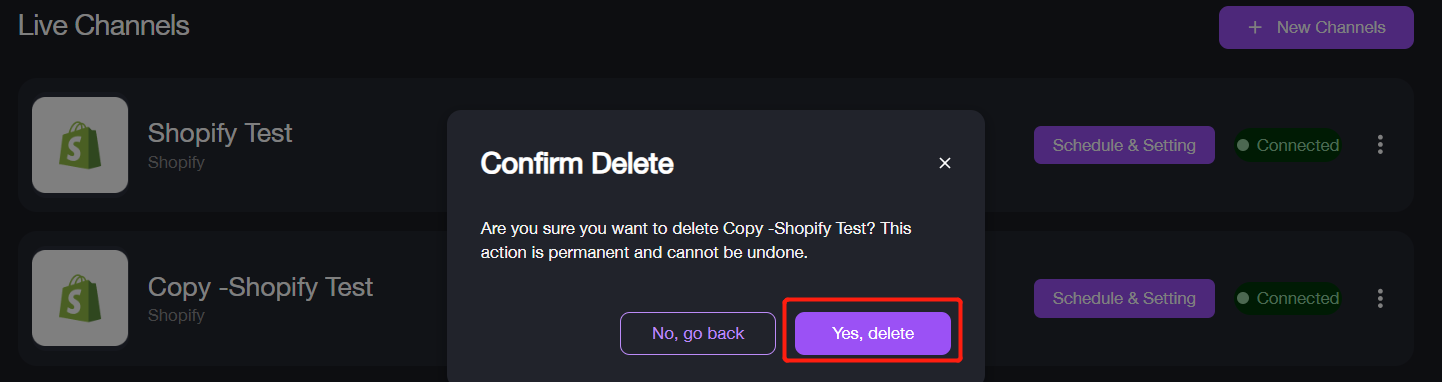
After deleting successfully, the corresponding channel will be removed from the live channel list.
How to Setup or Schedule the Channel
It supports to set a schedule for the channel to query and get the data from other applications.
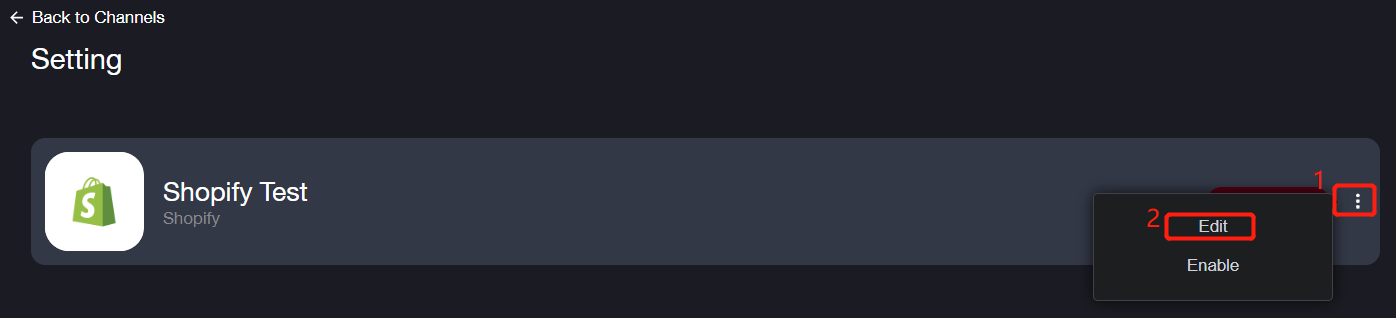
1. Click Schedule & Setting to skip to the details page.

2. Click Edit after click on three dots option.
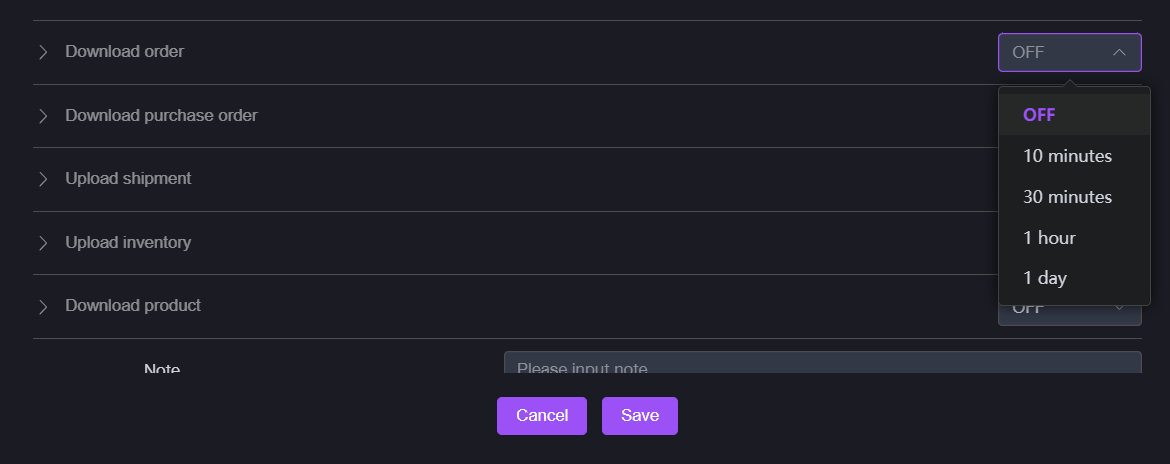
3. Here you can configure the frequency for the channel to download/upload the corresponding data.
4. Take Download order as the example: After frequency setup, please configure the other detailed parameters.
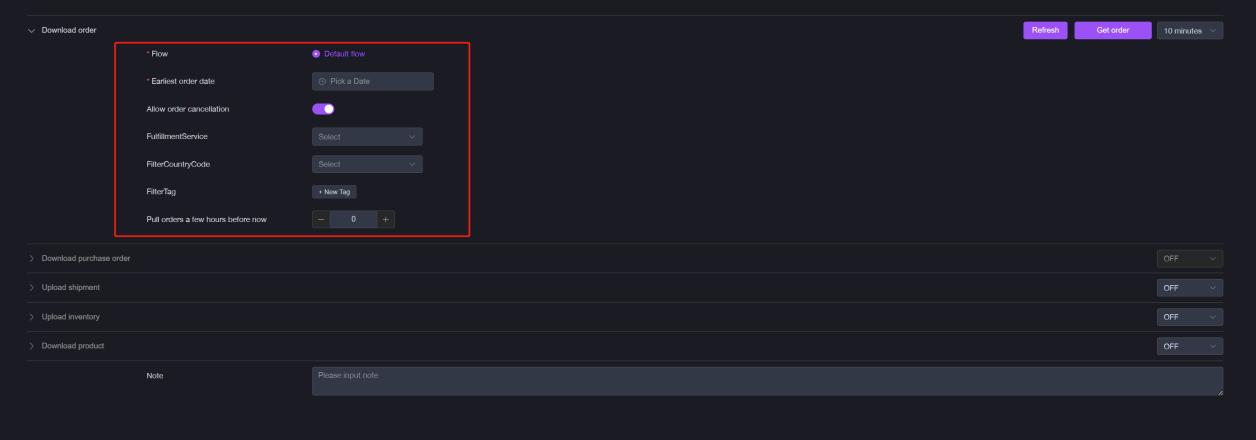
5. Click Save after complete the form. After the channel has configured the settings, it will transfer to Enable status and will get the data according to the schedule setup.
