Check In
Check In
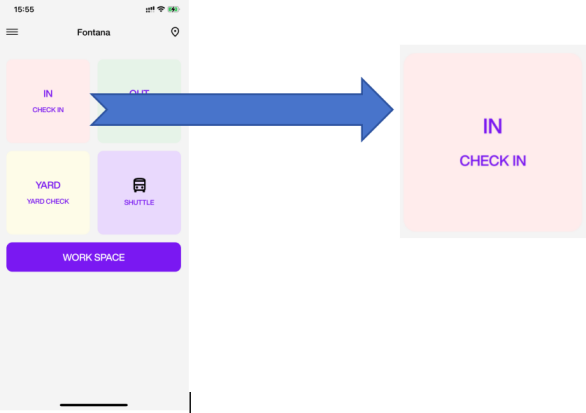
Entering the Check In Process
On the home screen, tap Check In to begin the Gate Check In process.
Check In
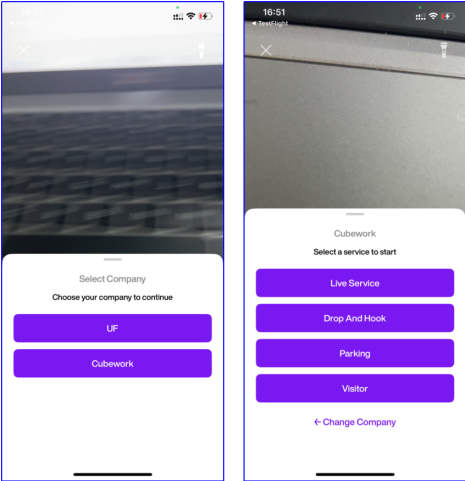
Select The Check In Service
Swipe up on the Select Company section to reveal the Service List. From here, you can manually select the Company and appropriate service type for the Gate Check In.
Company: Click Cubework.
Service:
Live Service: Live Load & Live Delivery
Drop & Hook: Drop Off Full & Drop Off Empty
Parking
Visitor
Live Service Check-In Steps
If the driver is scheduled for on-site loading or unloading, select Live Service to begin the check-in process.
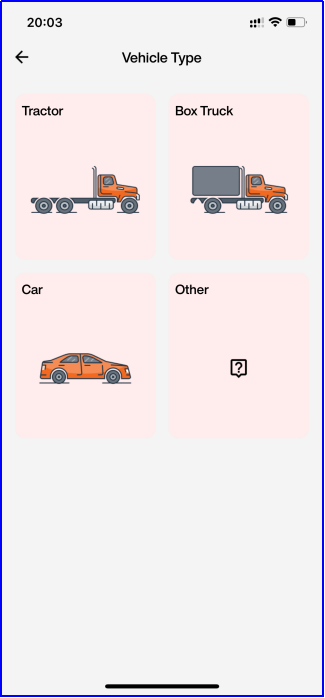
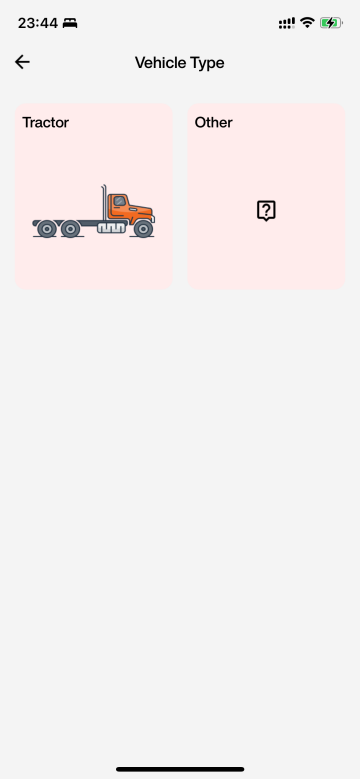
Select Vehicle Type
Choose the appropriate type of vehicle (Tractor/Box Truck/Car/Other).
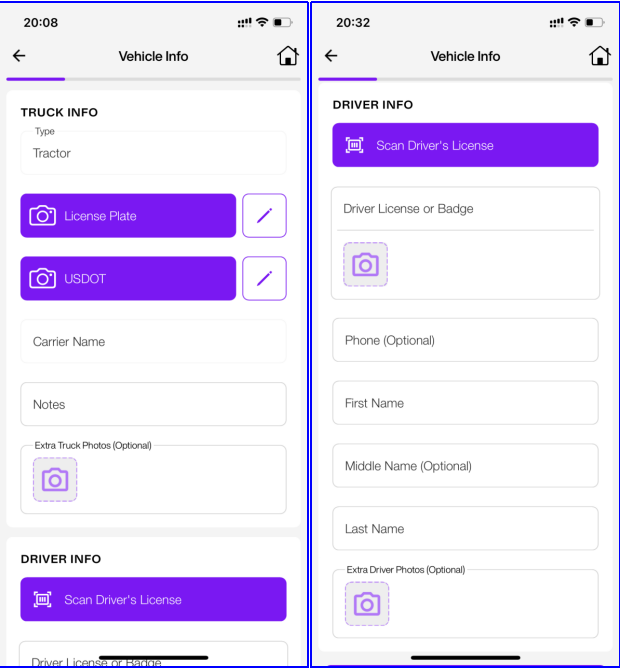
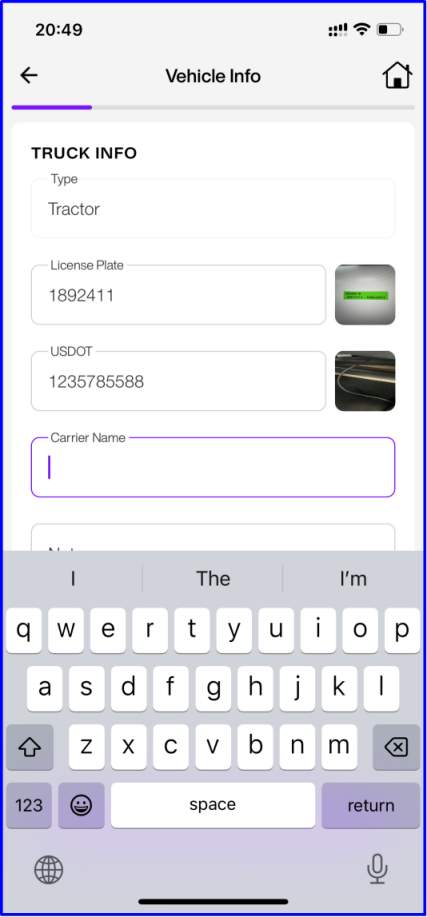
Enter Vehicle Details And Driver Details
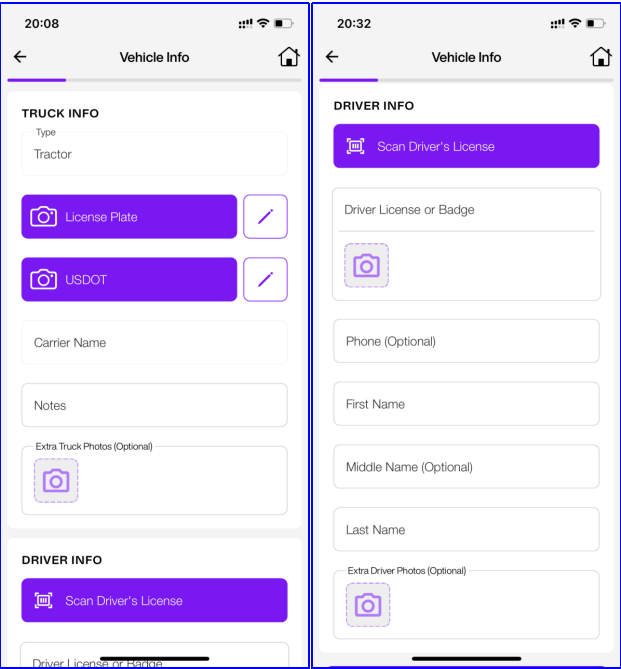
1. Fill in the required vehicle information such as plate number and Carrier Info.
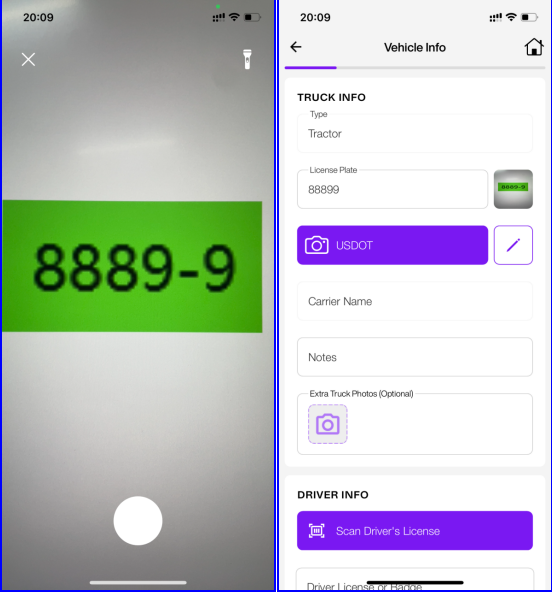
A. Plate Number. You can manually enter the plate number using the keyboard(tap Edit Icon), or tap the camera icon to take a photo for OCR recognition. Regardless of which method is used, taking a photo is mandatory to complete this step.
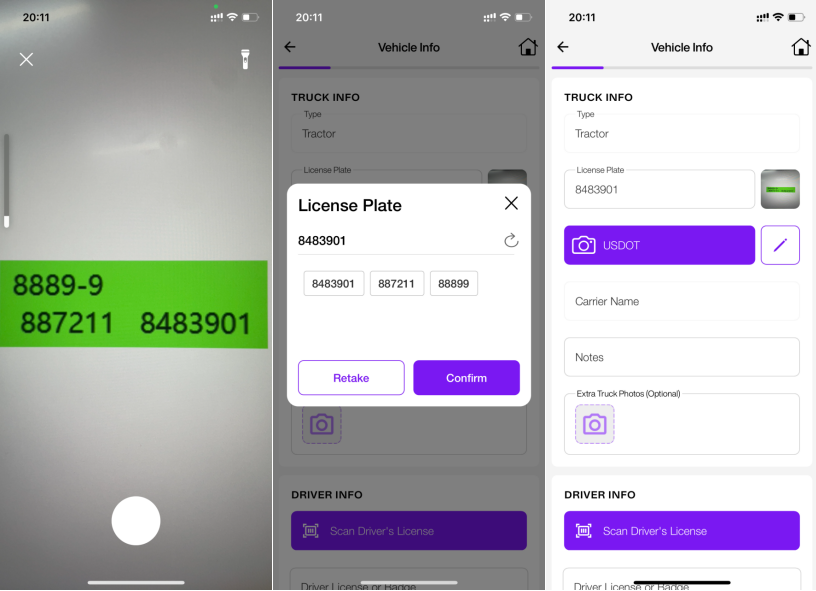
When using OCR to capture the plate number:
(1) If the photo contains only one valid license plate format, the system will automatically fill the input field with the recognized plate number.
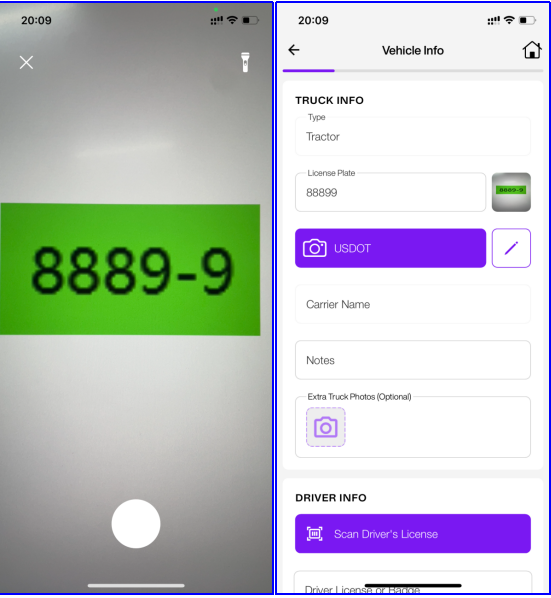
(2) If the photo contains multiple text strings, the system will extract all candidates, and you can manually select the correct one to confirm.

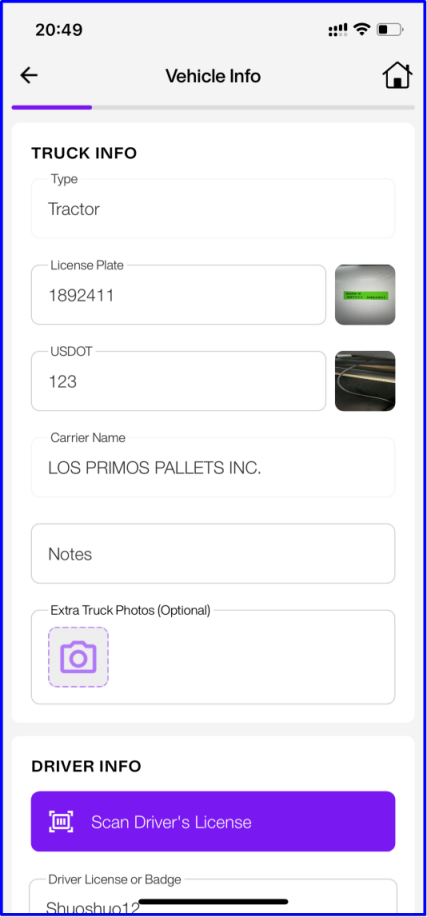
B. Carrier Info. You can manually enter the USDOT using the keyboard (tap edit icon), or tap the camera icon to take a photo for OCR recognition. Regardless of which method is used, taking a photo is mandatory to complete this step.
The system will automatically retrieve the Carrier Name based on the USDOT.

If the USDOT is not found in the system, you will need to enter the Carrier Name manually.

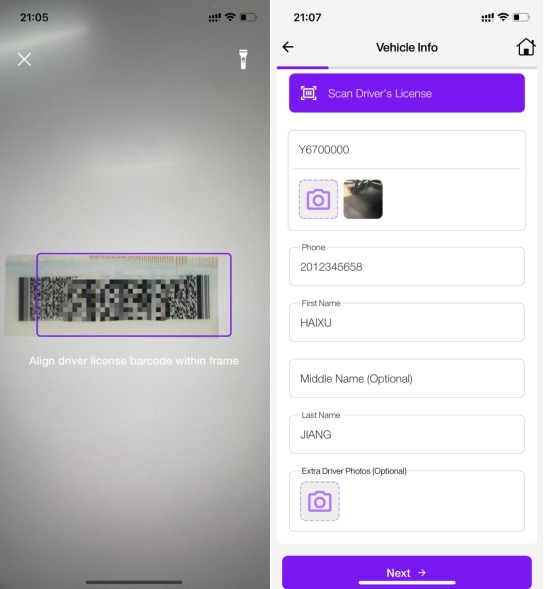
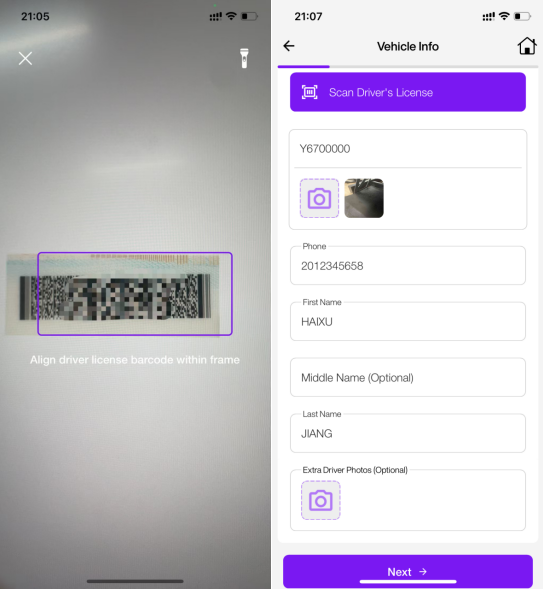
2. Driver Info. Enter the driver's information, including:
Driver's License or Badge ID
Phone Number
Driver Name
You can scan the barcode on the driver's license to quickly retrieve the Driver's License and Driver Name. If the driver's information already exists in the system and includes a phone number, the Phone Number field will be auto-filled.
3. If the plate number has a prior check-in record in the system, both the Carrier Info and Driver Info will be auto-filled based on the previous entry.
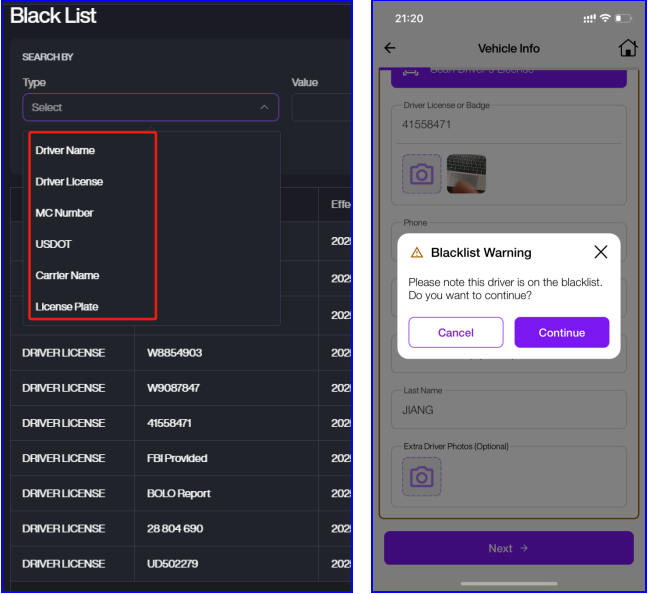
4. If the Driver, Vehicle, or Carrier is listed in the system's blacklist, a Black Warning message will pop up when you tap Next.
Select Equipment Type
Choose the appropriate type of Equipment. When selecting different vehicle types, the available equipment options will vary as shown in the table below.
Vehicle | Equipment |
|---|---|
Tractor | Trailer/Container + Chassis/Flabed/Other |
Box Truck/Car/Other | No Equipment |
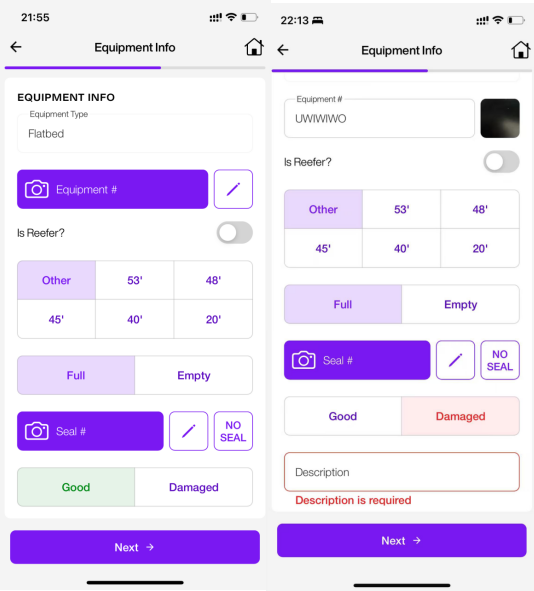
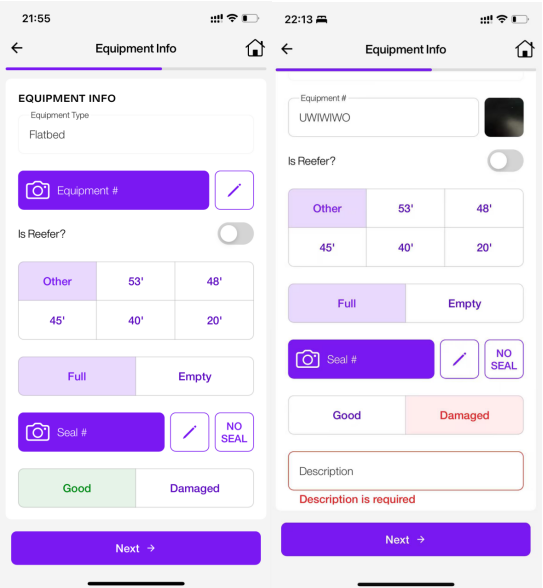
Enter Equipment Info
On the Equipment Info screen, please complete the following fields based on the actual equipment.
Equipment: Tap the camera icon to take a photo for OCR recognition, or tap the pencil icon to manually enter the equipment number.
Is Reefer?
Equipment Size
Load Status
Seal Number: If Load Status is Full, tap the camera icon to scan the seal, or tap the pencil icon to enter it manually. If no seal is present, tap No Seal.
Equipment Condition: If Damaged is selected, you will be required to enter a description of the damage before proceeding.
Enter Trip Information
1. On the Trip Information screen, select the appropriate Inbound Action and Outbound Action for this check-in.
The available actions depend on the Load Status (Full/Empty). Refer to the table below.
Load Status | Action |
|---|---|
Full | Inbound: Live Delivery/None; Outbound: Live Load/None |
Empty | Inbound: None; Outbound: Live Load/None |
2. If you realize that the driver's current visit does not fall under Live Service, you can tap the Change link next to the Service field to select the correct service type.
3. You need to select the Customer for the vehicle entering the yard. If the customer is unknown, click the Unknown Customer button.
Distribute Location
1. On the Distribute Spot/Dock screen, the system displays the assigned Dock for the check-in based on the Inbound and Outbound actions.
2. Live Delivery Assisgnment
For Live Delivery, the system will assign a Dock (e.g., DOCK14).
You can tap Manual Change to override and assign a specific Dock manually, or select Next Available to let the system find the next open dock.
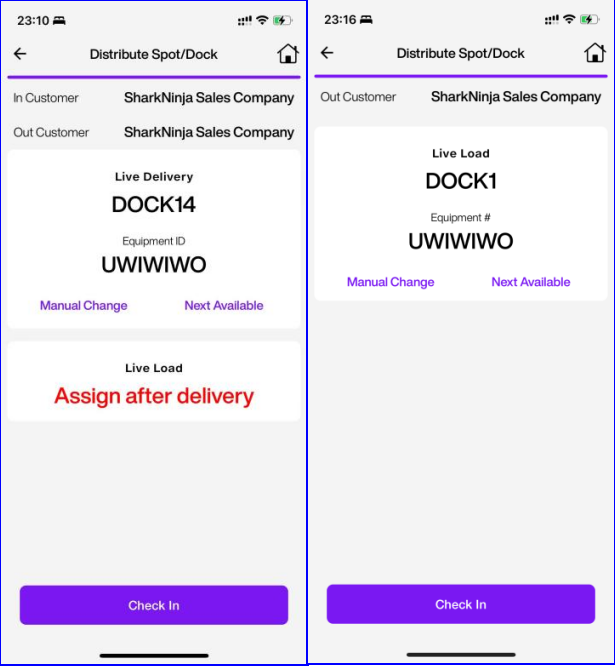
3. Live Load Assignment
When both Inbound Action is Live Delivery and Outbound Action is Live Load, dock for loading (Live Load) will be assigned after delivery is complete.
When only Outbound Action is Live Load (no inbound delivery), the system will immediately assign a dock for loading.
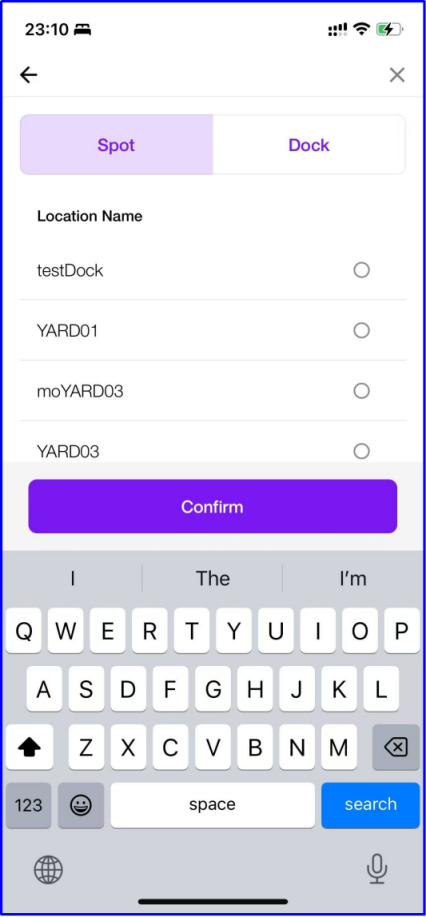
4. If you tap Manual Change on the dock assignment page, you will be taken to the manual selection.

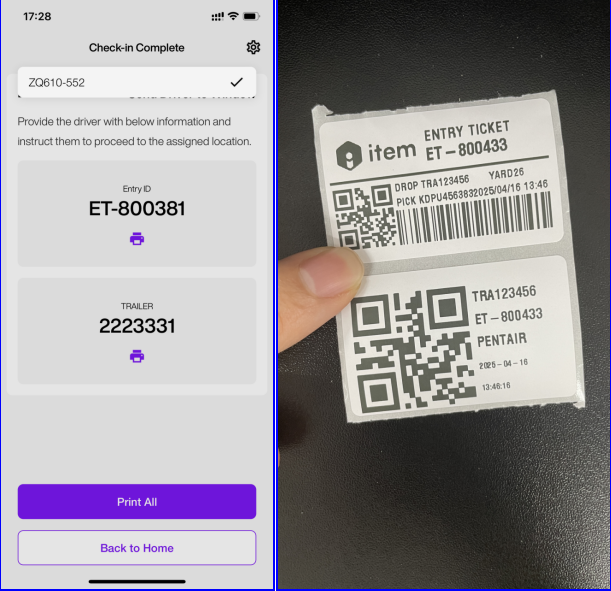
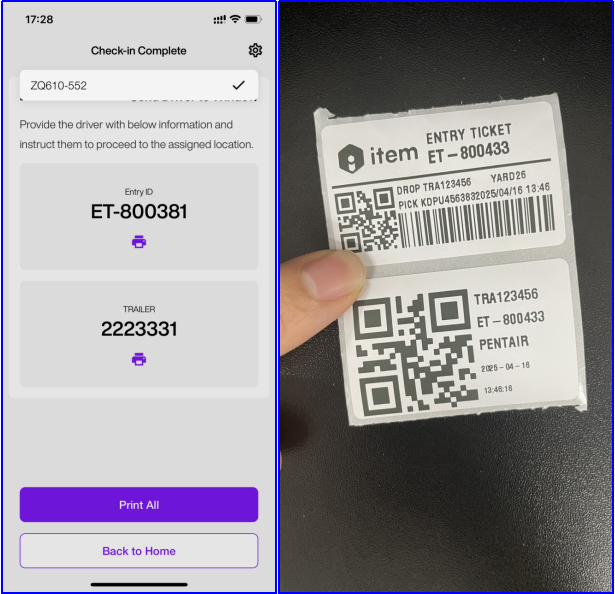
Print Label
1. You can print the Entry ID label and equipment label (e.g. trailer number). You may choose to print them individually or all at once using the Print All button.
2. Use the printer dropdown setting icon in the top-right corner of the screen to select the printer you want to use.
Drop & Hook Check-In Steps
Select Drop And Hook if the driver's visit involves drop off equipment (e.g., trailer, chassis) or pick up existing equipment from the yard.
Select Vehicle Type
Choose the appropriate type of vehicle (Tractor/Other).
Enter Vehicle Details And Driver Details
1. Fill in the required vehicle information such as plate number and Carrier Info.
A. Plate Number. You can manually enter the plate number using the keyboard(tap edit button), or tap the camera icon to take a photo for OCR recognition. Regardless of which method is used, taking a photo is mandatory to complete this step.
When using OCR to capture the plate number:
If the photo contains only one valid license plate format, the system will automatically fill the input field with the recognized plate number.
If the photo contains multiple text strings, the system will extract all candidates, and you can manually select the correct one to confirm.
B. Carrier Info. You can manually enter the USDOT using the keyboard (tap edit button), or tap the camera icon to take a photo for OCR recognition. Regardless of which method is used, taking a photo is mandatory to complete this step.
The system will automatically retrieve the Carrier Name based on the USDOT.
If the USDOT is not found in the system, you will need to enter the Carrier Name manually.
2. Driver Info. Enter the driver's information, including:
Drivero's License or Badge ID
Phone Number
Driver Name
You can scan the barcode on the driver's license to quickly retrieve the Driver's License and Driver Name.
If the driver's information already exists in the system and includes a phone number, the Phone Number field will be auto-filled.
3. If the plate number has a prior check-in record in the system, both the Carrier Info and Driver Info will be auto-filled based on the previous entry.
4. If the Driver, Vehicle, or Carrier is listed in the system's blacklist, a Black Warning message will pop up when you tap Next.

Select Equipment Type
1. Choose the appropriate type of Equipment. When selecting different vehicle types, the available equipment options will vary as shown in the table below.
Vehicle | Equipment |
|---|---|
Tractor | Trailer/Chassis Only/Container + Chassis/Flatbed/Other/No Equipment |
Other | No Equipment |
Enter Equipment Info
On the Equipment Info screen, please complete the following fields based on the actual equipment.
Equipment Number: Tap the camera icon to take a photo for OCR recognition, or tap the pencil icon to manually enter the equipment number.
Is Reefer?
Equipment Size
Load Status
Seal Number: If Load Status is Full, tap the camera icon to scan the seal, or tap the pencil icon to enter it manually. If no seal is present, tap No Seal.
Equipment Condition: If Damaged is selected, you will be required to enter a description of the damage before proceeding.
Enter Trip Information
1. On the Trip Information screen, select the appropriate Inbound Action and Outbound Action for this check-in.
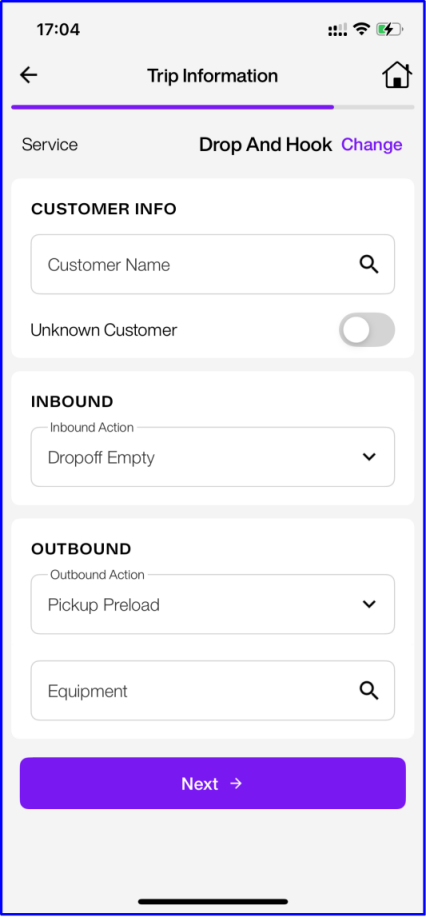
The available actions depend on the Load Status (Full/Empty). Refer to the table below.
Load Status | Action |
|---|---|
Full | Inbound: Drop Off Full/None; Outbound: Pickup Preload/Pickup Empty/None |
Empty | Inbound: Drop Off Empty/None; Outbound: Pickup Preload/Pick Empty/None |
2. If you realize that the driver's current visit does not fall under Live Service, you can tap the Change link next to the Service field to select the correct service type.
3. You need to select the Customer for the vehicle entering the yard. If the customer is unknown, click the Unknown Customer button.
Distribute Location
1. On the Distribute Spot/Dock screen, the system displays the assigned Dock for the check-in based on the Inbound and Outbound actions.
2. Drop Off Assignment
For Drop off, the system will assign a Dock (e.g., DOCK14).
You can tap Manual Change to override and assign a specific Dock manually, or select Next Available to let the system find the next open dock.
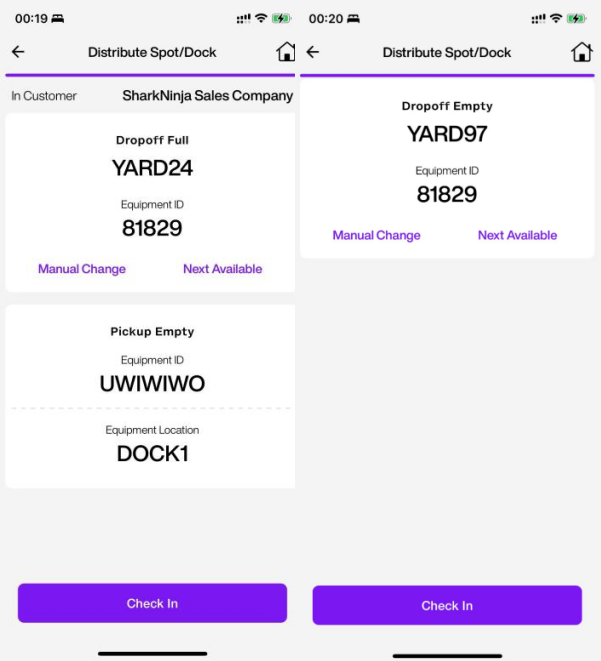
3. Pickup Assignment
For pickup, the system will immediately assign a dock.
4. If you tap Manual Change on the dock assignment page, you will be taken to the manual selection.
Print Label
1. You can print the Entry ID label and equipment label (e.g. trailer number). You may choose to print them individually or all at once using the Print All button.
2. Use the printer dropdown setting icon in the top-right corner of the screen to select the printer you want to use.