Add New Receipts
Add New Receipts
The receipts can be created by EDI or API, or manually entered into Item WMS. This section introduces the manual adding methods.
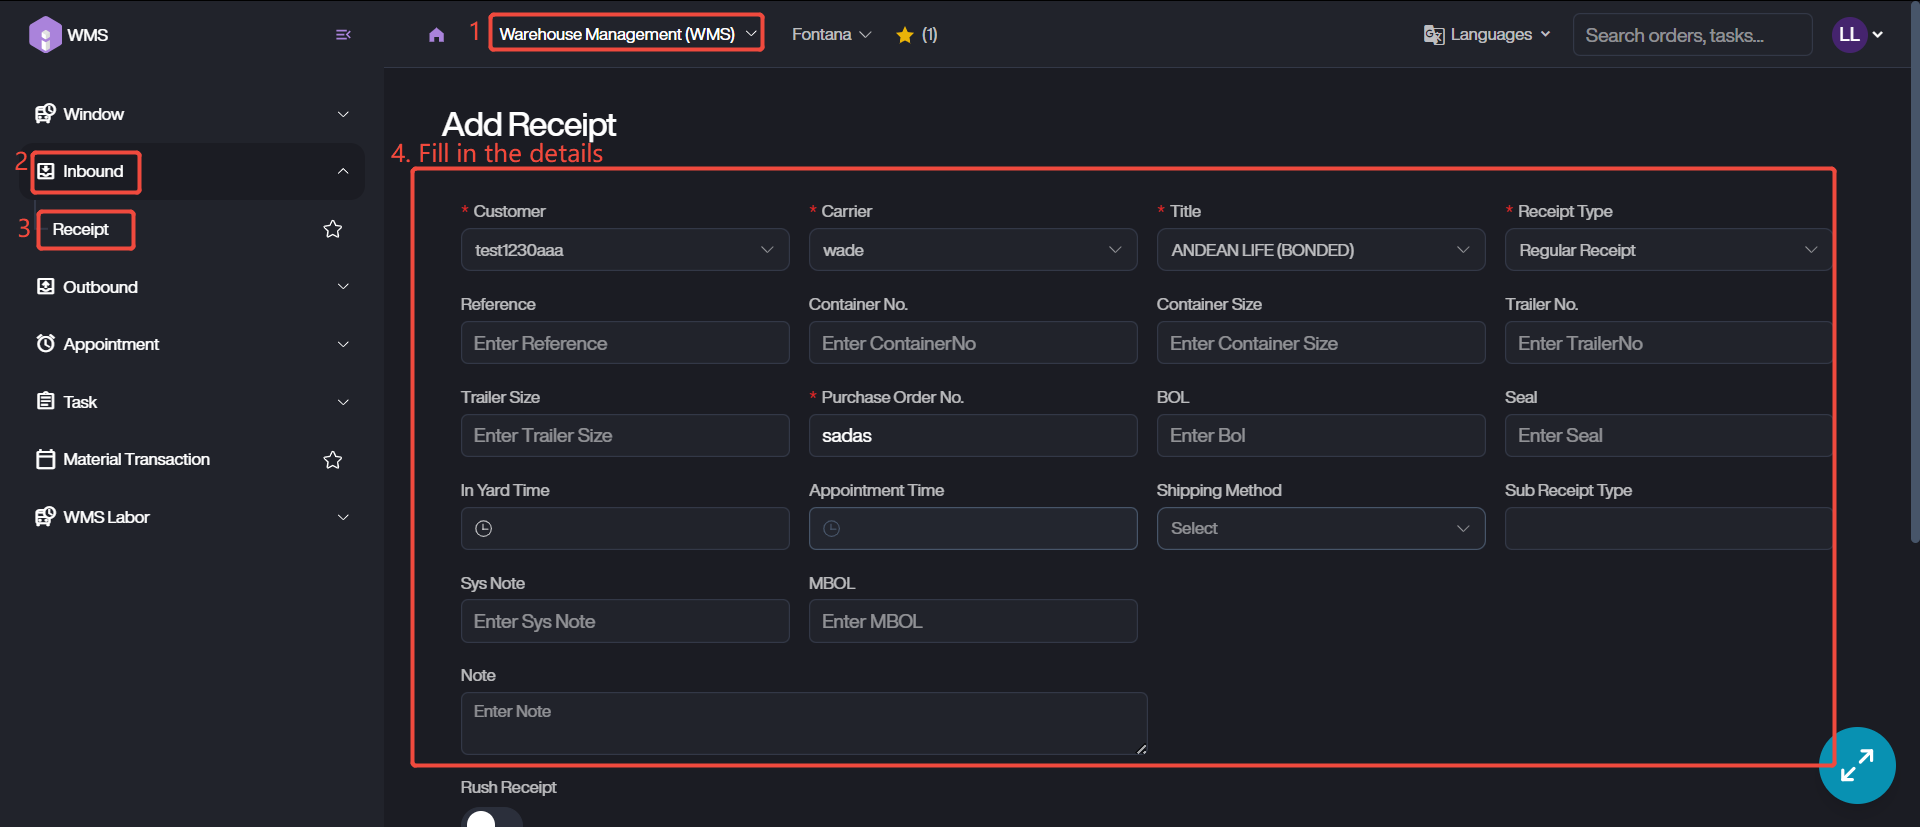
1. Keep in Warehouse Management (WMS) module, access to receipt list via Inbound > Receipt.
2. Click on + Add Receipt to manually add a new receipt.
3. Fill in the receipt details, make sure to fill in the all required fields, including Customer, Carrier, Title, Receipt Type and Purchase Order No.
4. Type in additional information if needed, such as reference or notes.
Receipt Type | Description |
|---|---|
Regular Receipt | Standard receipt process for incoming goods from external suppliers. |
Title Transfer Receipt | Records ownership transfer of inventory without physical movement. |
Migo Transfer Receipt | Goods receipt based on SAP MIGO transactions for inventory updates. |
Internal Transfer Receiving | Captures inventory received from another internal warehouse or facility. |
Transload | Logs goods transferred between carriers or containers without long-term storage. |
Material Purchase | Receipt of raw materials or suppliers procured for production or operations. |
Return From End User | Processes goods returned by customers for restocking or disposal. |
5. Add receiving items by clicking on + Add Item Line.
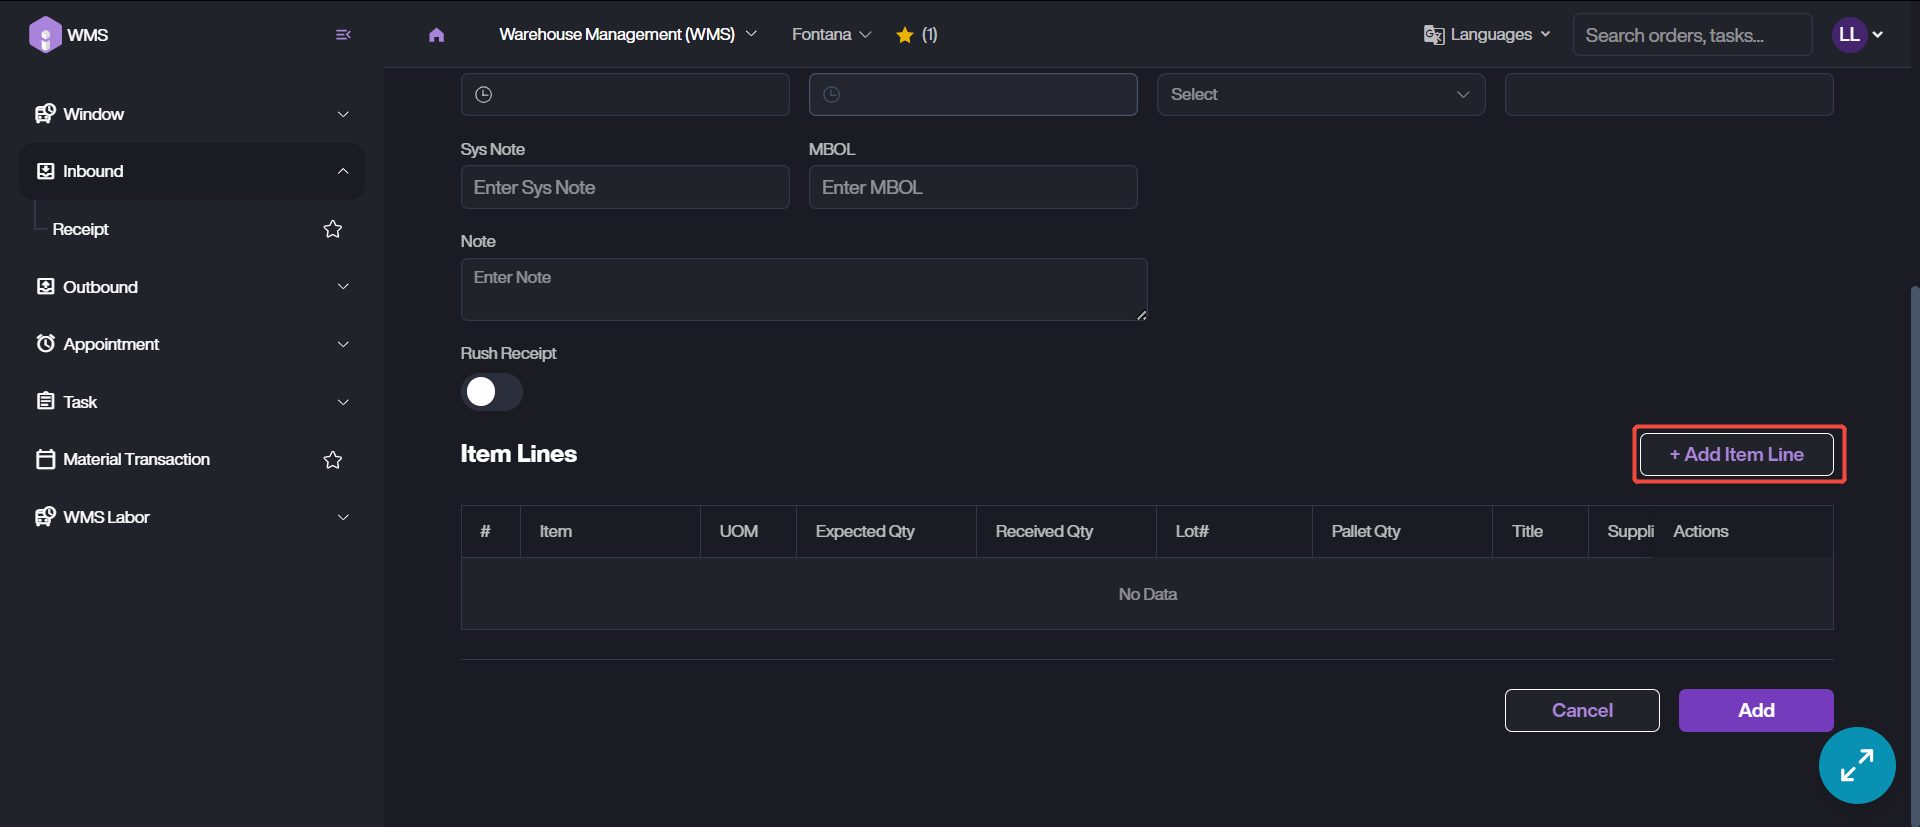
6. Type in more details, such as Item Name, UOM, and the quantity. If there is any additional information, please fill it into the corresponding fields.
7. Click Add button to save the item information. If the receipt contains multiple item lines, please repeat Step 5 and Step 6 to add each item.

8. After the items are added completely, please submit the receipt adding via clicking on Add button at the bottom.