Connector
Connector
The built-in Integration module is designed for configuring the back end settings to connect with internal or third-party platforms. All available platforms are displayed in the Integration section and can be found in the drop-down list when adding a new connector. Use Connectors to link with external platforms or internal systems for data syncs.
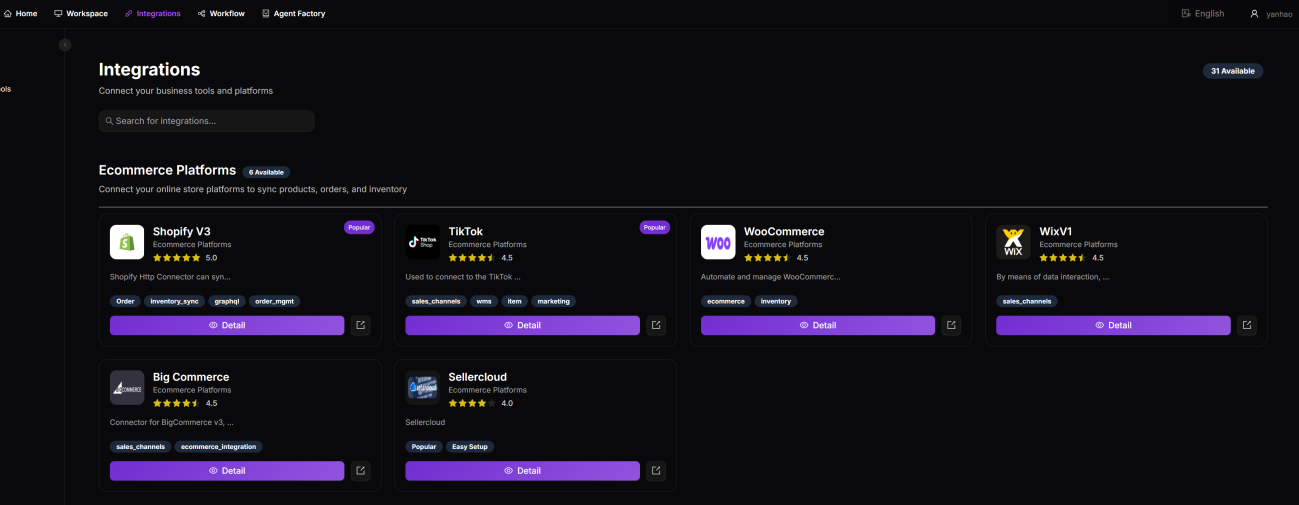
Adding a Connector
1. Navigate to Workspace > Merchant, select your merchant, and open the Connectors tab. 2. Click + Add Connector. 3. From the Integration dropdown, select the platform.
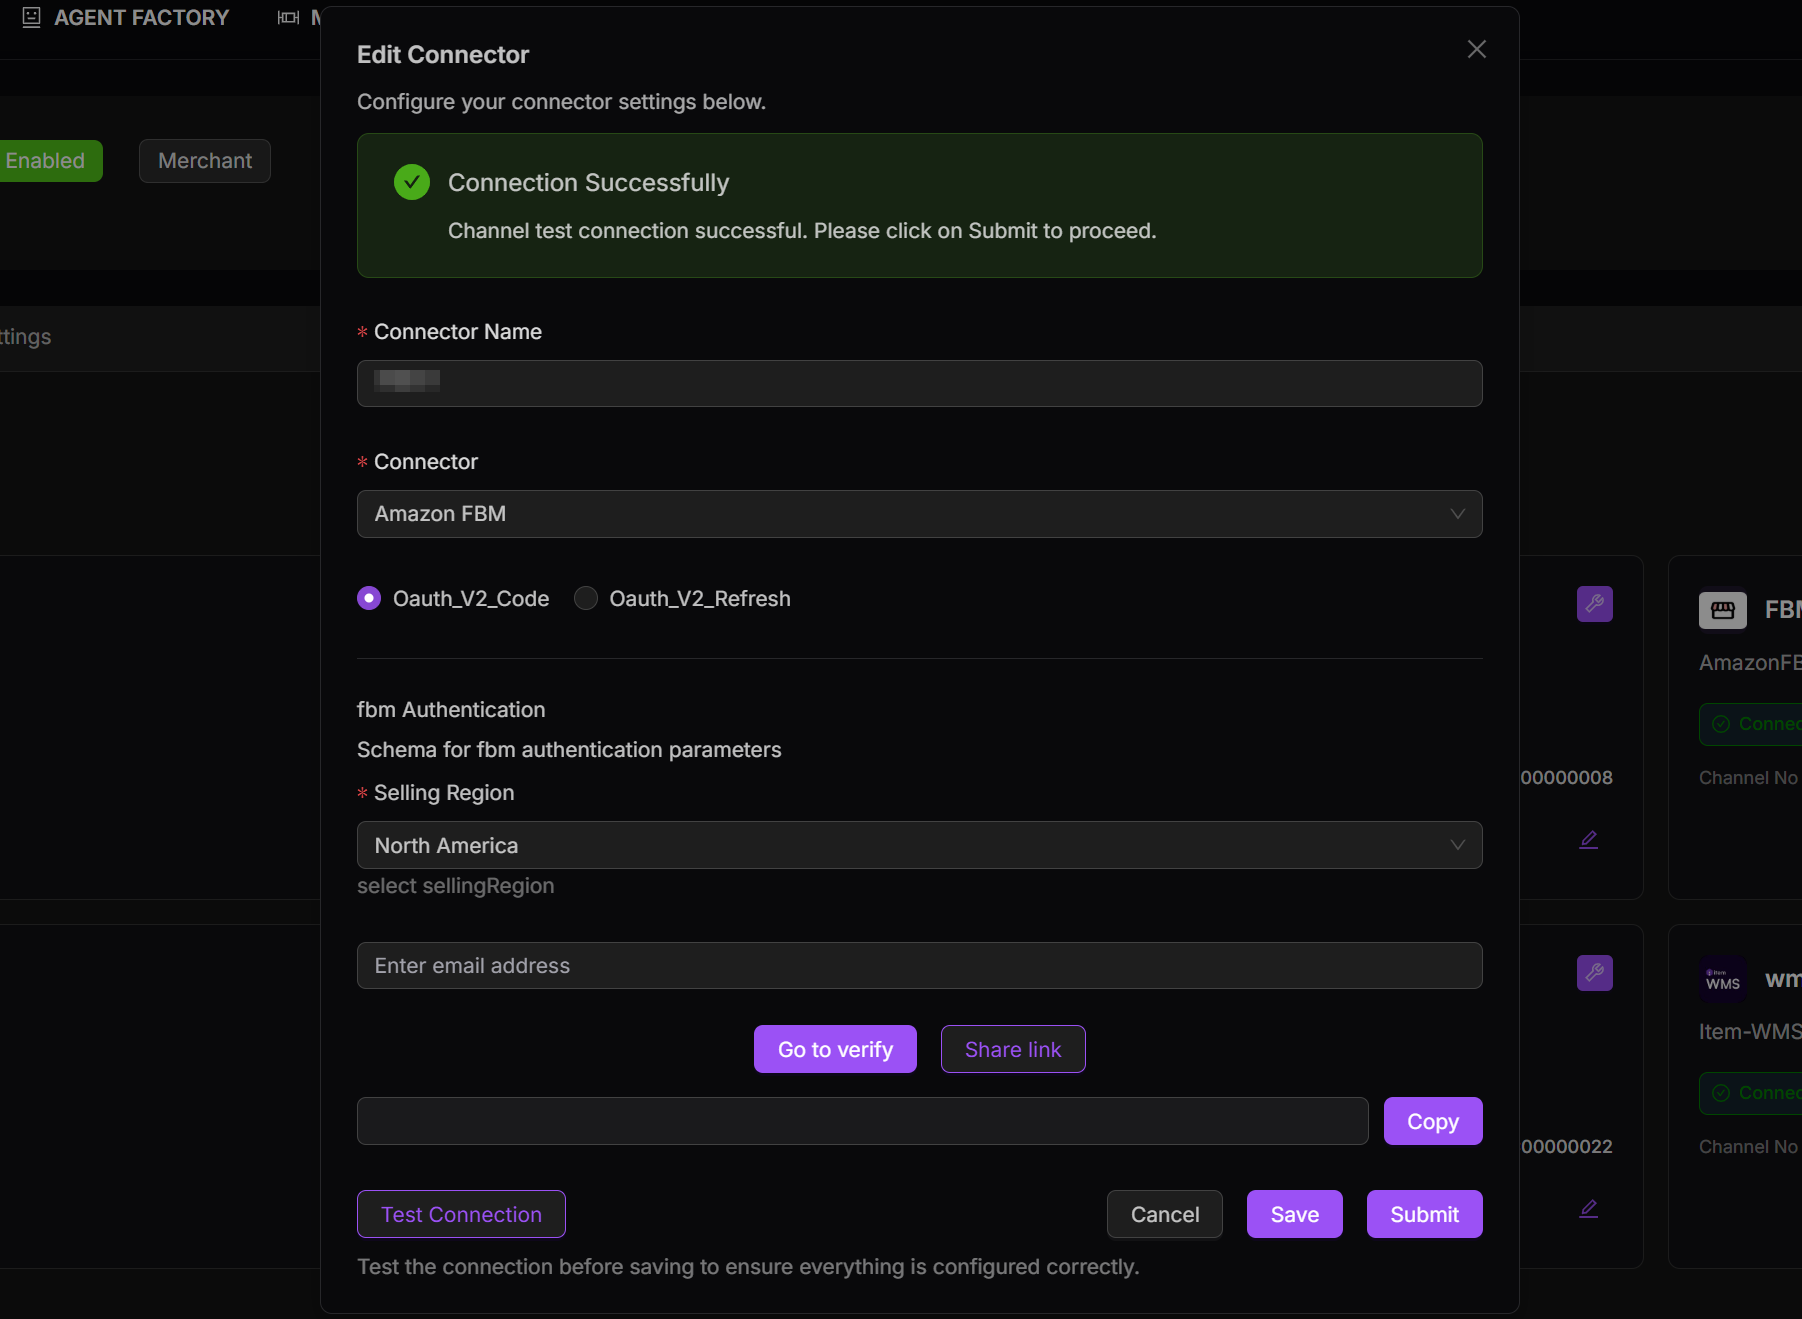
4. Enter a descriptive Connector Name. 5. Select the authentication method from the available options (e.g., OAuth 2.0, API Key, or Session Auth). 6. Enter the required credentials or initiate authorization.
Note: If token-based authentication is used, enable Send Email When Token Expires to receive renewal reminders.
7. Click Test Connection to validate. 8. Once the test is successful, click Submit.

9. The new connector will appear in your merchant’s Connected Systems list.
Note: The general process is the same for all platforms, though the specific authentication fields vary depending on the platform type.