QuickBooks
QuickBooks Setup Guide
Follow the steps below to complete the QuickBooks channel integration with Item DI.
Step 1: Create a New Merchant
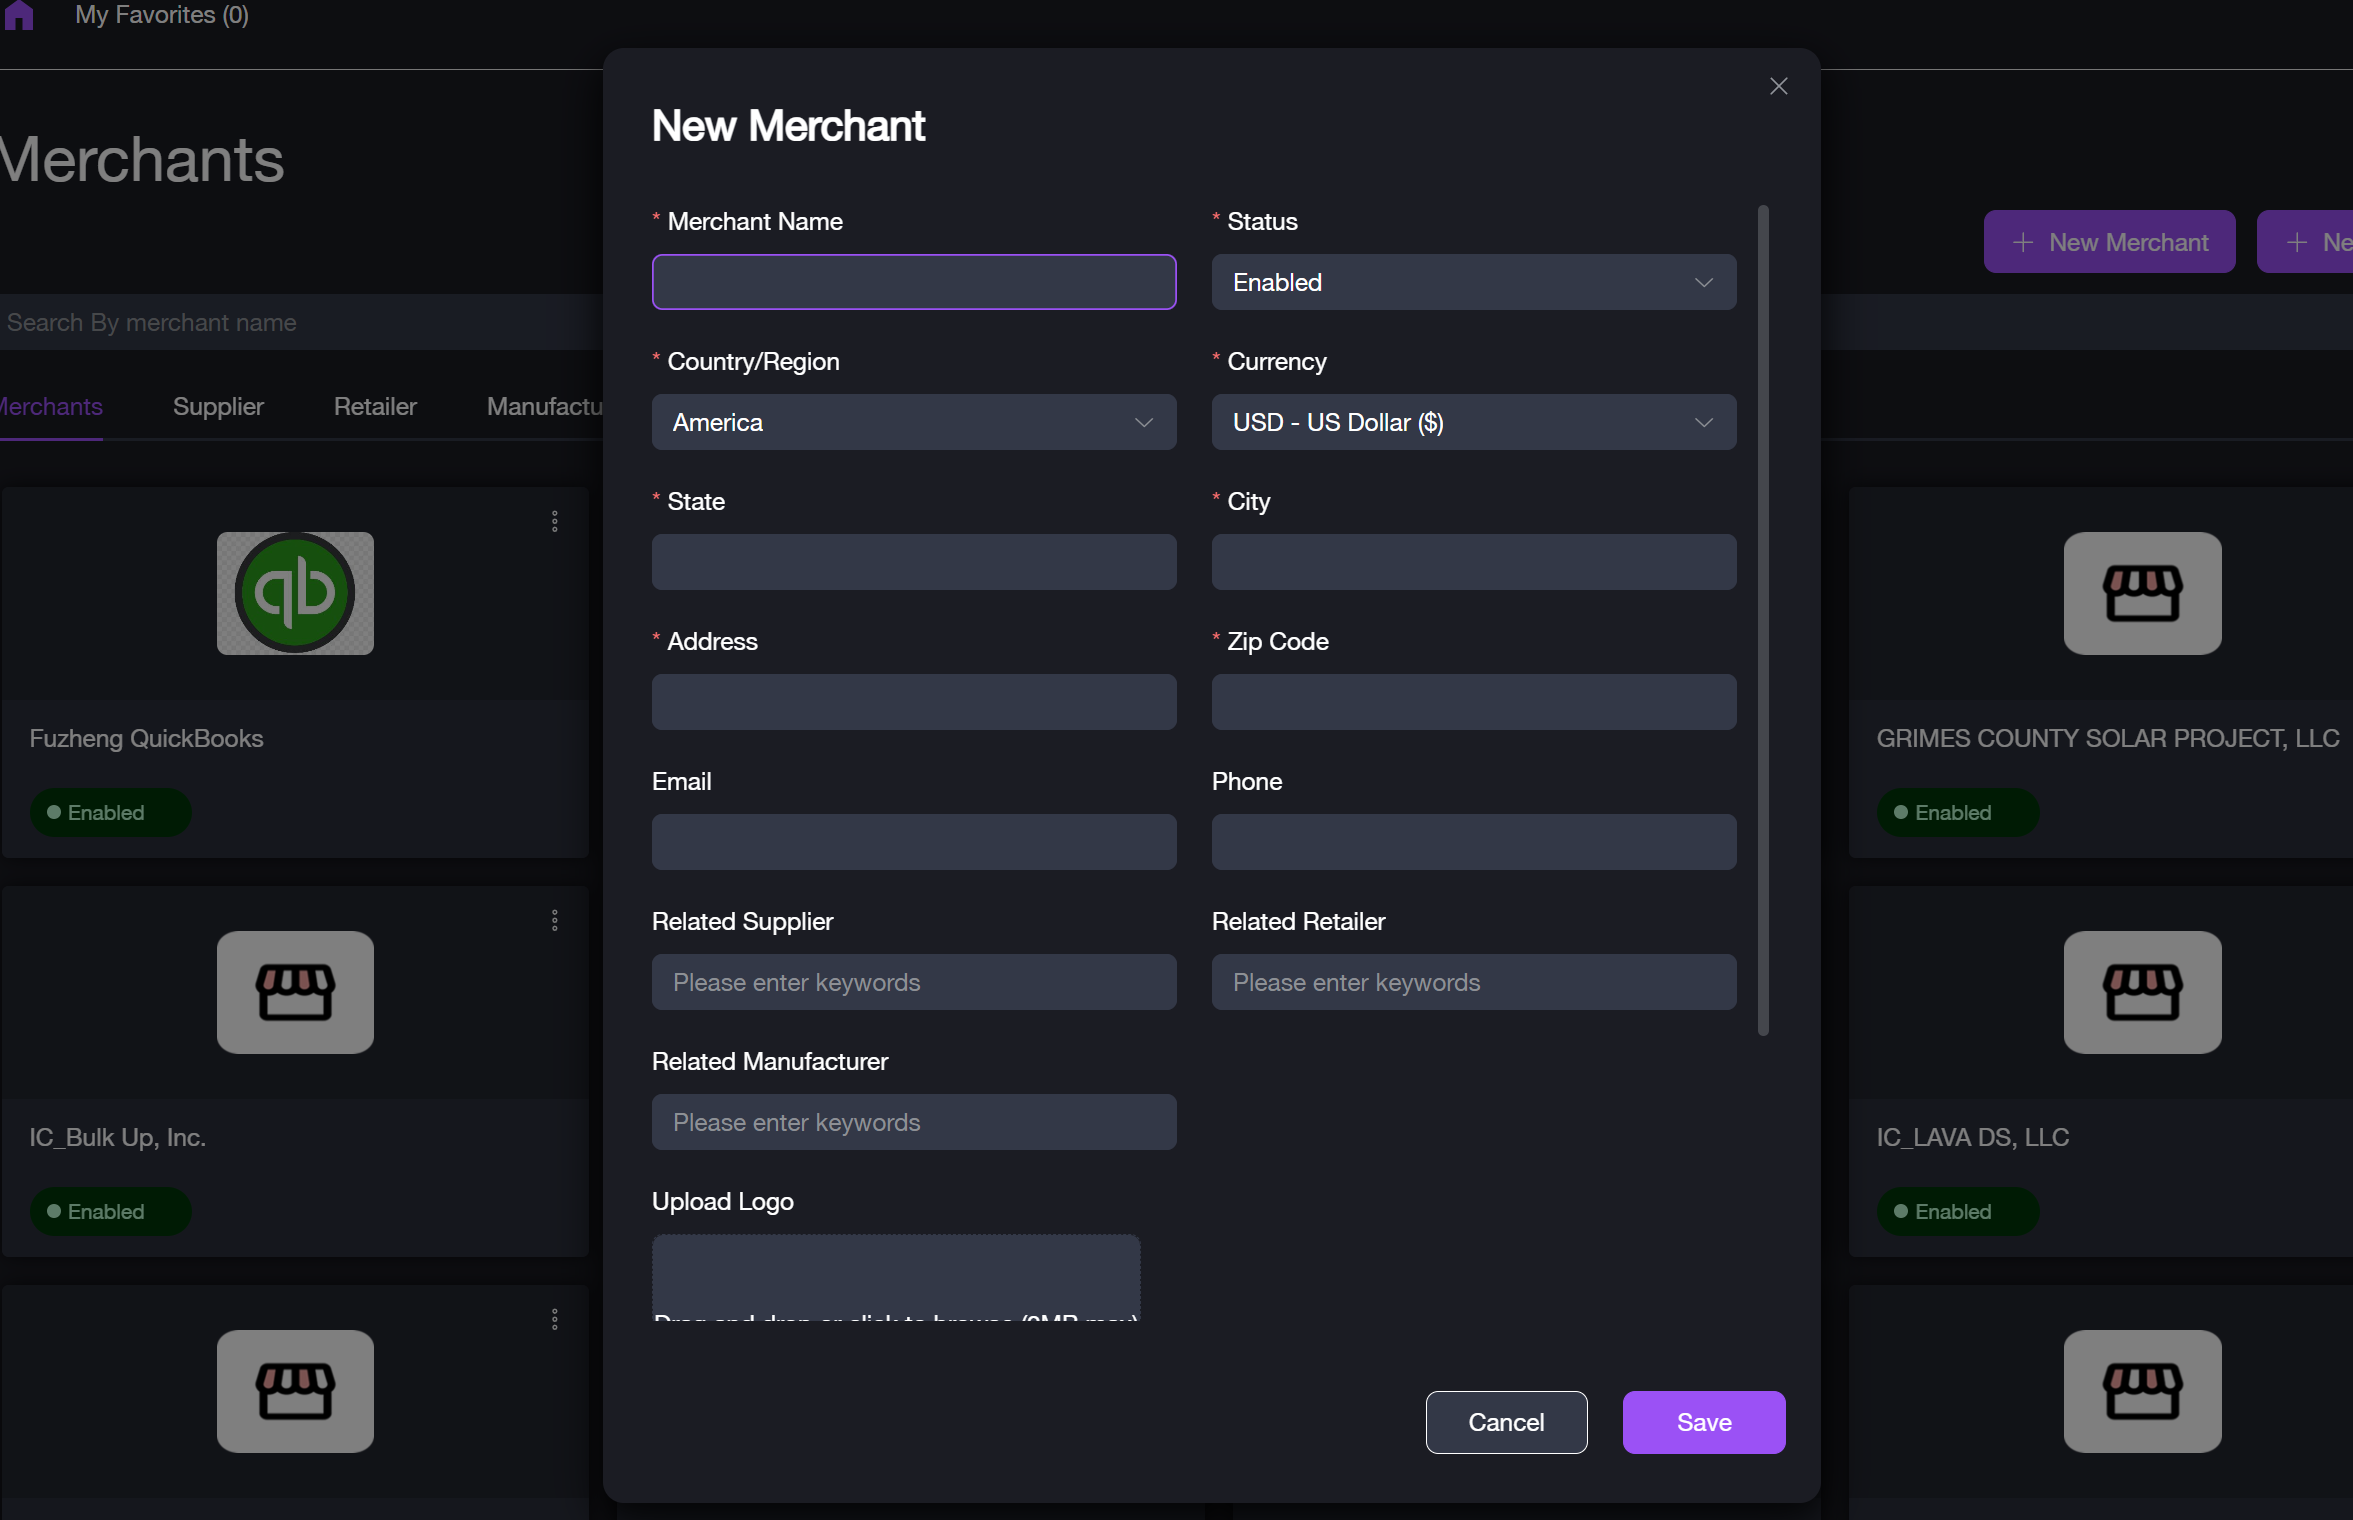
Before connecting QuickBooks, ensure that a merchant account is set up in Item DI.
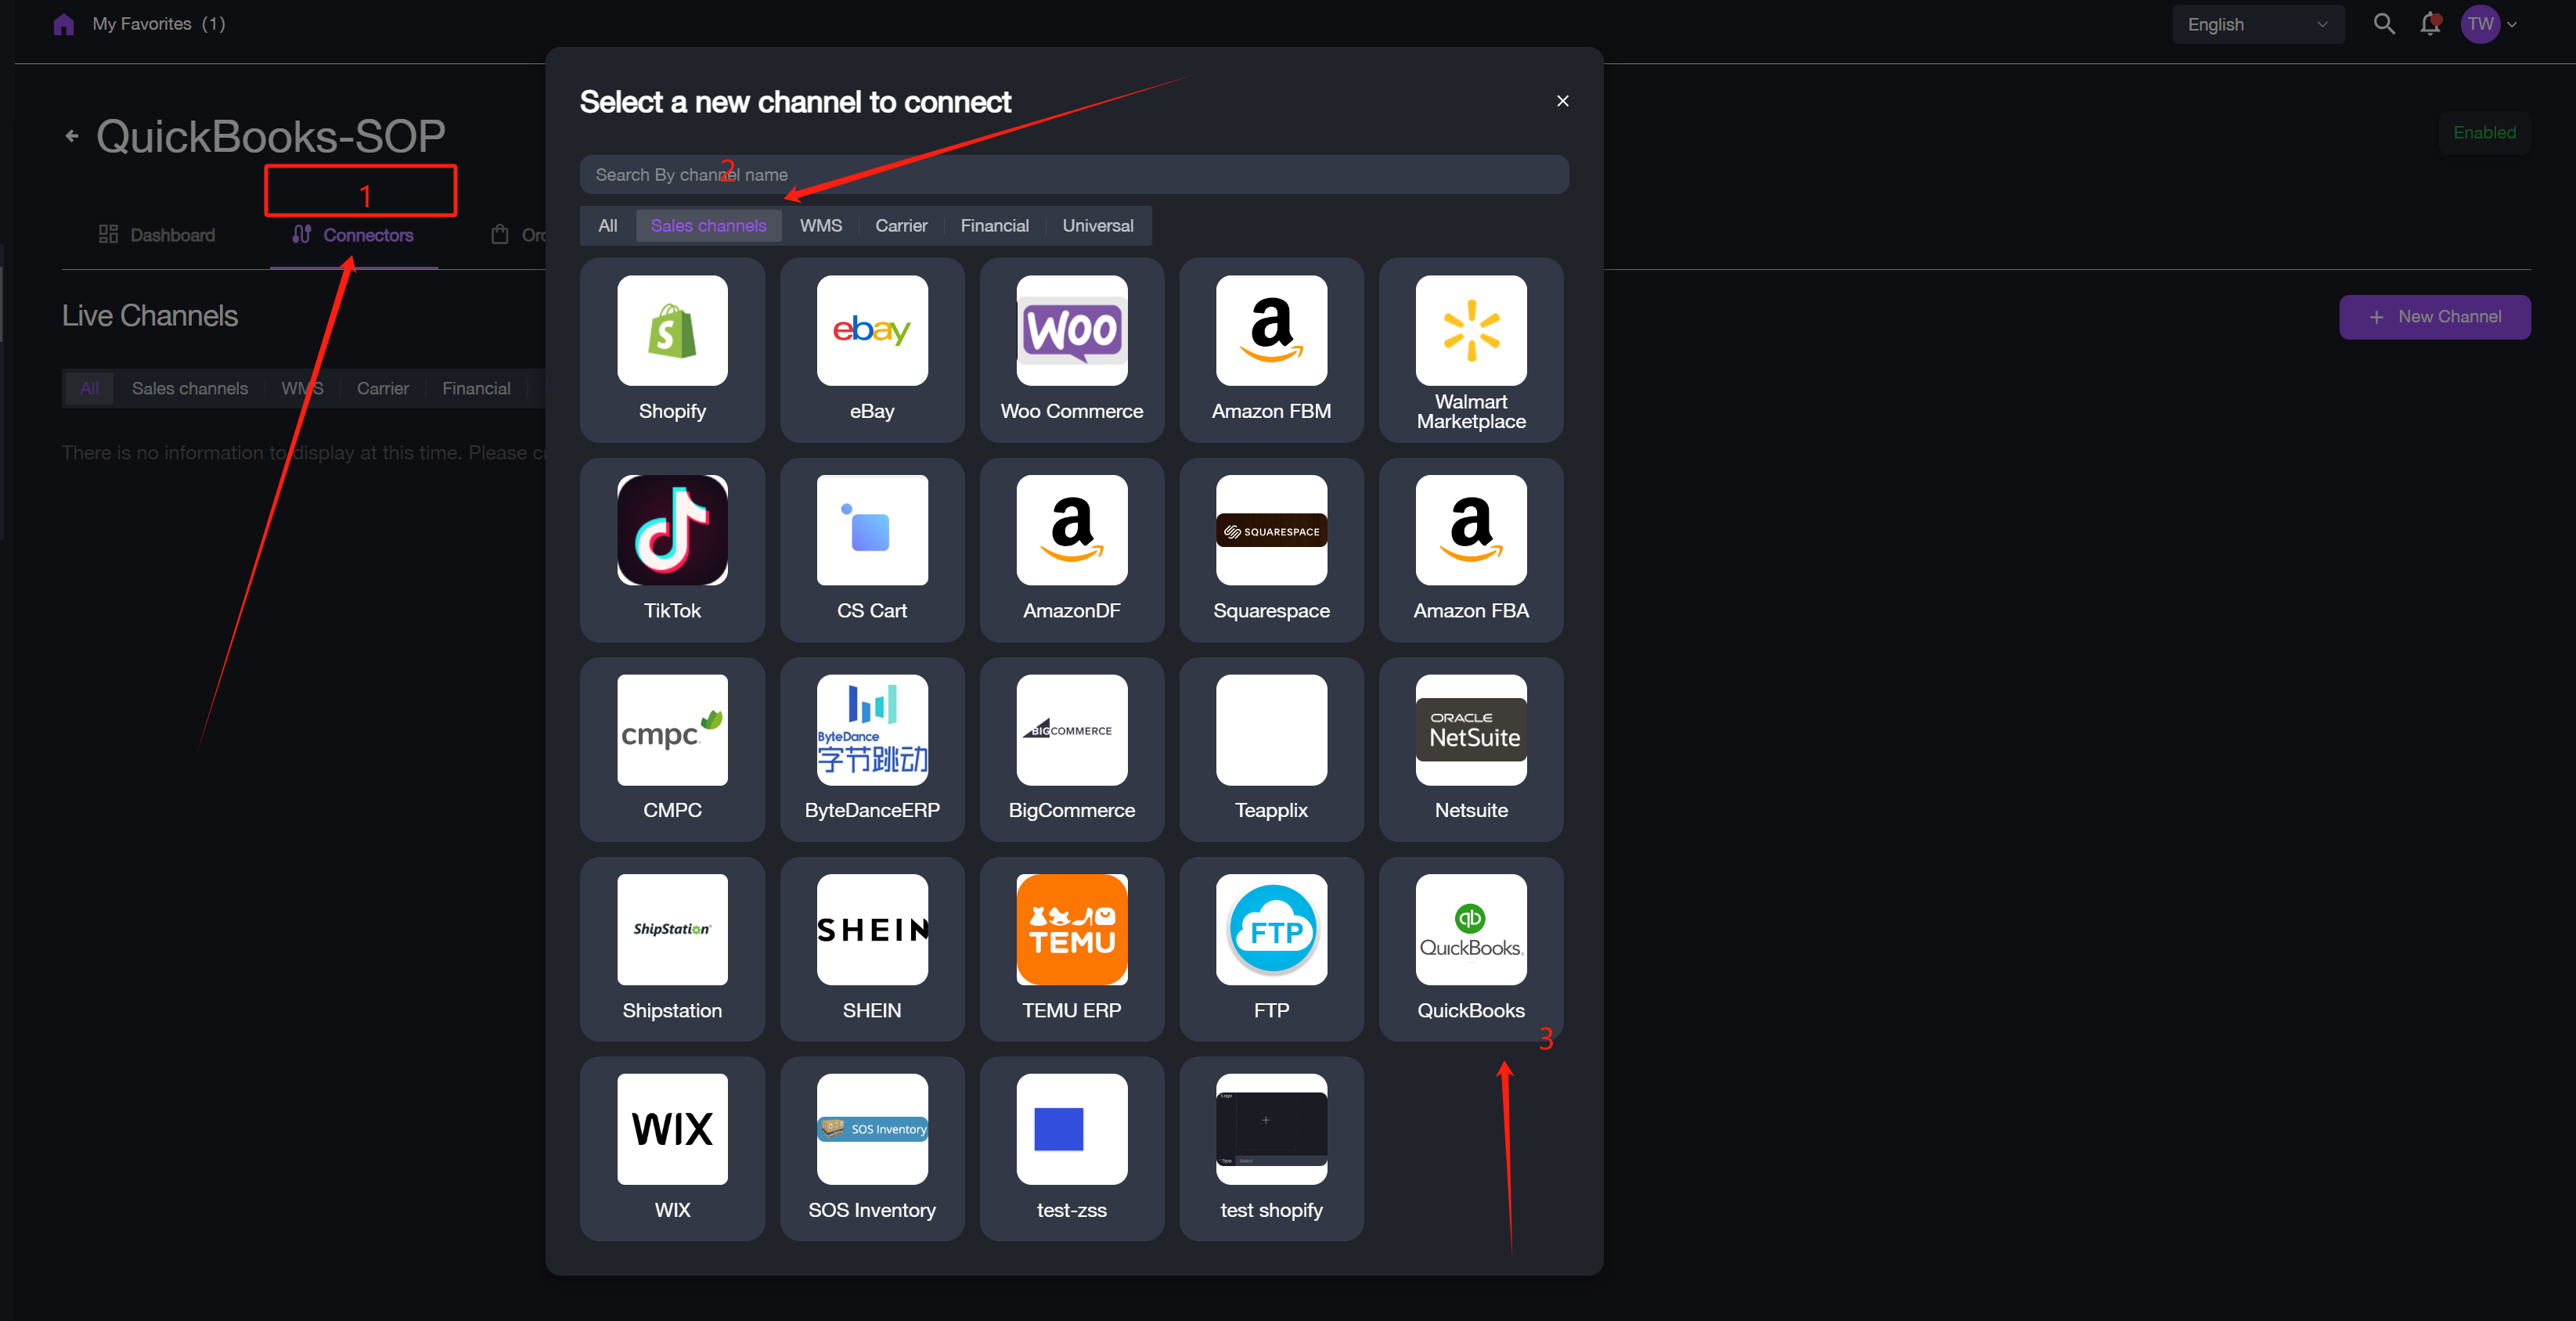
Step 2: Connect QuickBooks to Item DI
To integrate QuickBooks with Item DI, follow these steps:
1. Navigate to Merchants > [Select Merchant] > Connectors > Sales Channels. 2. Click + New Channel or the New Channel text link. The new channel setup window appears. 3. Select QuickBooks from the list of available channels.
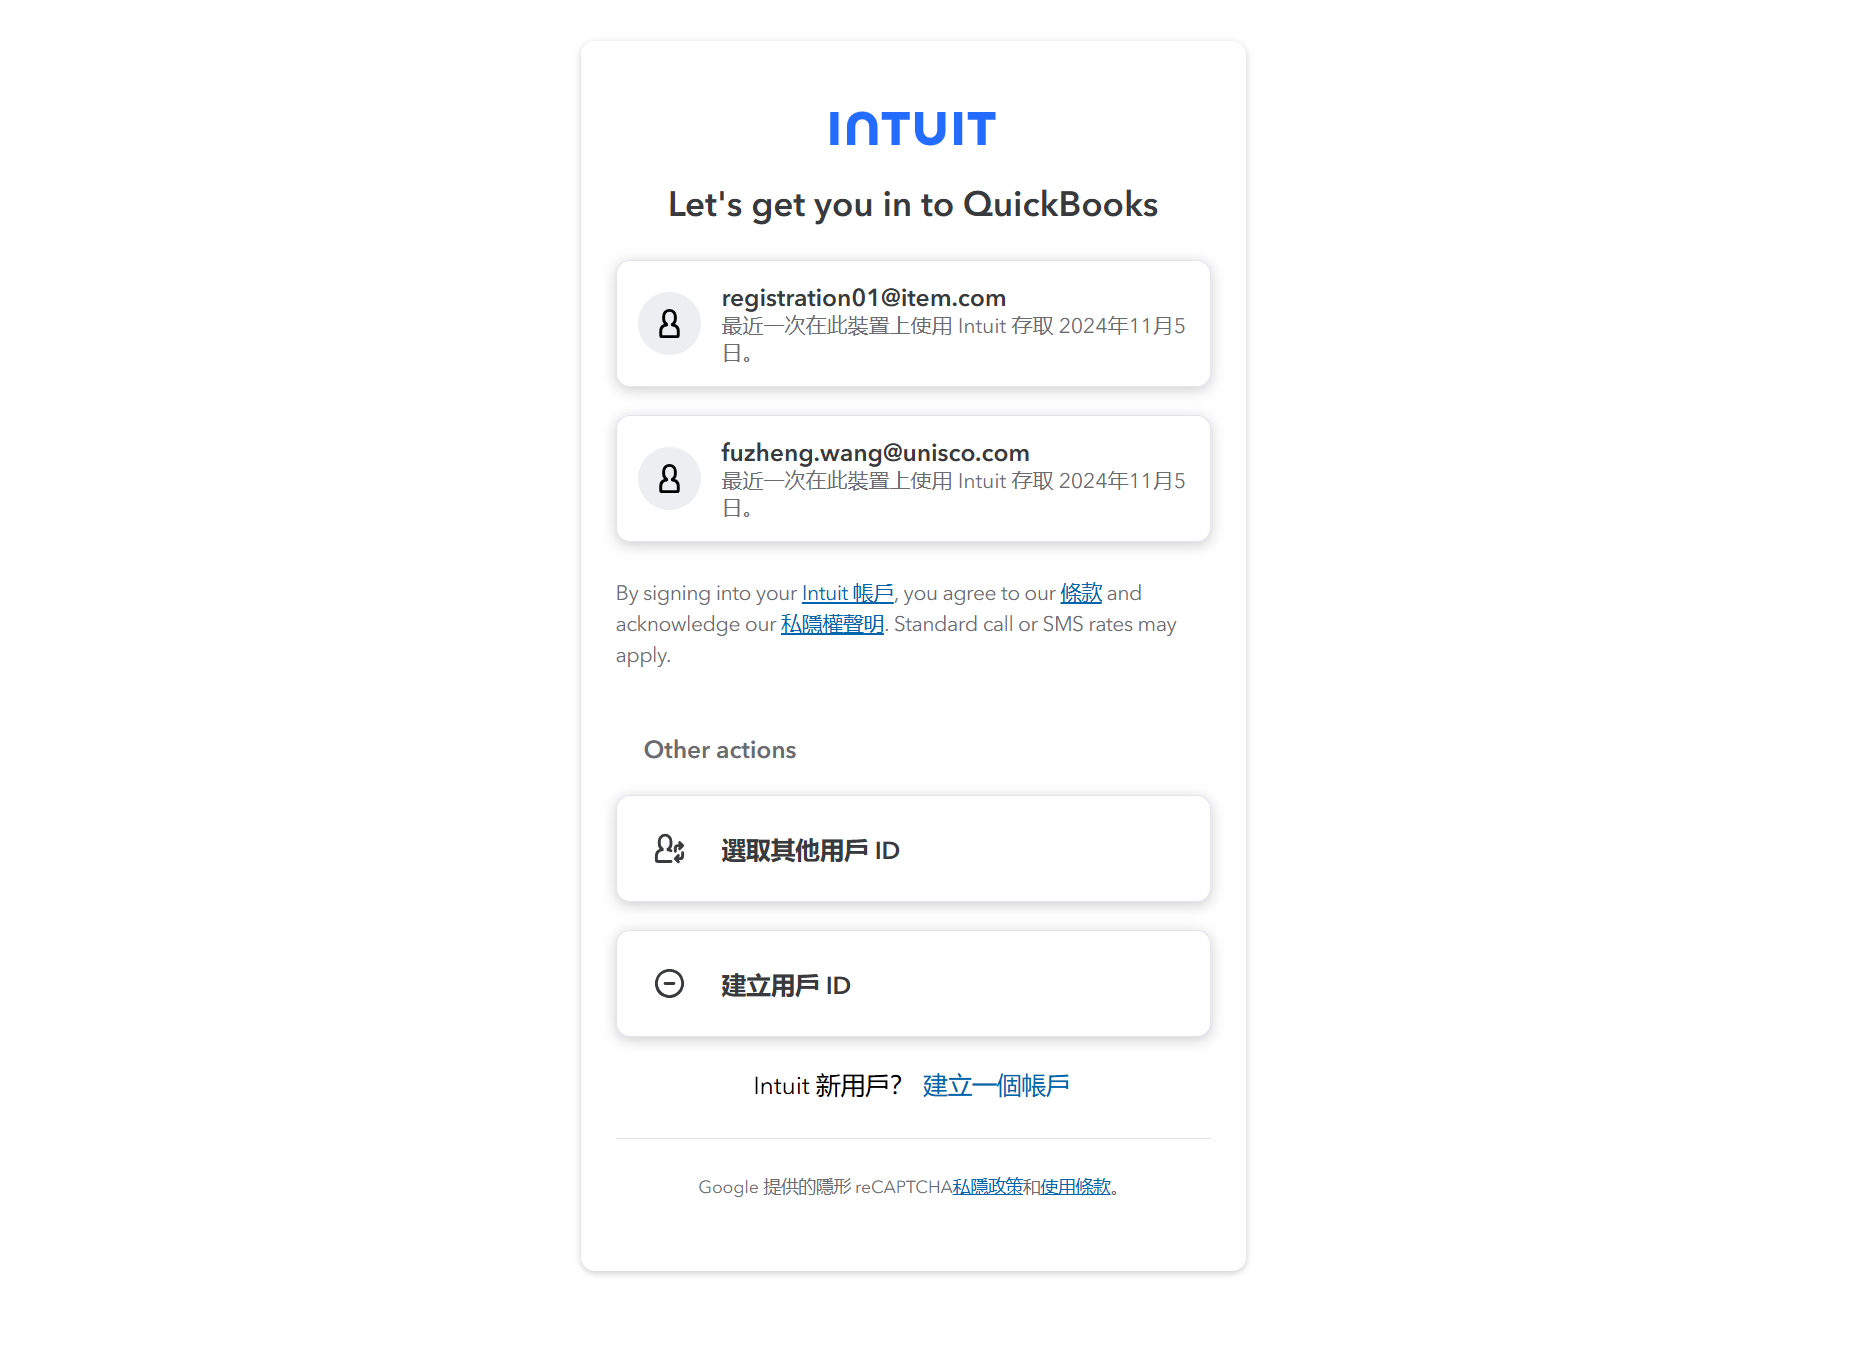
4. Click Go to Verify to be redirected to the QuickBooks sign-in page. 5. Sign in to your QuickBooks account for authorization. After successful login, you will be redirected back to the channel connection page.
6. Enter a Channel Name and an optional email address (for token expiration notifications). 7. Click Test Connection. 8. If the "Connection Successful" message appears, click Submit to finalize the setup. The sales channel will now be in a connected state.