Entry Management
Entry Management
The Window Check-in process is to create an Entry ID. Entry IDs are a record to permit a vehicle (a tractor-trailer or box-truck) or container to enter the facility yard. These contain Check-in time and docks, the equipment, driver information and etc. This article introduces the relevant operation for creating new entry IDs and managing the existing entry list.
How to Create a New Entry
This section introduces the operations when creating a new Entry ID during driver check in.
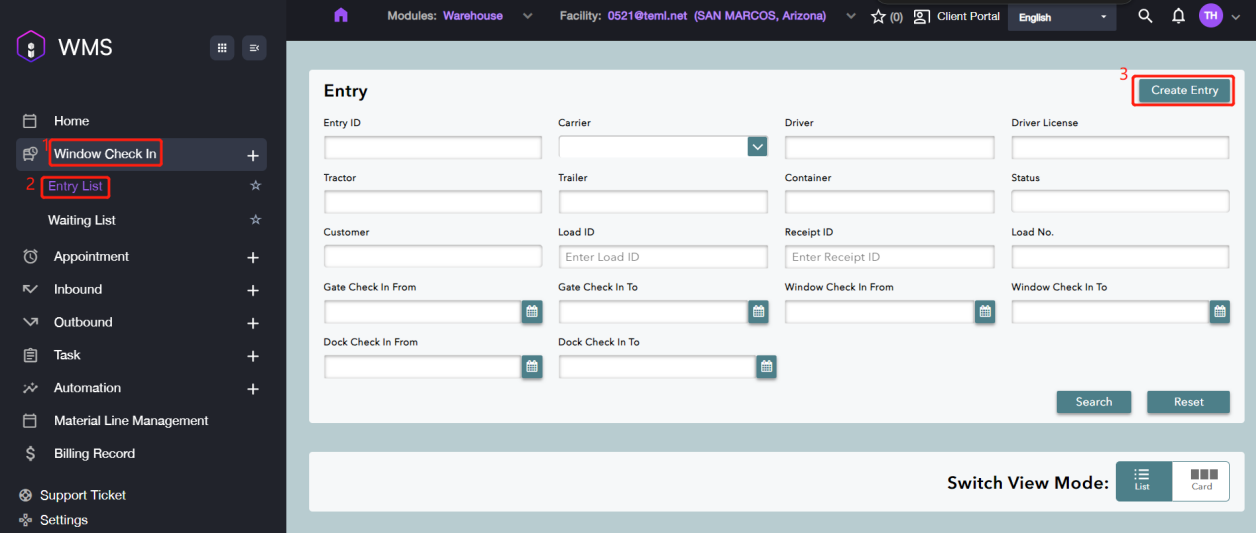
1. Navigate to Window Check In > Entry List, click Create Entry button at the top right corner.
2. Select one entry type according to your requirements, then click OK for the next step.
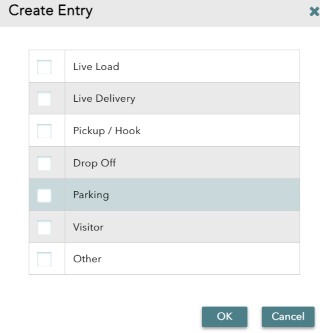
Entry Type | Description |
|---|---|
Live Load | Outbound orders where a trailer or container is loaded at the facility. |
Live Delivery | Inbound orders where a trailer or container is offloading at the facility. |
Pickup / Hook | No-touch freight service. A tractor arrives and picks up or drops off a trailer without loading or unloading. |
Drop Off | Delivery at the gate, such as USPS and other delivery services. |
Parking | Check this box if the vehicle or container is to be parked at the yard. |
Visitor | One-time guest. |
Other | All types of entries not covered by the others. |
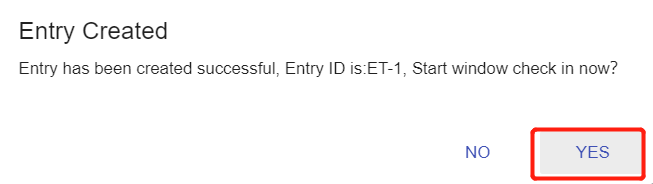
3. Click YES on the pop-up window to fill out the carrier information.
4. Enter the relevant carrier information, then click on CONTINUE to next step.
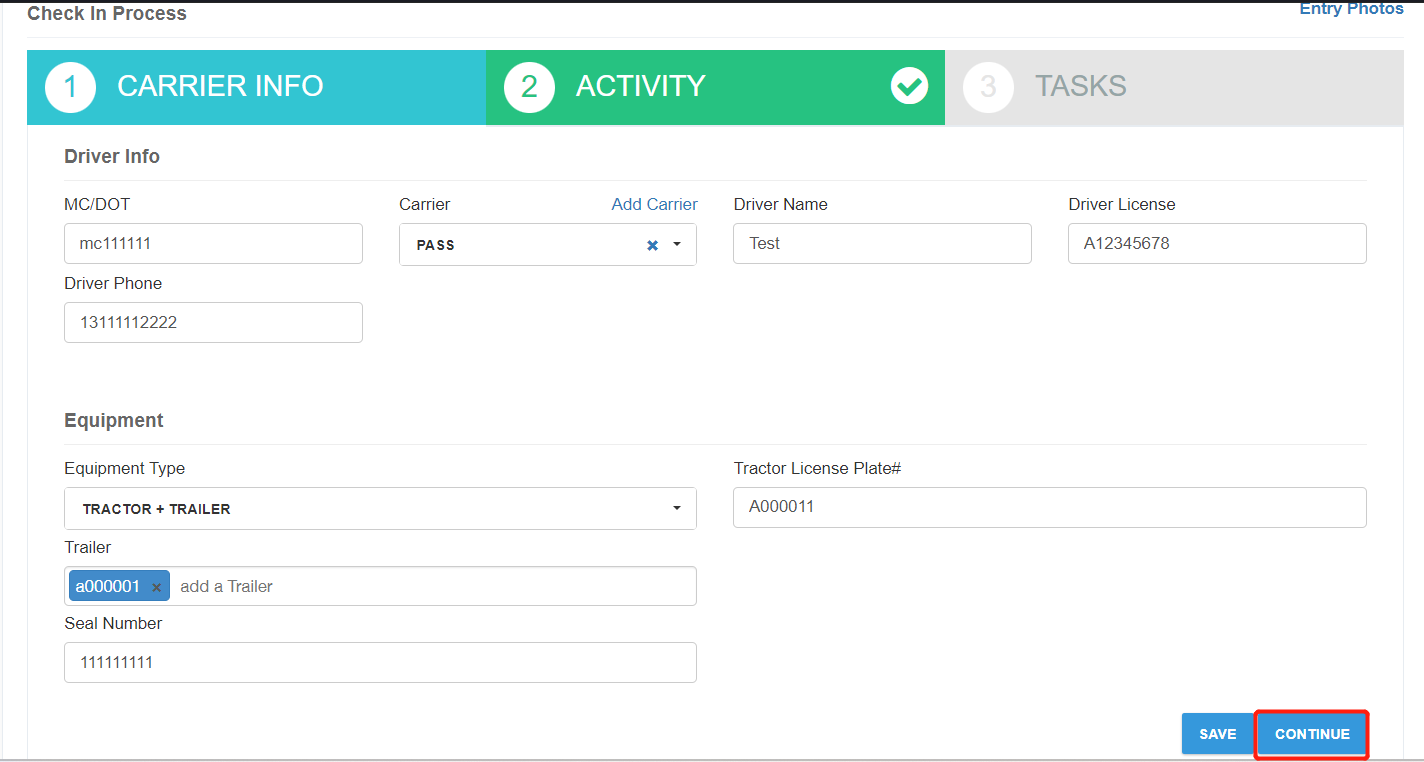
Parameter | Description |
|---|---|
MC/DOT | Vehicle’s MC/DOT number. |
Carrier | Name of the carrier. For example, FEDX_CG for FedEx ground. |
Driver Name | Driver’s name from the driver’s license. For example, Steve Jimenez. |
Driver License | Driver’s license number. For example, A3452341. |
Driver Phone | Cell phone number to contact the driver. |
Equipment Type | Type of vehicle or vehicle/trailer combination. |
License Plate | License plate number of the vehicle. |
Container | The container ID. |
Trailer | Trailer’s license plate. |
Seal Number | Seal number of the container. |
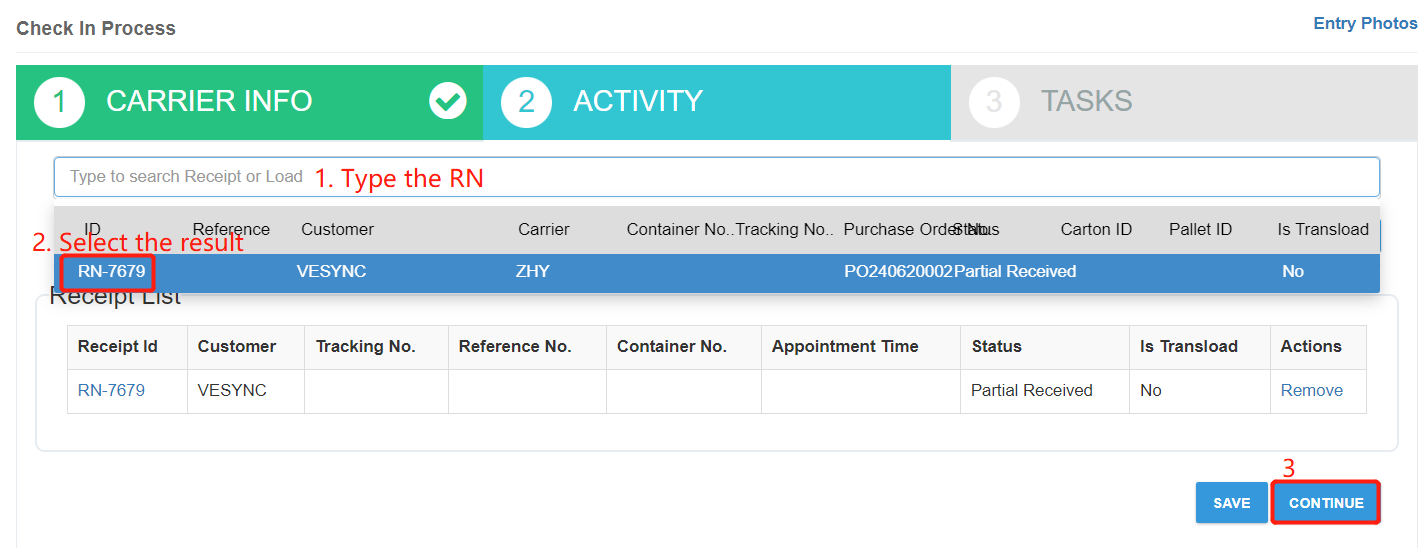
5. In the Activity tab, please type an RN or Load in the input box to search Receipt or Load, and click the RN in the result list to associate it to the Entry ID. And then click Continue to next step.
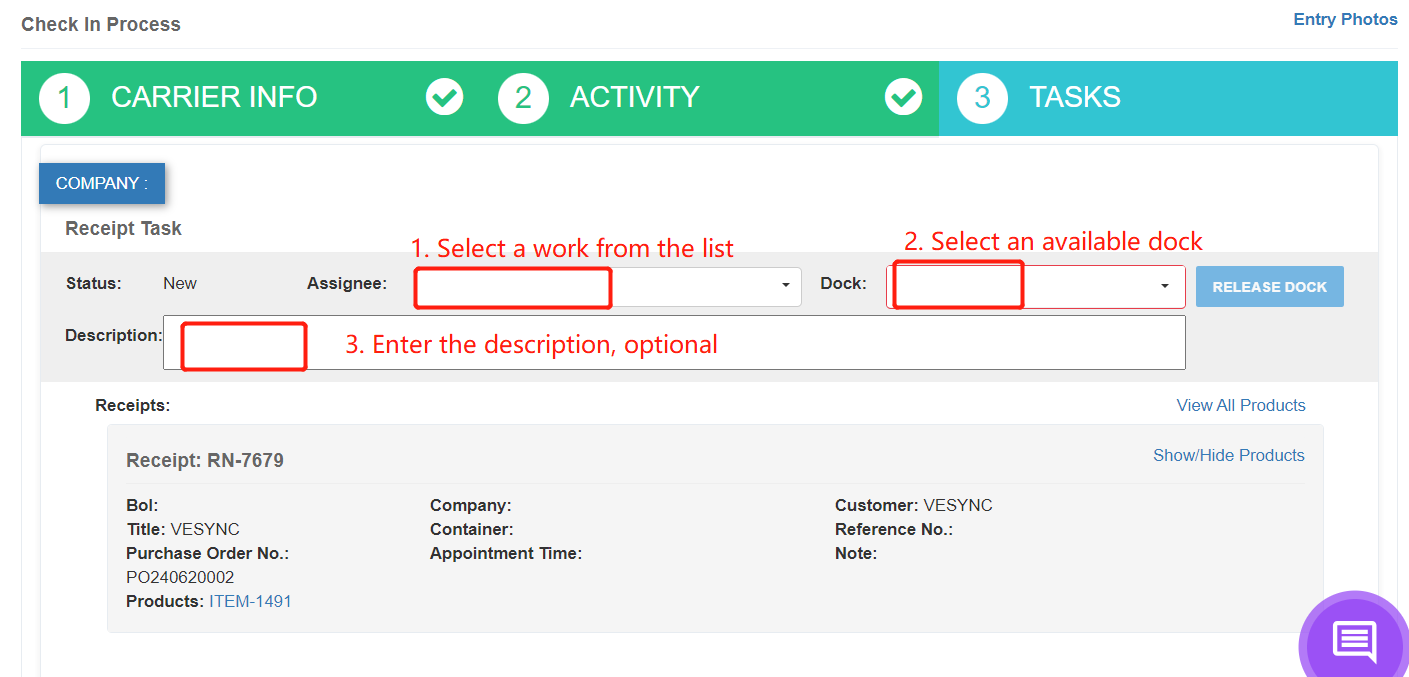
6. In the Task tab, please assign an Assignee and an available for this task. Please enter the short description of the task in the description box if you need.
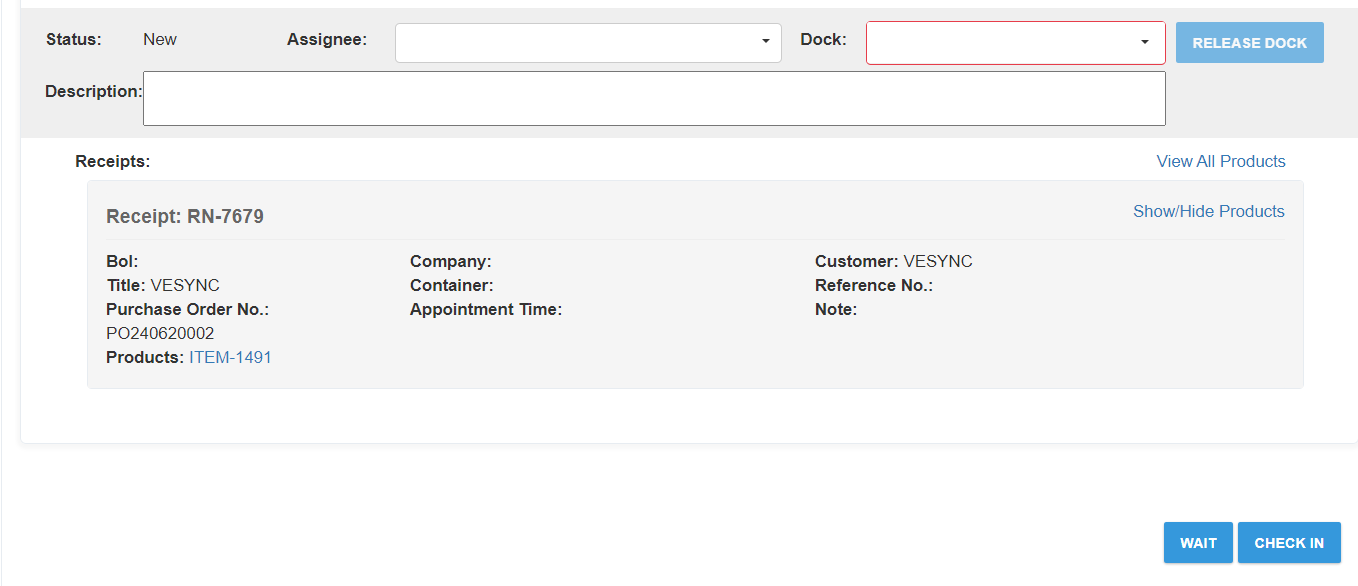
7. Scroll down and there are two action buttons: WAIT and CHECK IN.
Parameter | Description |
|---|---|
Assignee | Name of the warehouse employee who will perform the task. |
Dock | Dock number, corresponding to where the goods will unloaded or loaded. |
Description | Description of the task. |
If you want to check in the entry immediately, please click CHECK IN button then click OK in the confirmation window. The assignee will receive a notification of the corresponding task on their WMS mobile app.
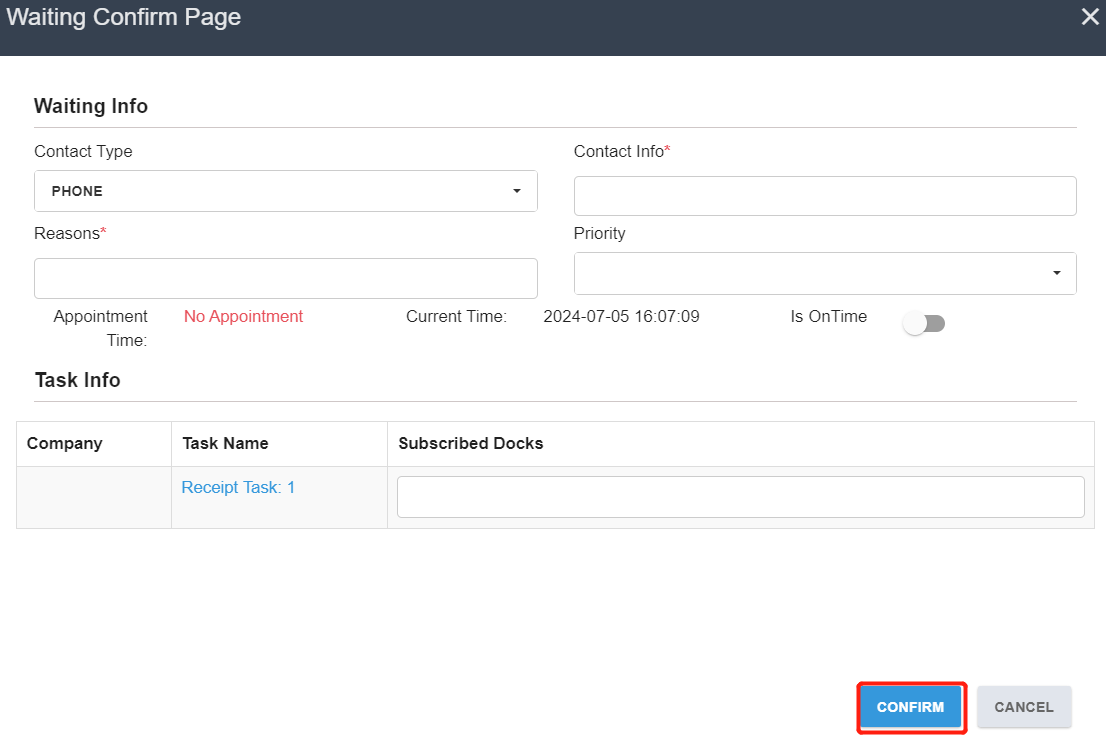
If you want to delay for the check-in, please click WAIT button and enter the Contact Info and select one reason from the list on Waiting Confirm Page. Then click Confirm button to complete.
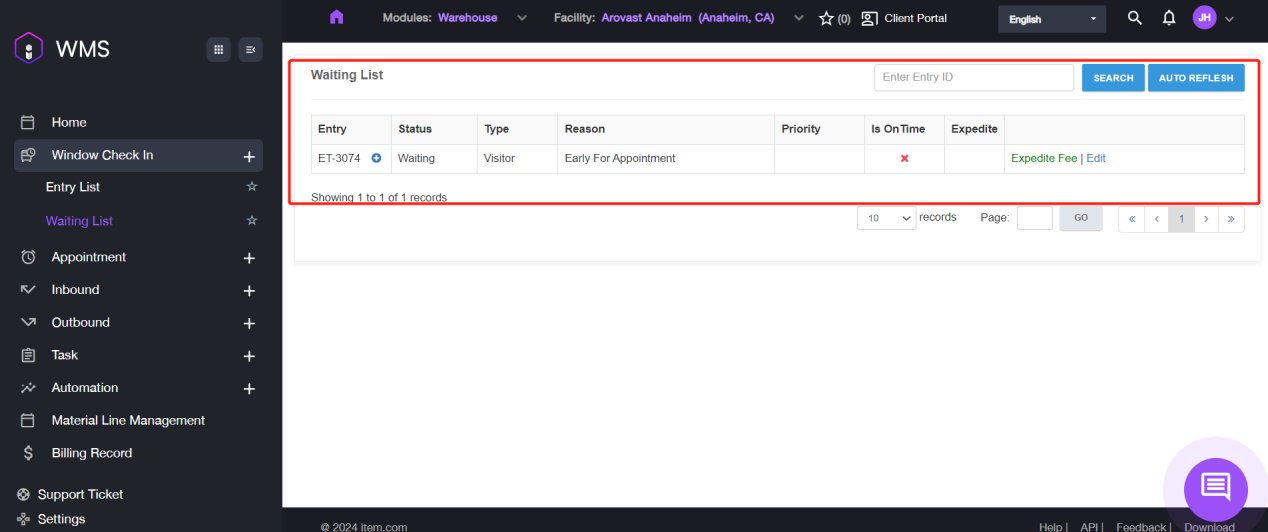
Then click OK in the confirmation window. Then the entry will be display under Window Check In > Waiting List. Take an example as shown:
How to Manage the existing Entry List
This section introduces the relevant management operations such as editing entry type, update the carrier information and etc.
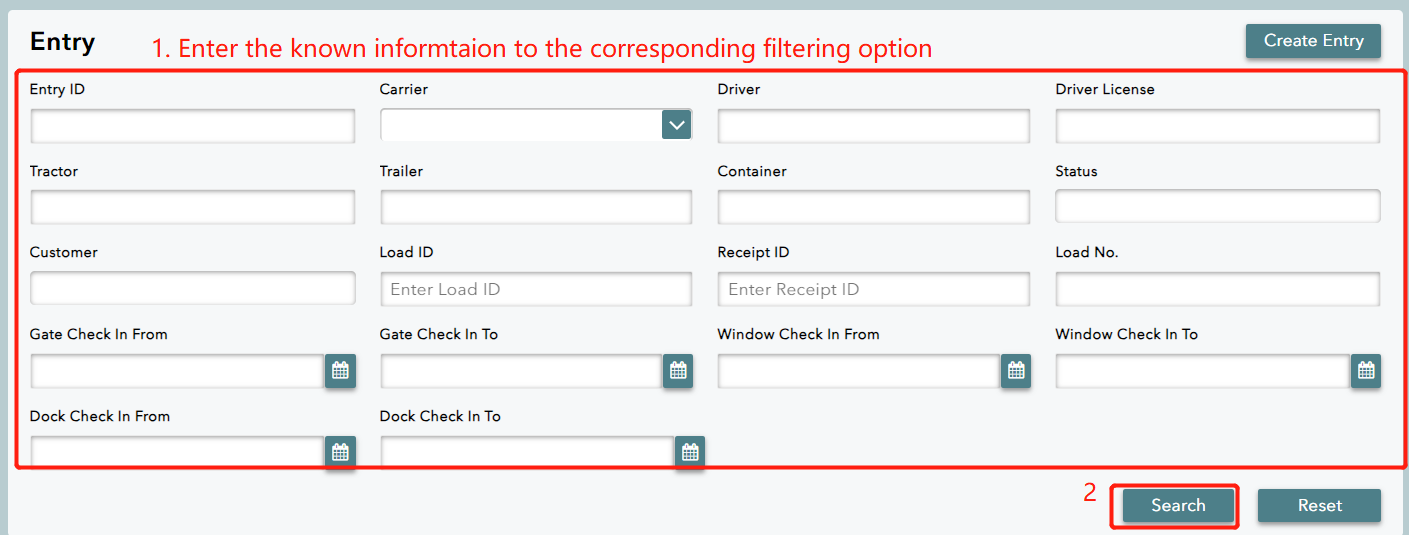
Navigate to Window Check In > Entry List, it displays the filtering on the higher half of the interface which is convenient for user to quickly search the target entry.
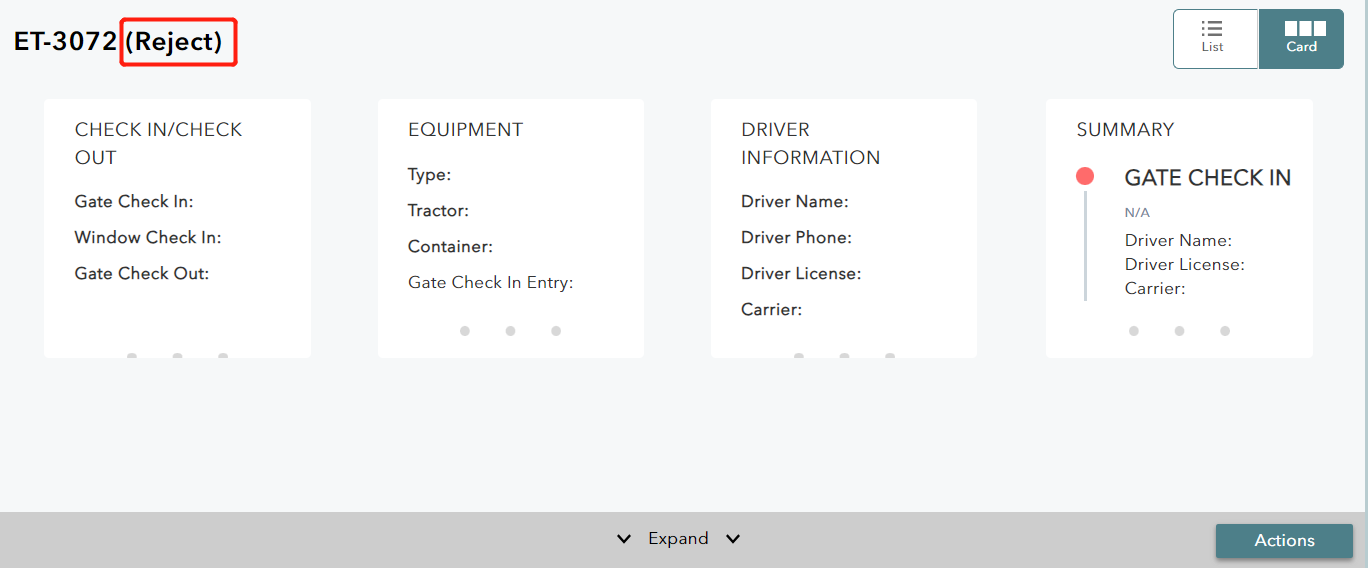
Scroll down to the lower half of the screen, it displays the entry list sorted by the date. Here are two view modes supported on Item WMS: List and Card. You can switch the view mode by clicking the button on Switch View Mode or on the corresponding Entry.

List: it directly displays five action buttons.
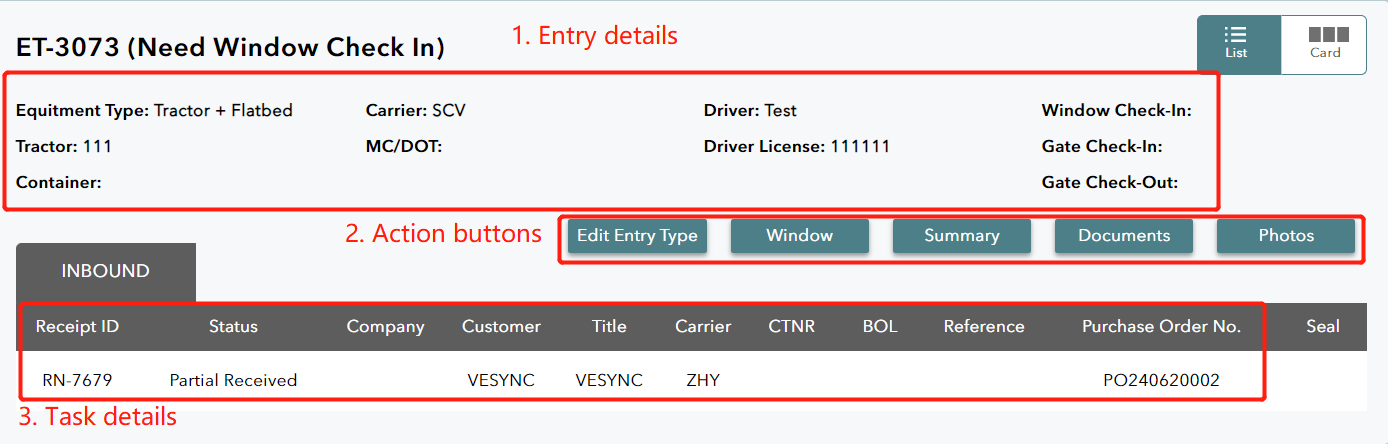
Card: it supports to show the whole details by clicking Expand.
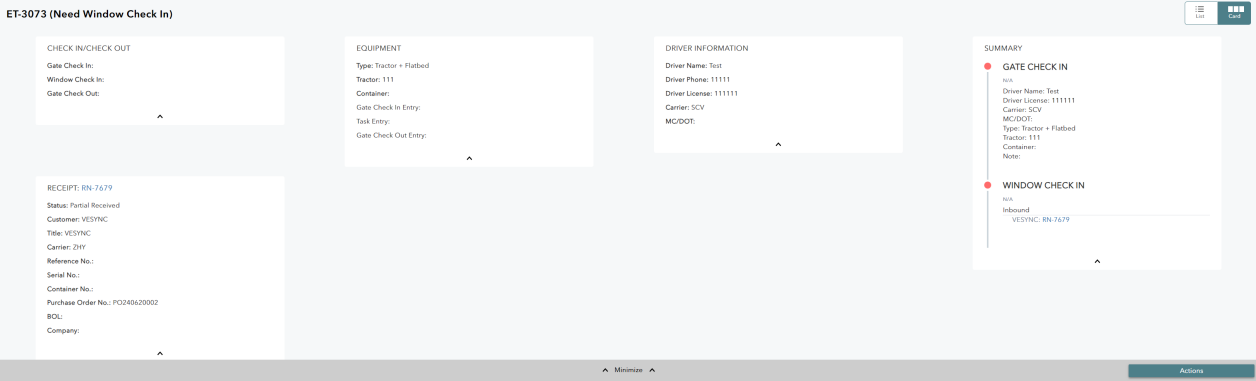
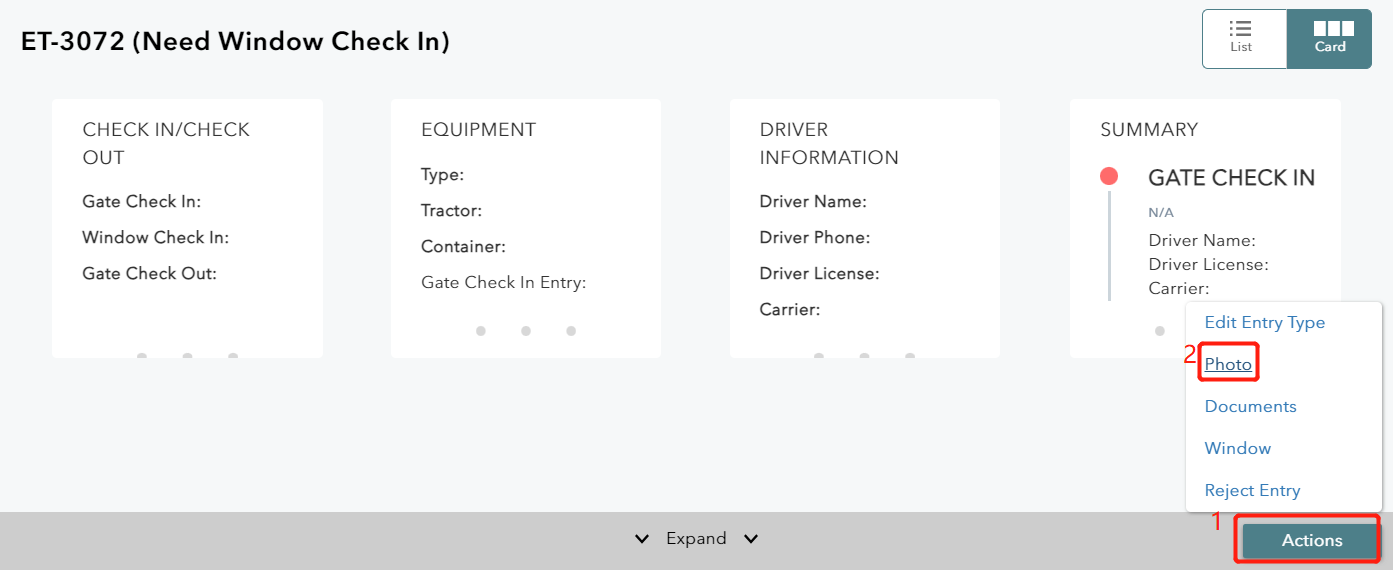
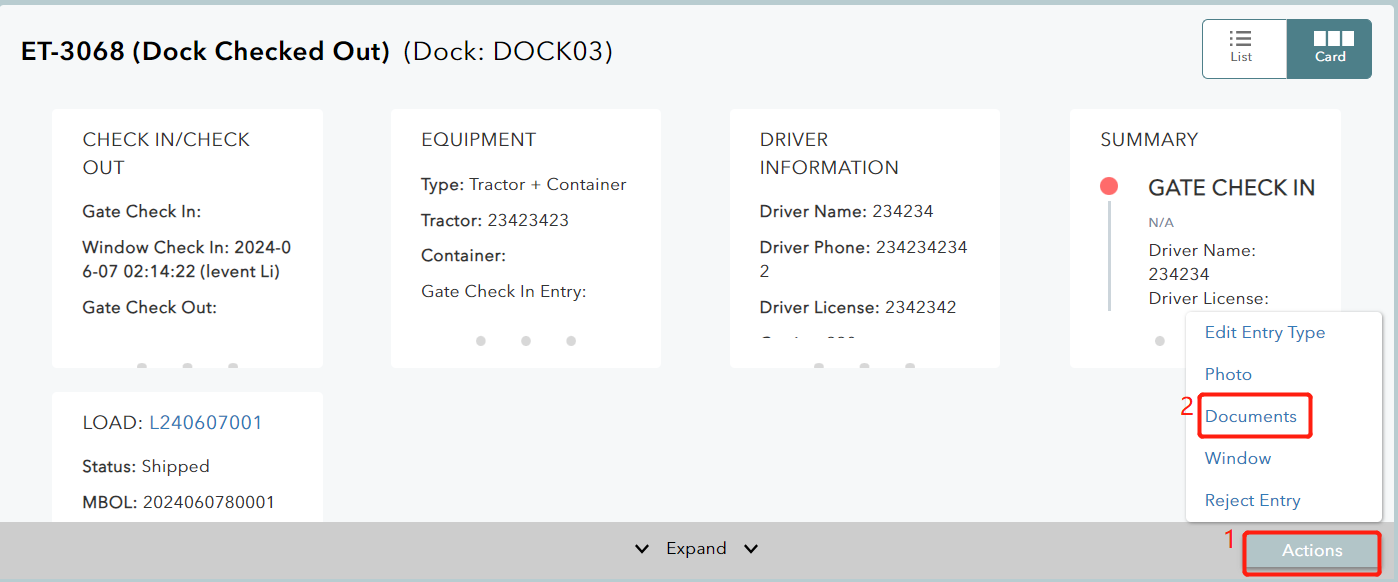
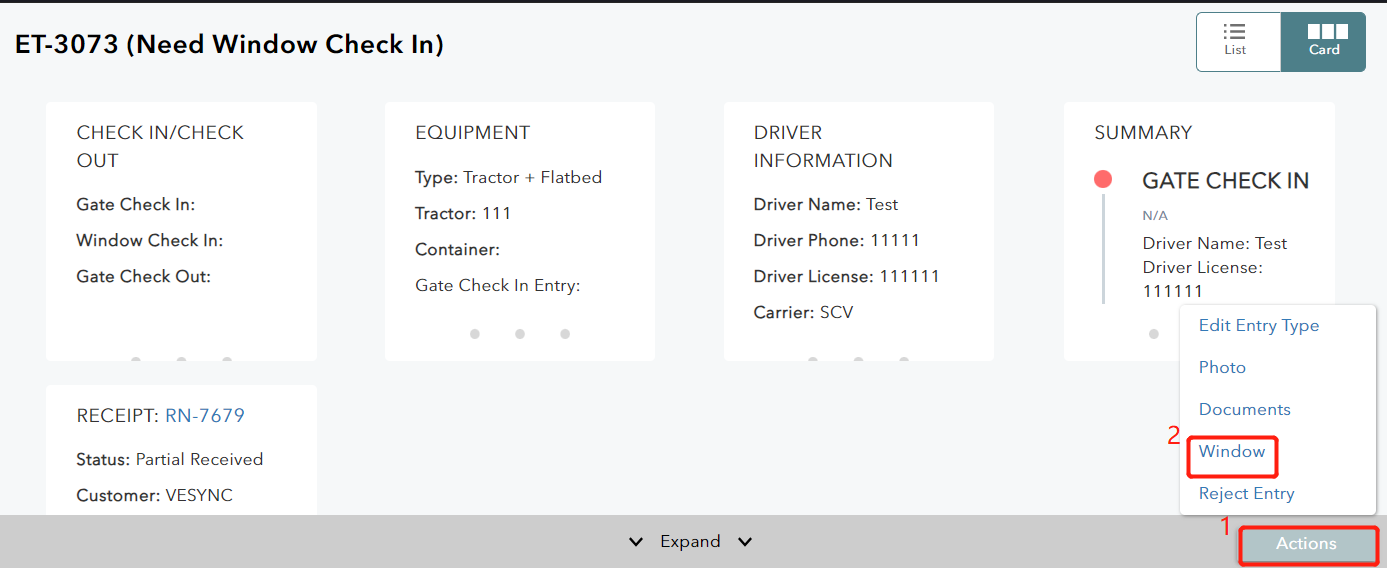
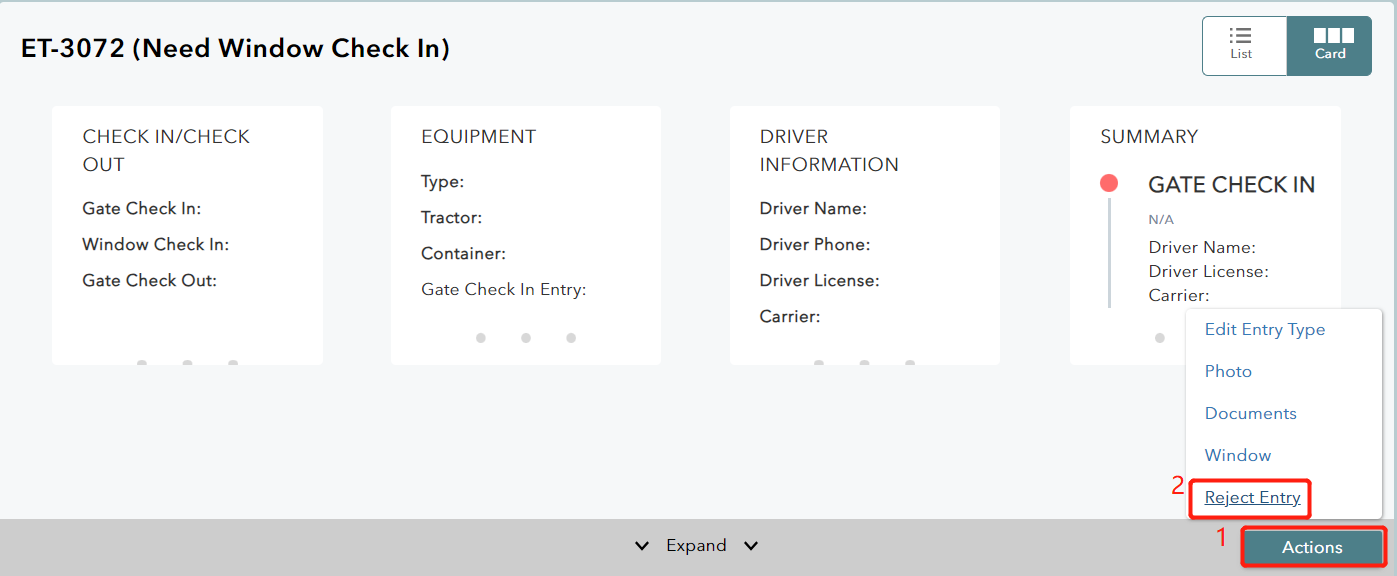
Take Card view mode as the example in the following operation introduce. There are five action buttons shown on the entry: Edit Entry Type / Photo / Documents / Window / Reject Entry.
Edit Entry Type
1. If you want to modify the entry type, please click Actions > Edit Entry Type.

2. Select entry type you want and click OK at the bottom.
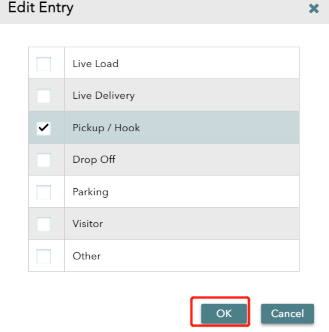
3. Click OK button on the pop-up window.
Photo
It supports viewing the photos of the entry by clicking Actions > Photo, such as a photo to show the driver ID or badge.
If you didn’t upload any photos when creating the entry, it will show no photo as shown:
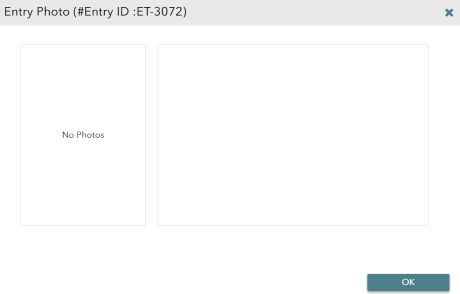
Please refer to Window Section below to upload the photo if you need.
Documents
It supports to preview and print some relevant documents.
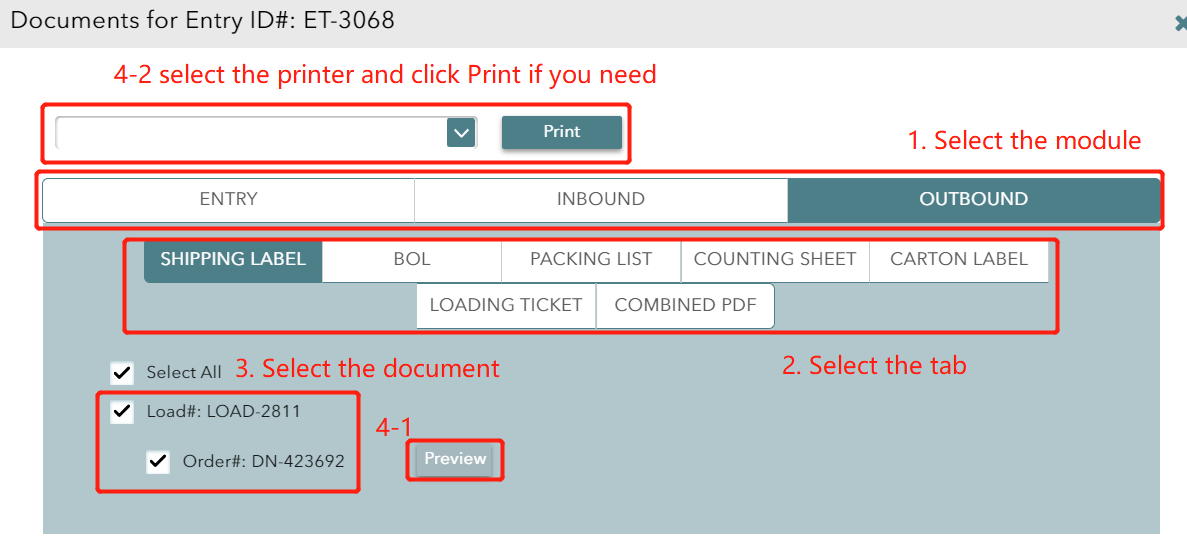
1. Please go to Actions > Documents.
2. Click corresponding module and select the documents to Preview or Print.
Window
It supports to modify the entry information including carrier, activity and tasks.
1. Go to Actions > Window.
2. Update the information you need and remember to click Save after complete. Please click CONTINUE if you want to skip the current module.
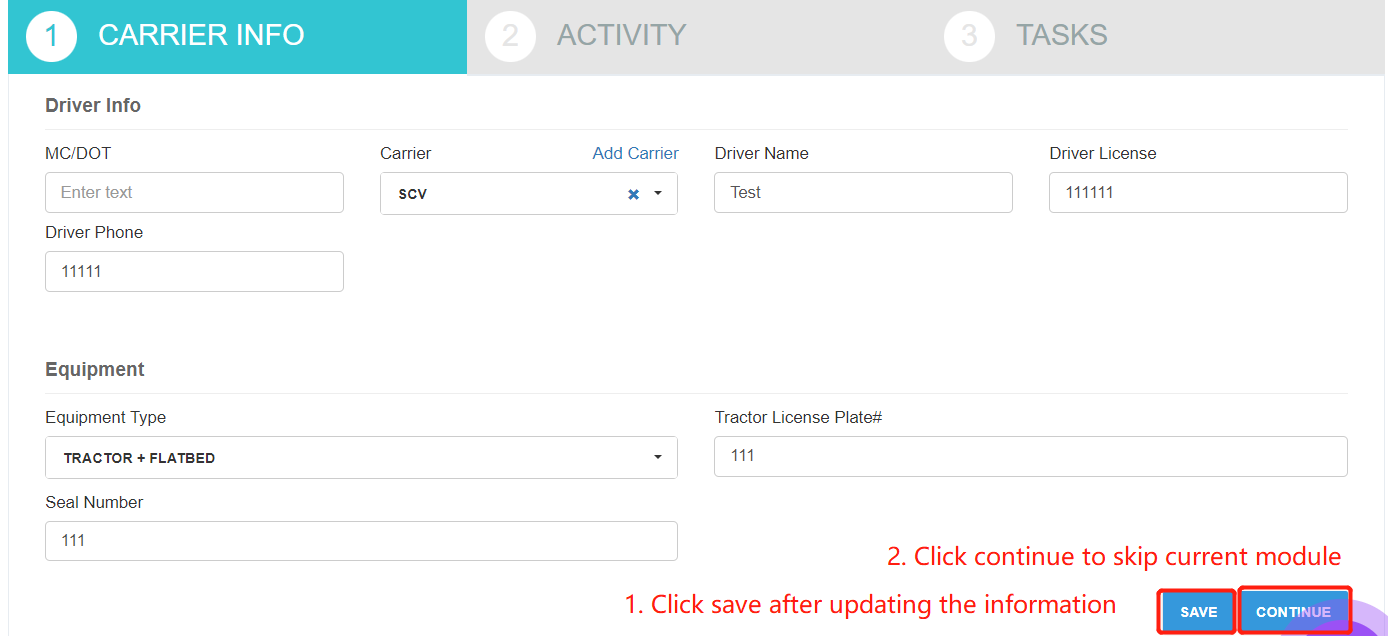
3. Click OK on the pop-up window after saving the updated information.
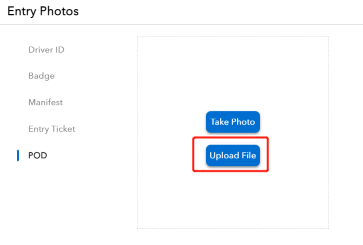
If you want to update or upload the photos, please click Entry Photos on the top right corner.

Then click Upload File to select local photo files and upload it to the corresponding item here. If you want to take a photo via the current mobile phone or computer, please click Take Photo to complete the progress.
Reject Entry
It supports to reject the entry if the information doesn’t match or any other exceptions. Please noted that the related Receiving task and Loading task will be canceled after rejecting the entry.
1. Go to Actions > Reject Entry.
2. Enter the comment and click Confirm to complete.
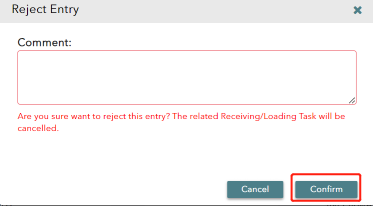
3. Click OK on the pop-up window.
After that, you will see the entry is marked as Reject on the entry list.