Receipt Management
Receipt Management
The Inbound process is where the warehouse formally accepts a shipment into the warehouse, it begins with a Receipt Notification (RN) or Receipt Confirmation (RC), which is a form that notifies the warehouse of an inbound order. This could be created by EDI or API, or manually entered into Item WMS. This article introduces the relevant receipt operations and explain the related parameters.
How to Search the Receipt
Item WMS supports two method for quick searching: Keyword Search and Advanced Search.
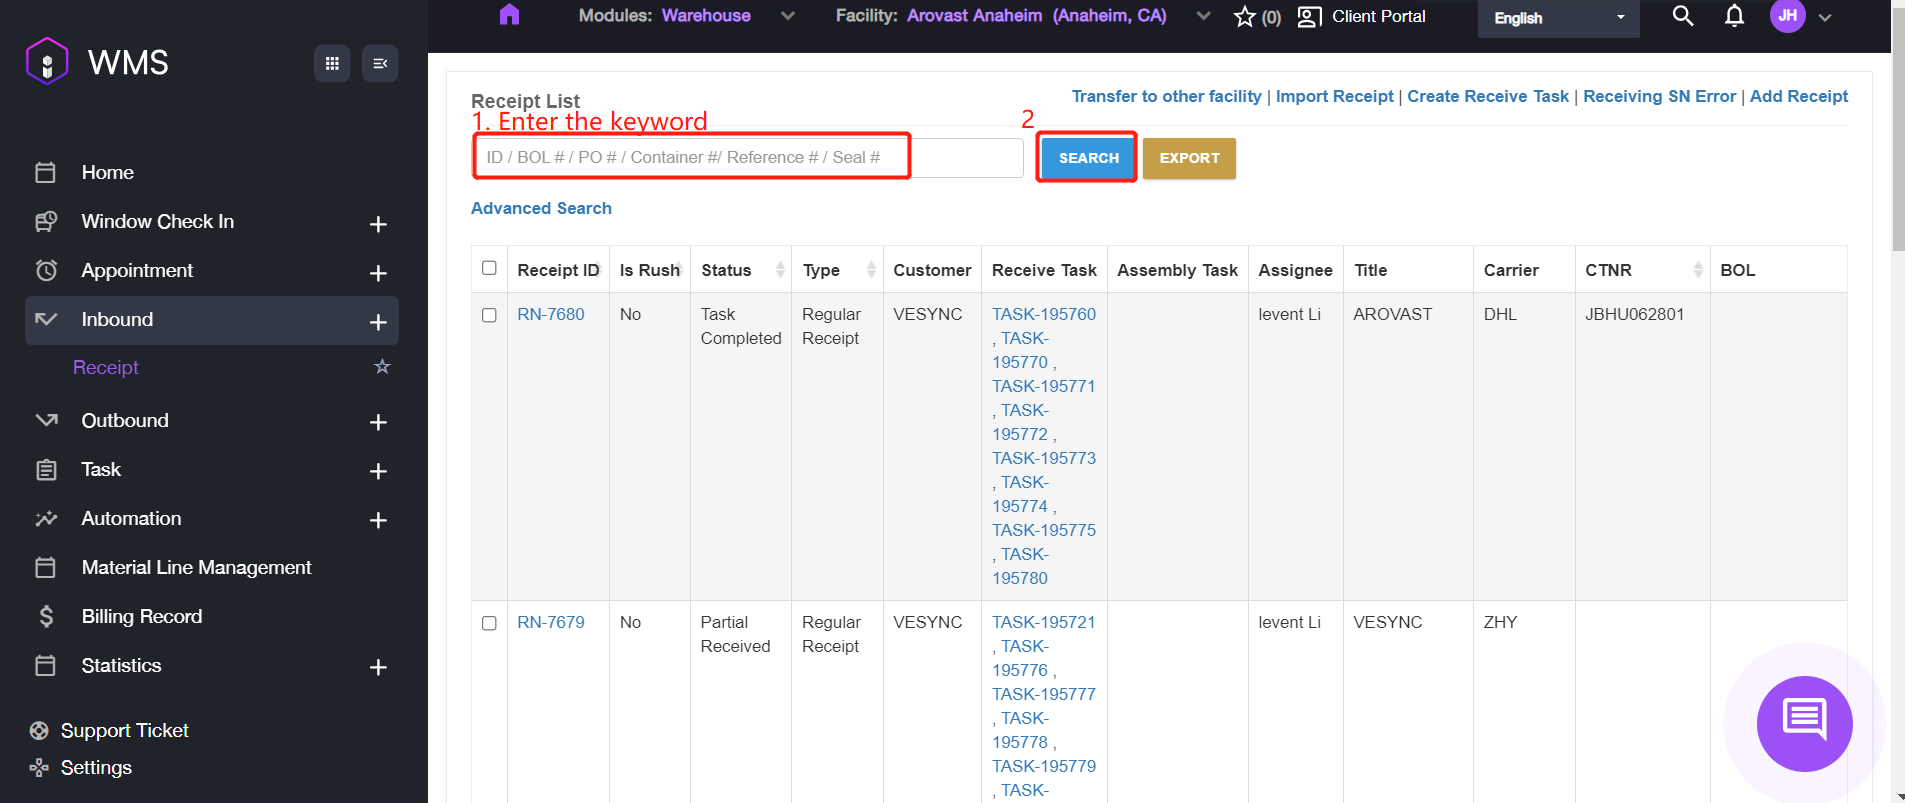
Keyword Search
1. Navigate to Inbound > Receipt, it will display the Receipt List. 2. If you remember any keyword of the receipt such as the Receipt ID or Container, please enter the keyword into the input box and then click SEARCH to complete.
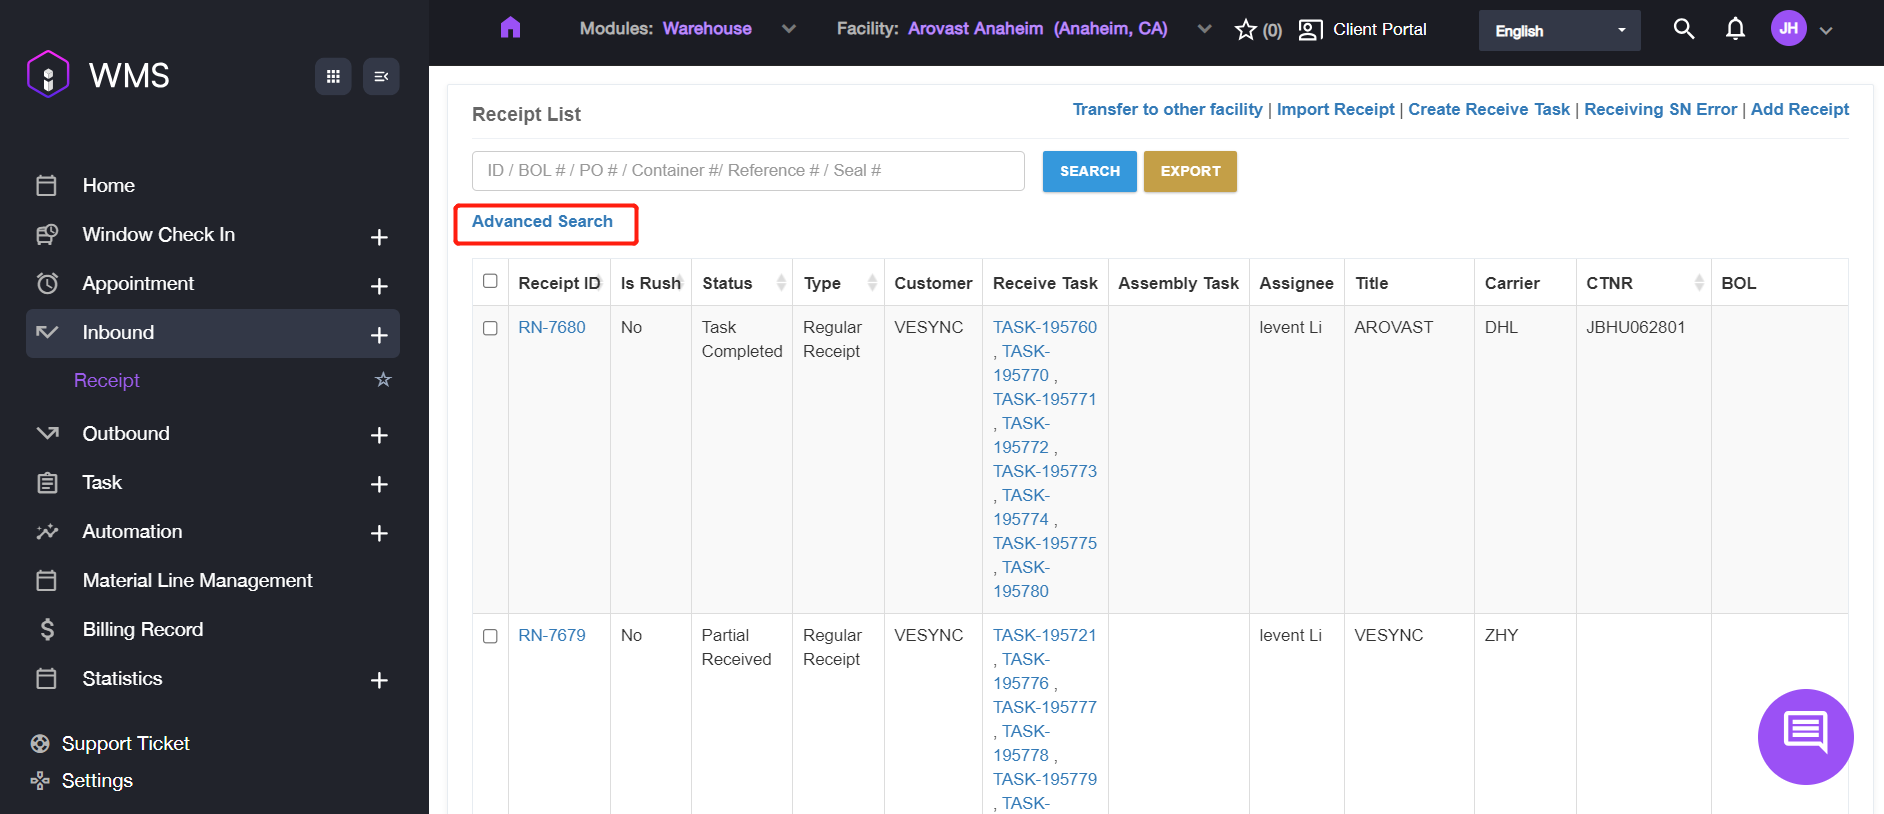
Advanced Search
1. If there are too many results after filtering via keyword or if you want to search some specific fields such as Status or Type, please click ADVANCED SEARCH.
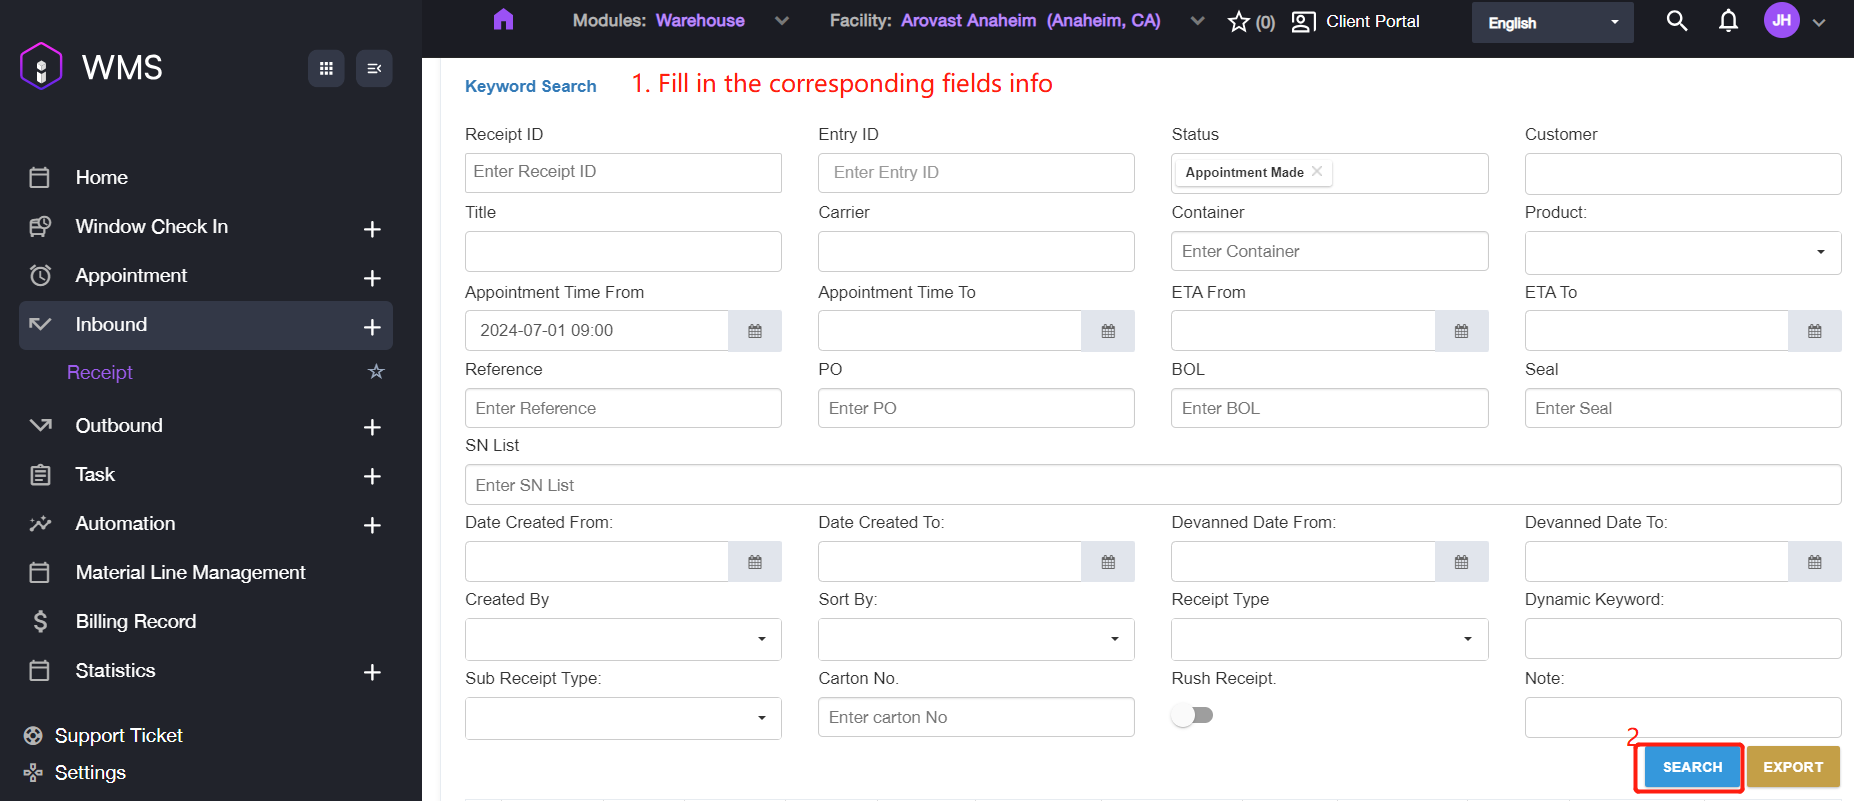
2. Fill in the corresponding fields information and click SEARCH button to complete.
Parameter | Description |
|---|---|
Rush Receipt | Indicates whether this is a rush order. |
Export Receipt
It supports to export the receipt lists if you need the data information to save locally.
1. Select the receipts you want, then go to EXPORT. There two methods: export via RN level and export by product level.
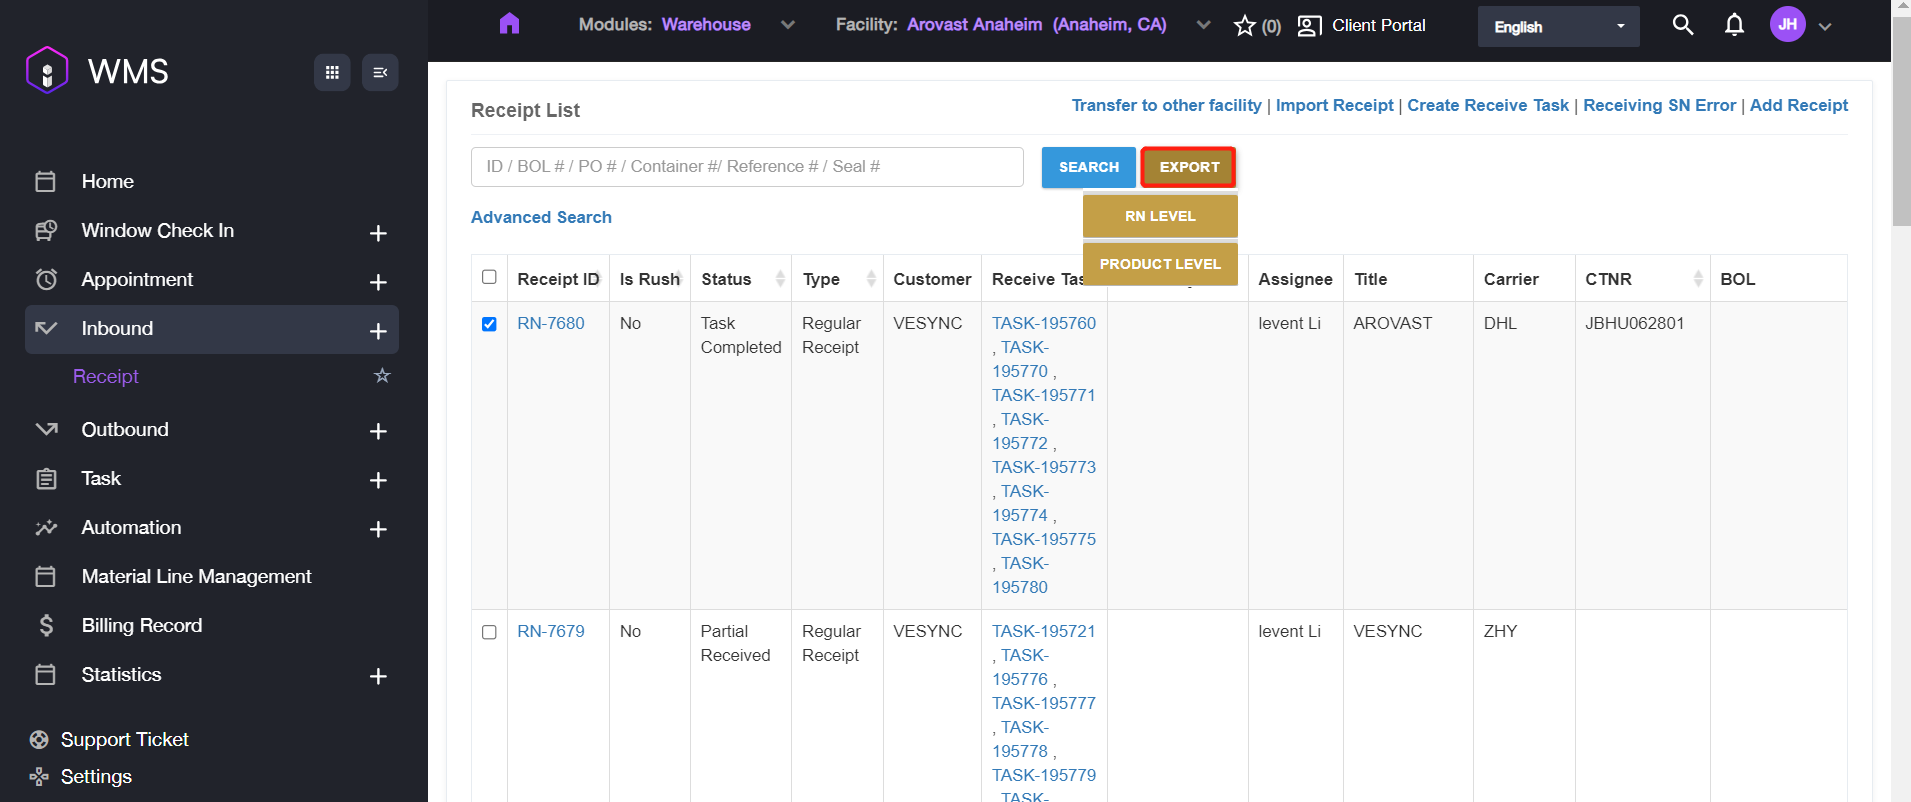
2. Click RN LEVEL button or PRODUCT LEVEL to export the receipts. The content included in the excel file will be different which is exported via two methods. Attached the figure as shown.
RN LEVEL

PRODUCT LEVEL

How to Create a New Receipt
It supports to create a new receipt by various methods including EDI/API, manually and etc. This section introduces the steps on how to create the receipt manually or in bulk.
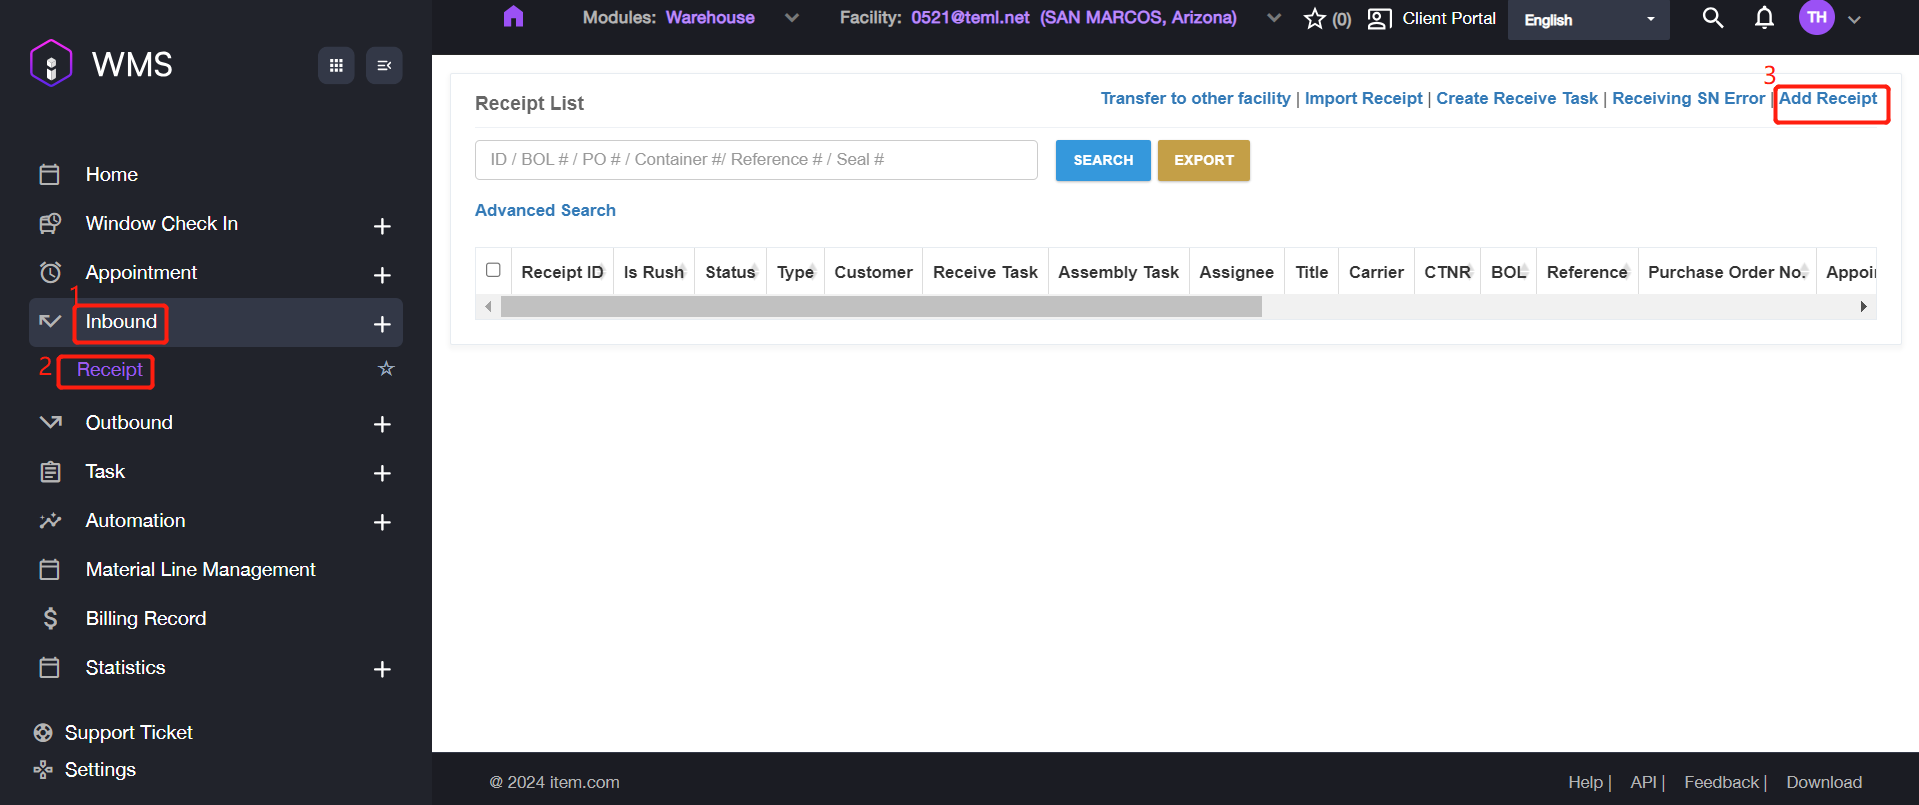
Manual Adding
1. Navigate to Inbound > Receipt > Add Receipt.
2. Fill in the required information.
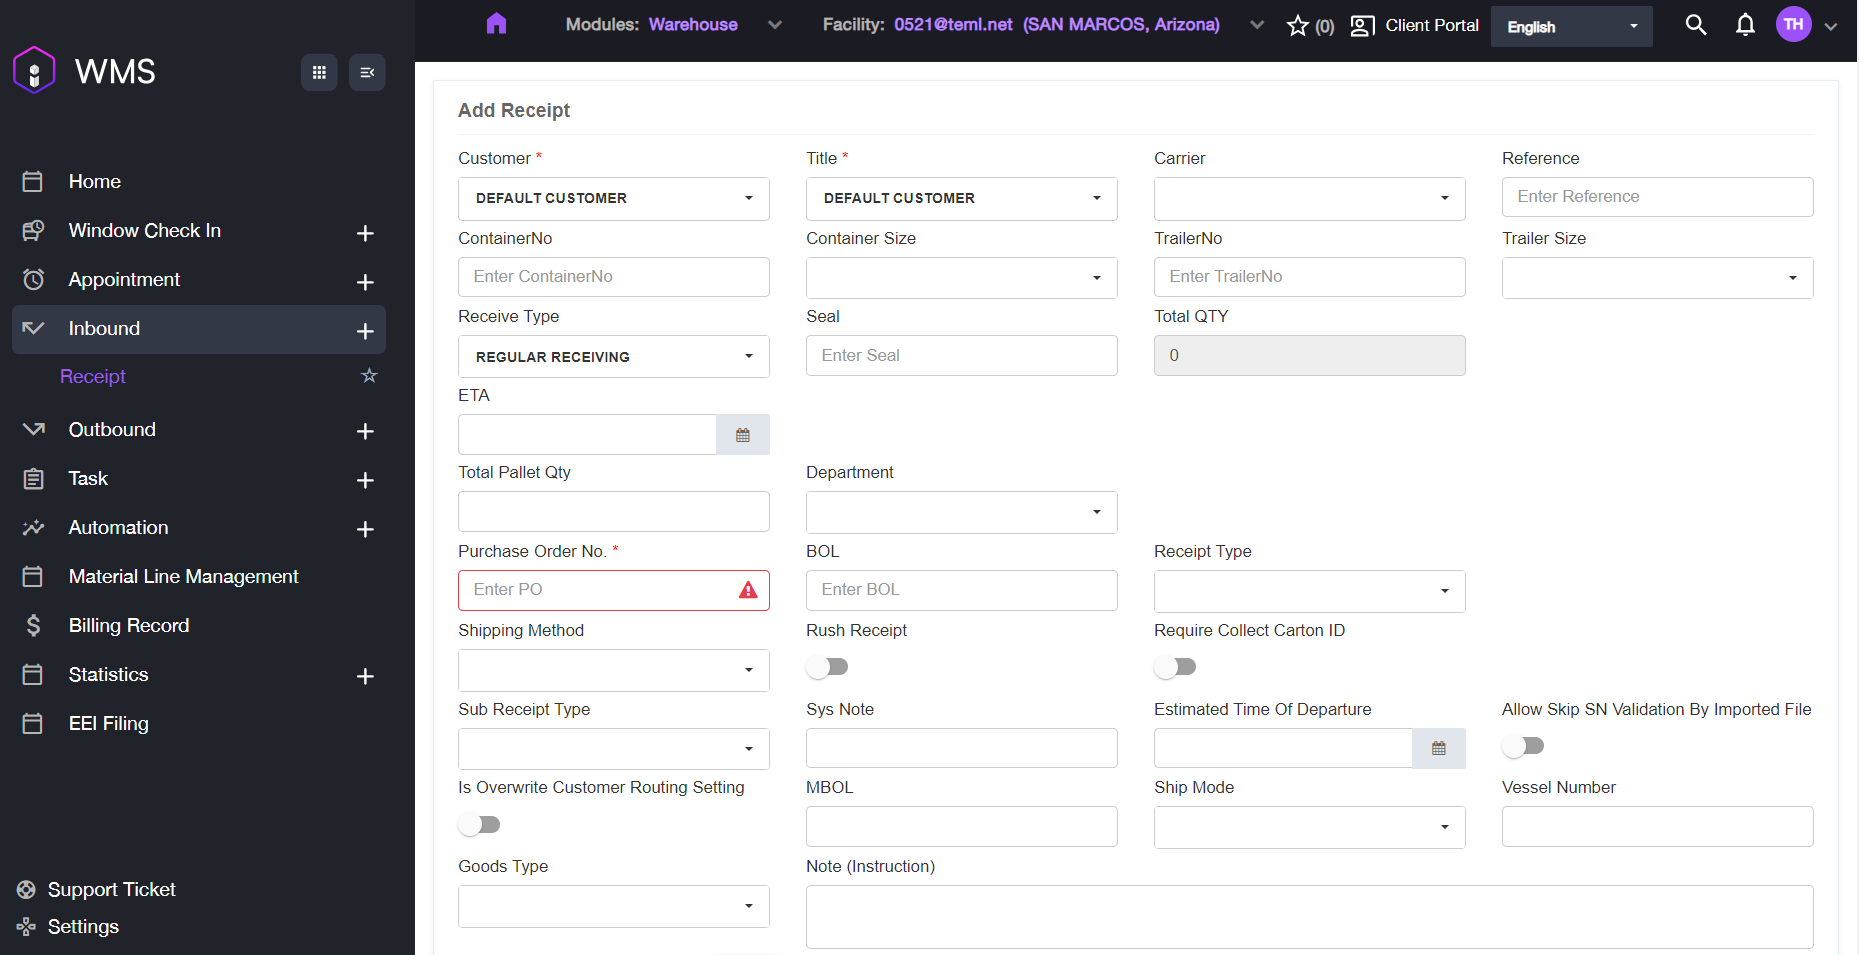
Parameter | Description |
|---|---|
Customer | Customer Name. |
Title | Consignee name or title holder of the item. |
Carrier | Carrier name |
Reference | Unique identifying of an order. |
Container No | Container’s unique identifying number. |
Container Size | Size of the container. Value: 20’, 40’, 40H’, 45’. |
Trailer No | Trailer’s unique identifying number. |
Trailer Size | Size of the trailer. Value:48’, 35’. |
Receive Type | Value: Bulk/ Regular Receiving |
Seal | Container seal number. |
Total QTY | Total expected item quantity. |
ETA | Estimated time of arrival. |
Total Pallet Qty | Total pallet quantity. |
Purchase Order No | Inbound Purchase Order Number, uniquely identifies a purchase order and is generally provided by the buyer. |
BOL | The billing of landing works as a receipt of freight services. A contract between a freight carrier and shipper and a document of title. |
Receipt Type | Value: Regular Receipt/Title Transfer Receipt/ Migo Transfer Receipt/ Inventory Receipt/ CrossDock/ Sales Return/RDN/Auto Process Receipt/ Customer Transfer/RTS/ Internal Transfer Receiving/Transload/ Purchase Return/Material Purchase/Assembly |
Shipping Method | Value: Truckload (TL) / LTL / Small Parcel / Will Call |
Rush Receipt | Indicates whether this is a rush order. |
Required Collect Carton ID | Indicates whether the receipt requires collecting a carton ID. |
Ship Mode | Value: Air/ Ocean/ Courier/ Truck/ Rail. |
Goods Type | Select a type for the good. |
Note (Instruction) | Receipt notes. |
3. Click ADD PRODUCT LINE to add the first line to the receipt.
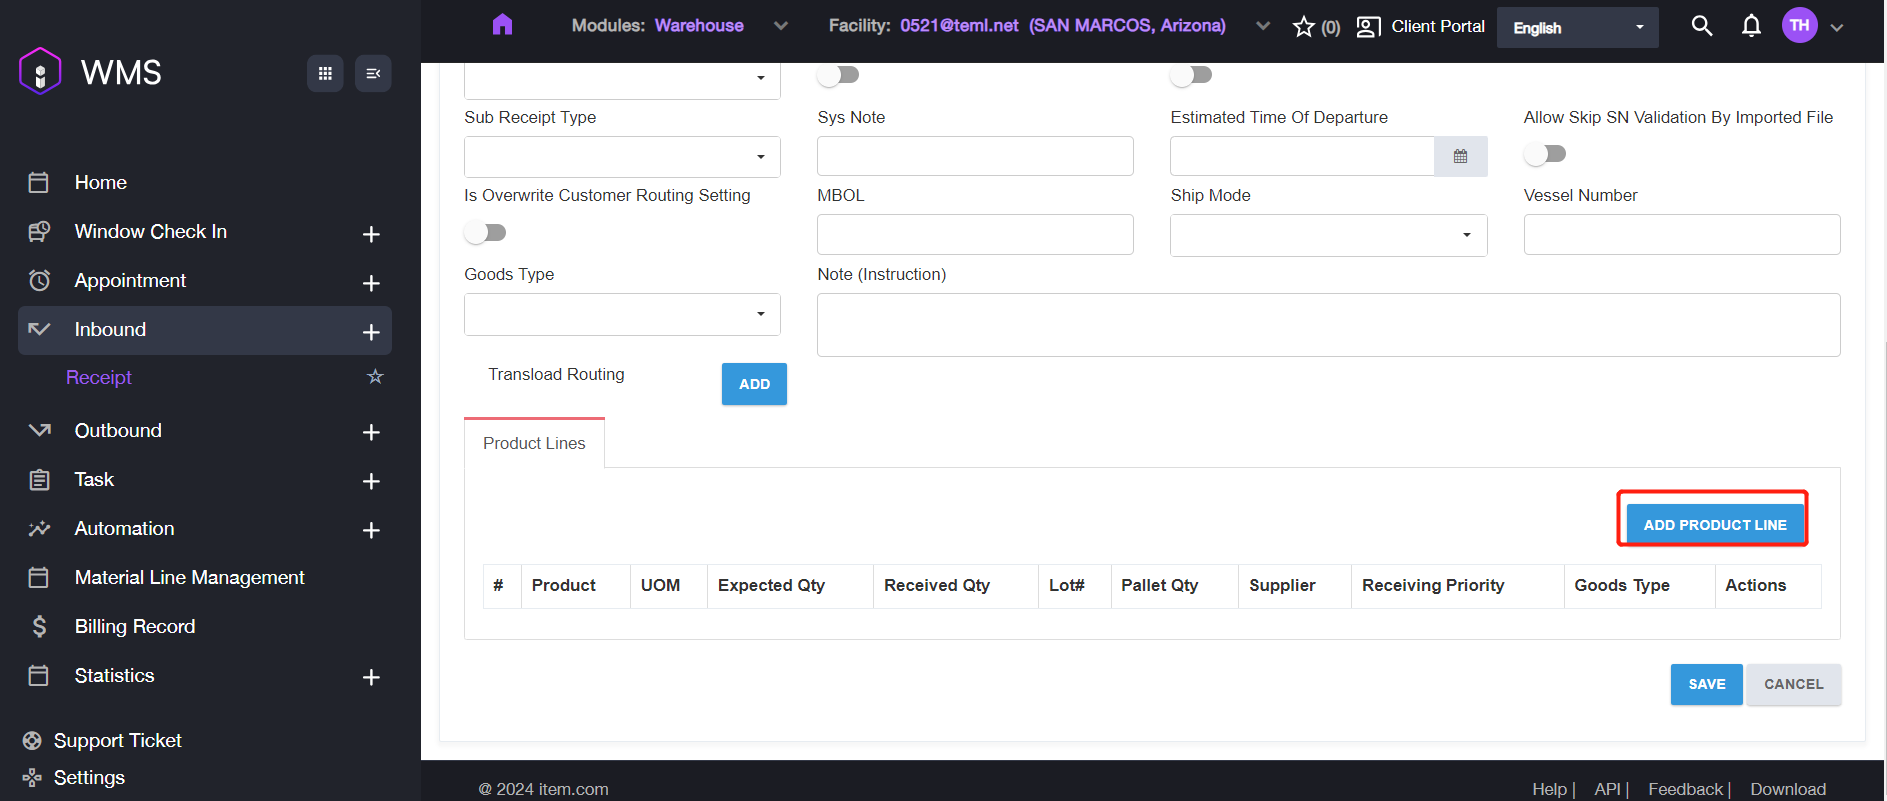
4. Fill in the information for the line, then click SAVE to save the receipt information.
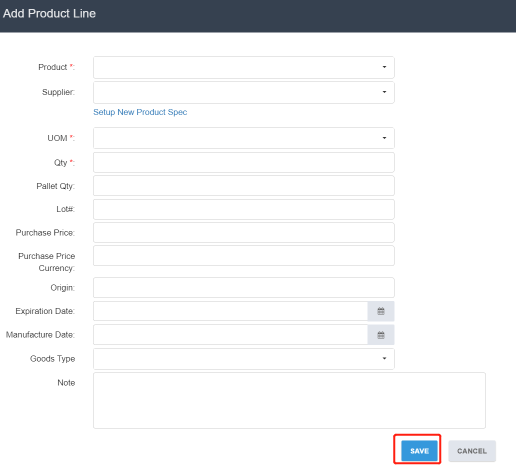
Parameter | Description |
|---|---|
Product | Select one product specification from the list. |
Supplier | A party that supplies goods. |
UOM | Unit of measurement. Value: EA = Units/Each; CS = Case |
Qty | The quantity of the products. |
Pallet Qty | Expected pallet quantity to receive. |
Lot# | A lot number is an identification number assigned to a particular quantity or lot of material from a single manufacture. It is used for FIFO, if you don’t have it, just leave it empty. |
Purchase Price | The purchase price of the product. |
Purchase Price Currency | Show the purchase price currency. |
Origin | The origin of the product line. |
Expiration Date | The expiration date of the product line. |
Manufacture Date | The manufacture date of the product line. |
Goods Type | Item commodity. |
Note | Remark some notes. |
5. Click SAVE to complete the progress.

In Bulk
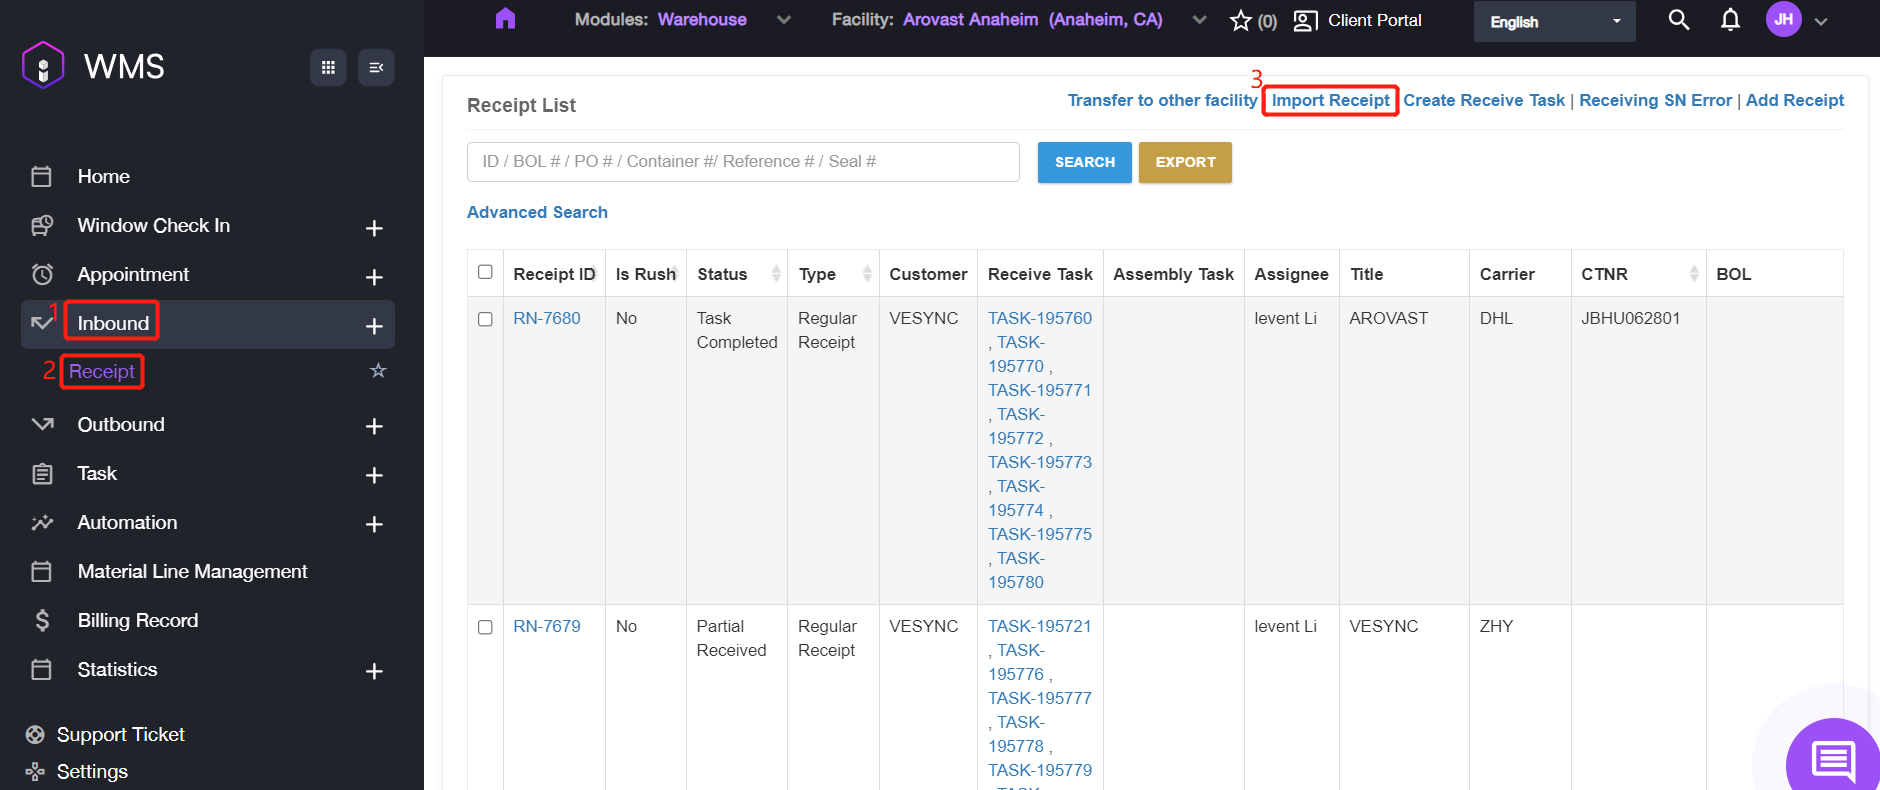
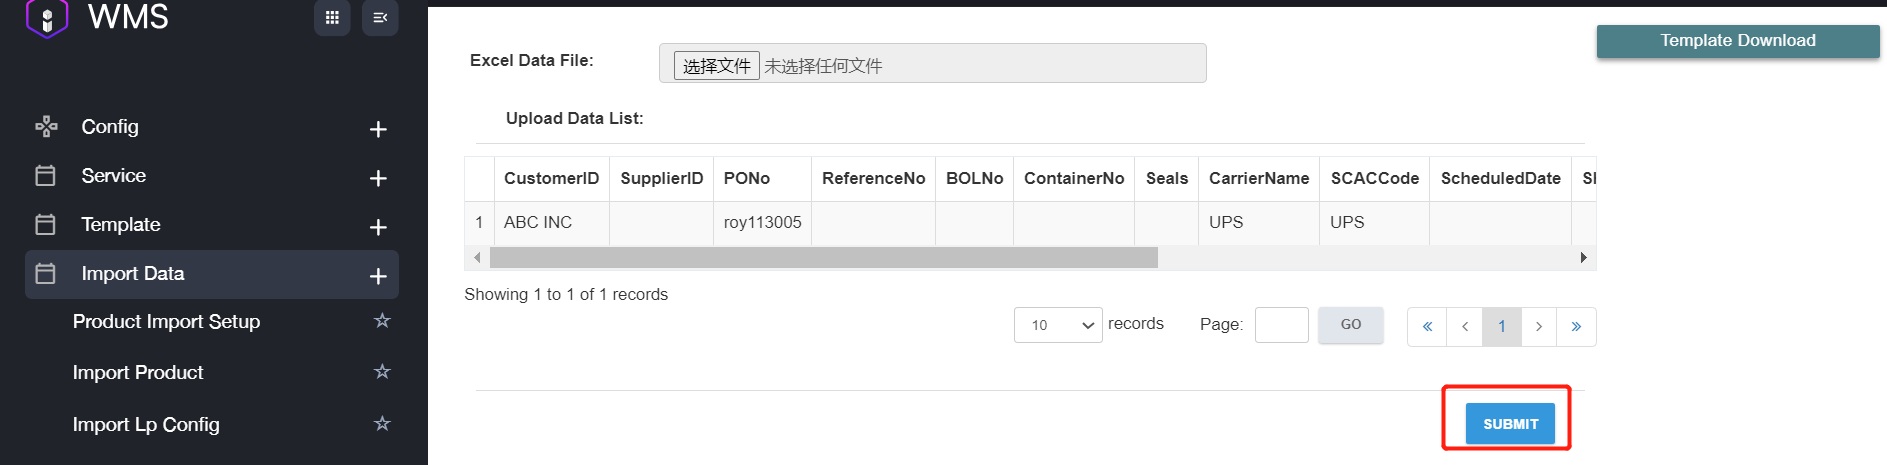
1. Navigate to Inbound > Receipt > Import Receipt.
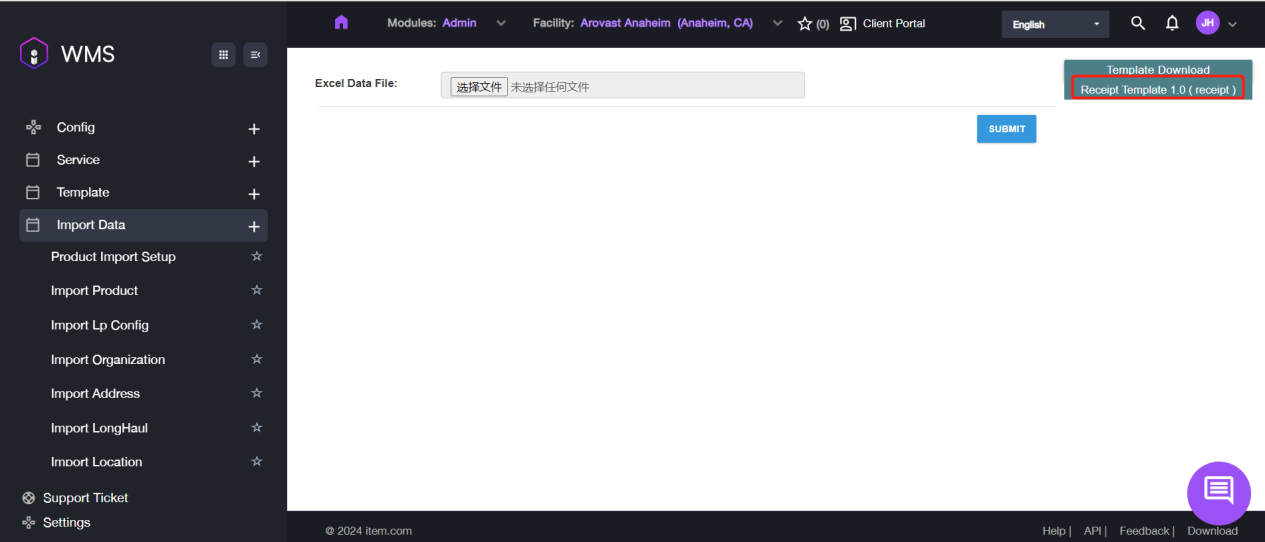
2. Please download the template file by navigating to Template Download then click Receipt Template 1.0 (receipt) , if you didn’t prepared the data file yet.
3. Open the excel file, fill in the required information then to save it.

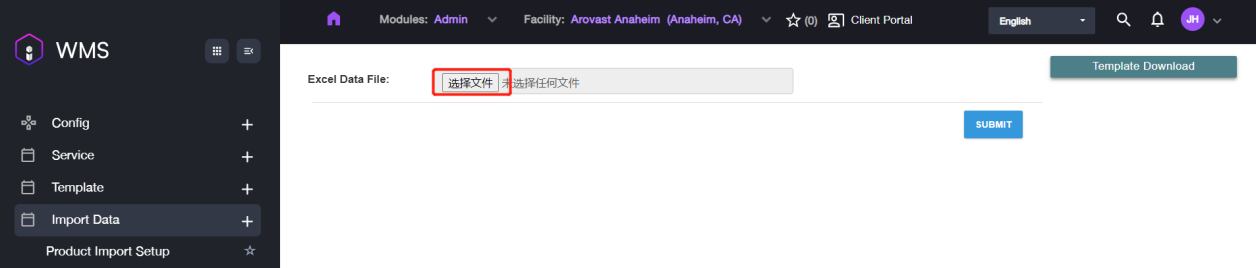
4. After configuring the data file, please click Select File button to upload the file.
5. After uploading successfully the data content will be shown here , if you found the information is incorrect or upload incorrect file, please click delete to remove the file and re-upload again.

6. If all information is correct, please click SUBMIT to complete importing receipts in bulk.
How to Transfer RN to other Facility
Note: The feature is only available for receipt with Imported or Open Status.
1. Navigate to Inbound > Receipt, select the specific receipt and click Transfer to other facility.
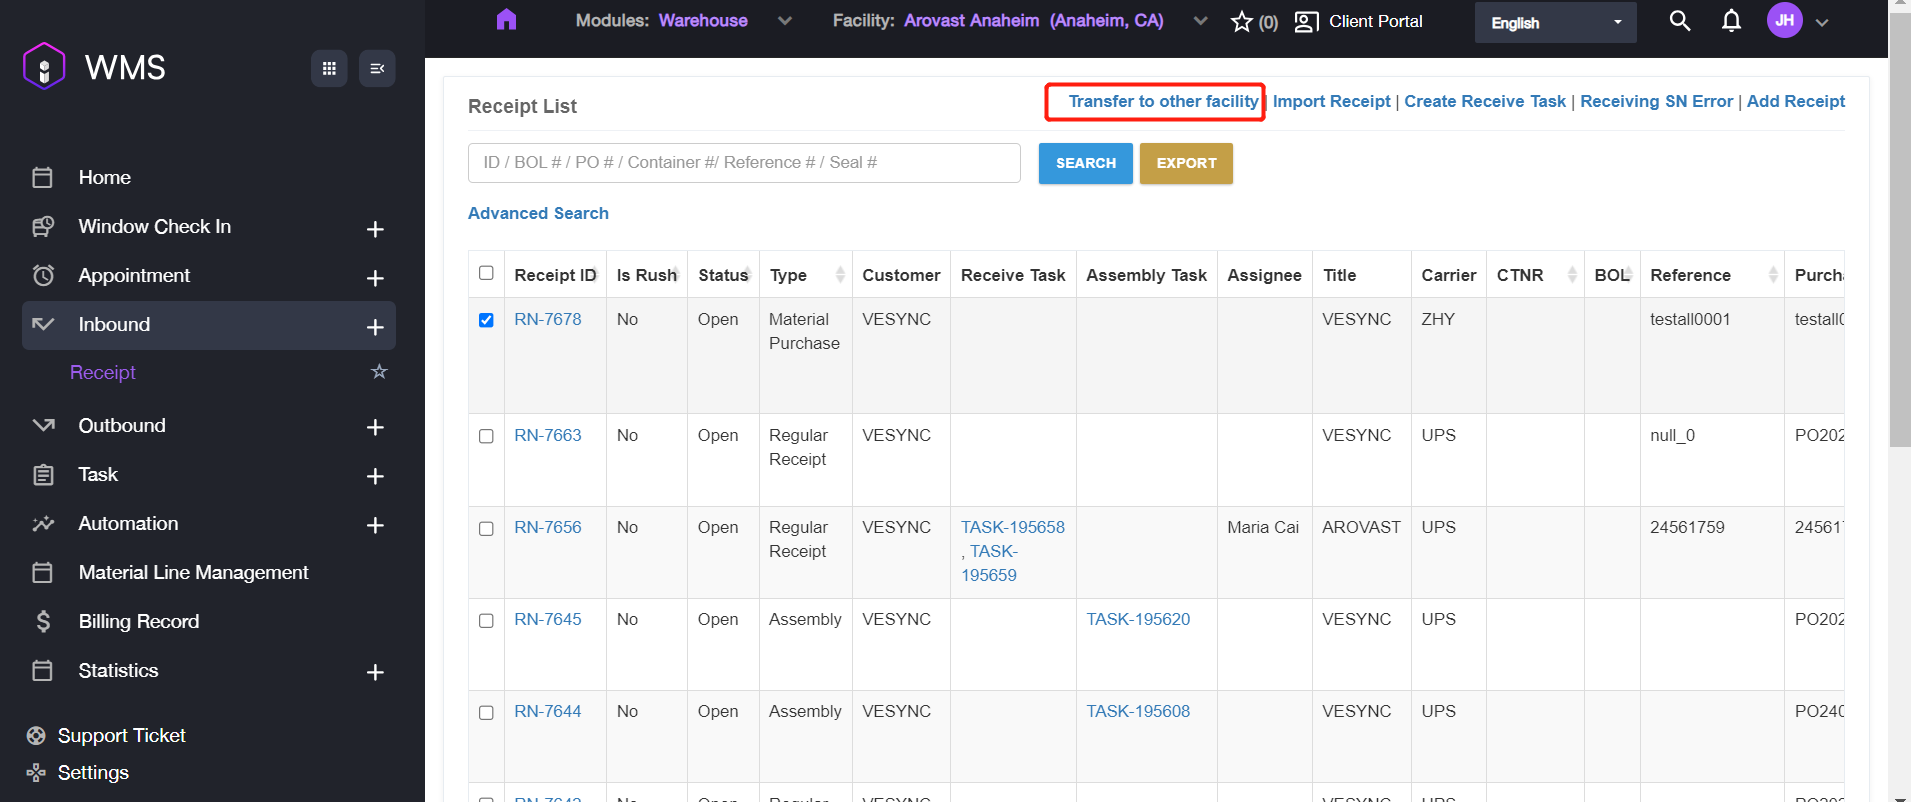
2. Choose the target facility and click Transfer Receipt to process the transfer.

After transferring successfully, the receipt in current warehouse will be canceled and new receipt will be created in target warehouse.
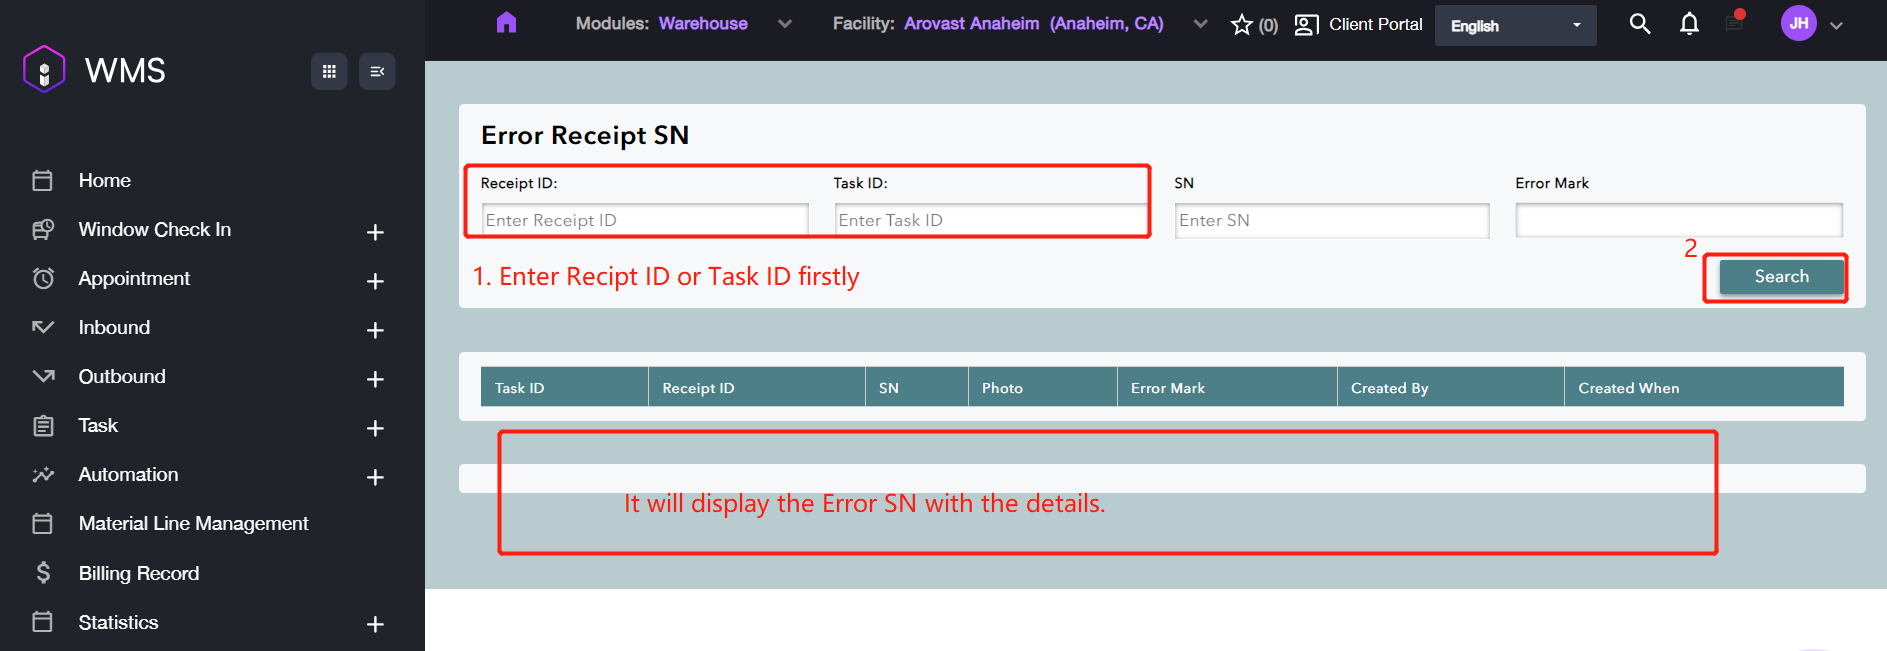
Receiving SN Error
This feature is a report to list the “Error SN” which mismatches the SN imported.
Advanced Conditions: 1. Item’s SN has been imported to the system. 2. The assignee has finished scanning the actual SN.
If you want to know if there is any differences of the SN information, please refer the following steps to operate. 1. Navigate to Inbound > Receipt, then click Receiving SN Error.
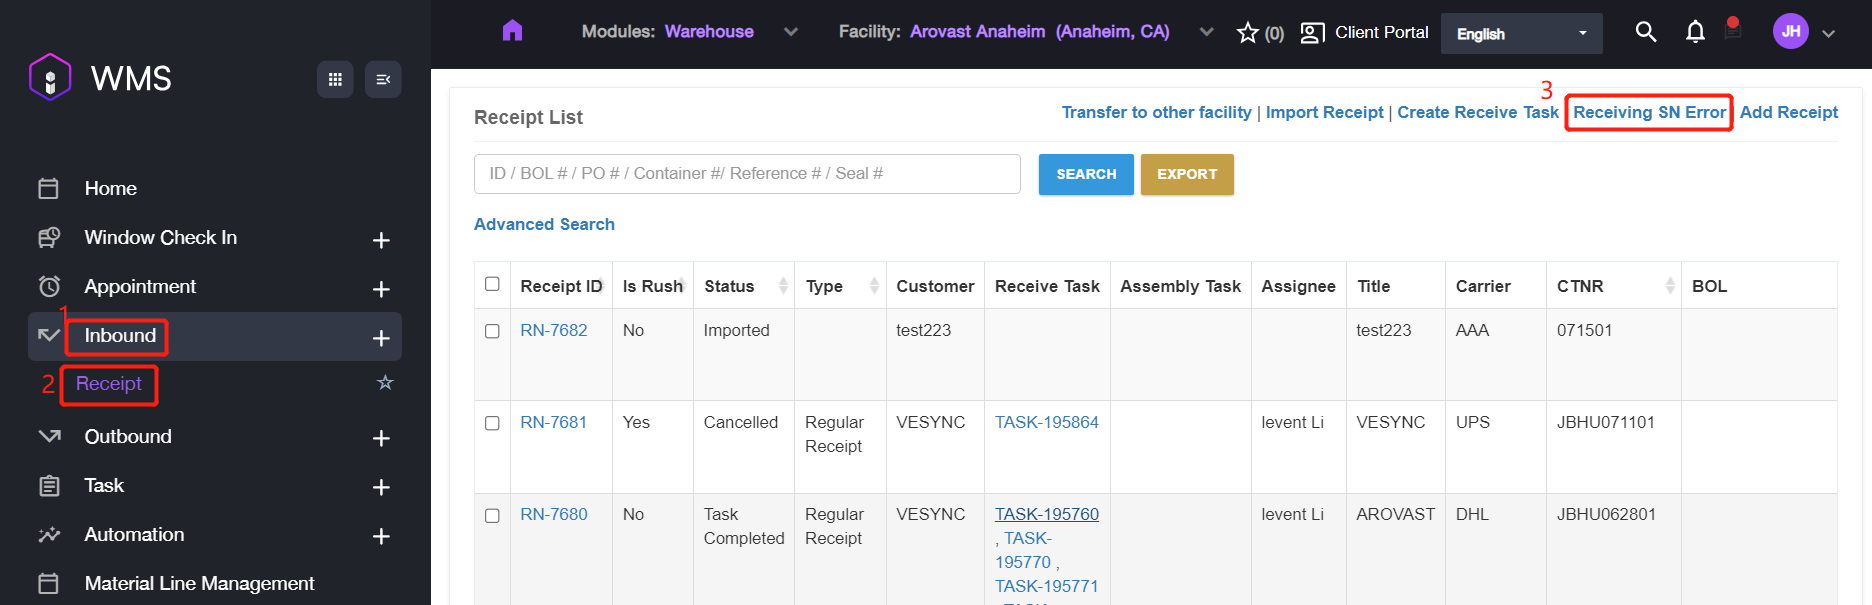
2. Enter Receipt ID or Task ID then click Search button for SN searching. 3. If there is any SN mismatched, it will list with the details on the lower of the screen.